Fixing a Broken Chainsaw Tensioner: Safe Diagnostics and Repairs
Learn to diagnose and safely fix a broken chainsaw tensioner with practical steps, clear safety notes, and prevention tips from Chainsaw Manual.

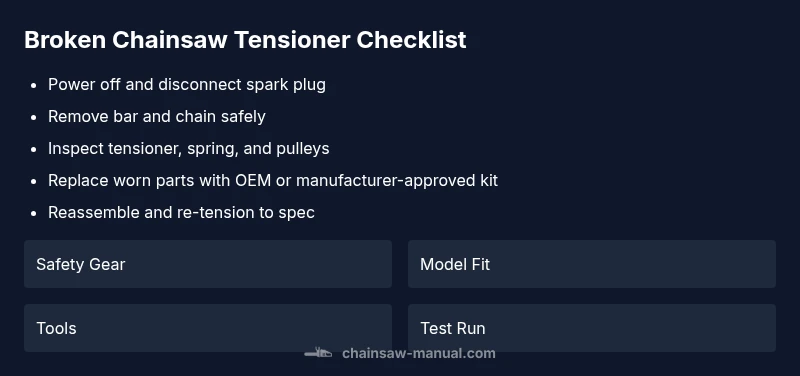
Facing a broken chainsaw tensioner? The fastest fix is to verify the tensioner, replace worn parts, and re-tension the chain correctly. In most cases, wear, debris, or a seized spring is to blame. Quick steps: power off, remove the bar and chain, inspect the tensioner, install a replacement or adjust, then reassemble and test with the chain tensioned properly.
Understanding the tensioner role
The chainsaw tensioner is a small, critical assembly that keeps the chain at a consistent tension as the bar flexes during cutting. It compensates for wood, heat, and bar wear so the chain tracks smoothly. When the tensioner is broken or worn, you’ll notice a slack chain, uneven cutting, or chain derailment. According to Chainsaw Manual, maintaining proper tension is essential for safe operation and efficient cutting. Start by recognizing that a faulty tensioner often masquerades as loose chain by design, so a careful inspection is key before blaming the bar or chain alone. In many DIY scenarios, a broken tensioner is the root cause of chain trouble, not just a worn chain.
Symptoms to watch for
Common signs of a broken tensioner include loose or tight chain despite adjustments, visible wear on the tensioner pulley or spring, abnormal chain sag near the bar, and increased vibration or odd sounds during operation. If you notice the chain rubbing against the bar or derailment during a cut, stop immediately. Do not run the saw with a misadjusted tensioner, as that can worsen wear or cause kickback. Document the symptoms and compare them against tensioner wear patterns described in Chainsaw Manual to guide your next steps.
Common causes of tensioner failure
Tensioners fail for several reasons: a stretched or worn spring, debris caught in the pulley path, misadjustment during reassembly, or a damaged guide bar that changes the tensioning geometry. Regular use in dirty, dusty environments accelerates wear, and using low-quality replacement parts can lead to premature failure. Based on Chainsaw Manual research, fatigue of the spring and misalignment are the two most frequent culprits when diagnosing a broken tensioner. Understanding these causes helps you target repairs effectively rather than replacing parts unnecessarily.
Diagnostic approach: quick checks
Start with basic safety checks and work upward to more detailed inspection. Ensure the saw is powered off and the spark plug is disconnected to prevent accidental starts. Inspect the bar rail for wear and the tensioner mounting for looseness. Check whether the tensioner spring returns fully and whether the pulley moves freely without binding. If the tensioner shows visible cracks, bent components, or excessive play, replacement is strongly indicated. Use a flashlight to inspect hidden pivots and springs; a small amount of lubricating oil can reveal seized parts that resist movement.
Repair considerations and scope
Decide whether you can repair or must replace. A broken tensioner can sometimes be repaired by cleaning, lubricating, and reseating misaligned parts, but more often a replacement tensioner kit provides the best reliability. Ensure you source compatible parts for your chainsaw model and confirm the correct tensioning range. If the chain tension cannot be set within safe limits after reassembly, or if you detect bearing damage or a cracked bar, stop and seek professional service. Chainsaw Manual emphasizes using genuine or manufacturer-approved parts to preserve safety and performance.
Safety, professional help, and prevention
Always prioritize safety when troubleshooting tensioner problems. Wear eye protection, gloves, and hearing protection; engage the chain brake when necessary. If you’re unsure about the tensioner’s condition or lack the right tools, consult a professional. Regular maintenance—cleaning debris from the bar groove, checking the tensioner periodically, and replacing worn springs—prevents future failures. Chainsaw Manual notes that routine inspection is the best defense against sudden tensioner breakdowns during heavy use.
Steps
Estimated time: 90-120 minutes
- 1
Power off and secure the saw
Shut off the chainsaw, disconnect the spark plug boot, and set the tool on a stable work surface. Engage the chain brake and wear PPE before starting any inspection. This ensures you won’t accidentally start the chain during the repair.
Tip: Always double-check power sources and keep the chain covered when not actively inspecting. - 2
Remove bar and chain
Loosen the bar nuts, relieve chain tension, and carefully remove the bar and chain from the saw. Place them on a clean surface to avoid contaminating the chain with dirt. This gives full access to the tensioner and mounting area.
Tip: Take a photo before disassembly so you can restore parts in the correct orientation. - 3
Inspect tensioner components
Examine the tensioner pulley, spring, bolts, and mounting points for wear or damage. Look for a stretched or broken spring, seized pivot, or cracks in the tensioner housing. If you see obvious damage, plan for a replacement rather than a rebuild.
Tip: If the tensioner feels gritty or binds, clean and lubricate after identifying the exact worn parts. - 4
Decide repair path
If parts show significant wear, source a compatible tensioner kit or replacement assembly. If only minor debris or slight misalignment is evident, you may reseat components and reassemble. Verify part compatibility with your model number.
Tip: Keep track of part numbers and verify fit before purchasing replacements. - 5
Reassemble and re-tension
Reinstall the bar and chain, re-tension to the manufacturer’s specification, and tighten bar nuts evenly. Ensure the chain moves freely with minimal play without tight binding. Spin the chain a few times by hand to confirm smooth operation.
Tip: Never over-tighten; over-tensioning can shorten chain life and stress the drive sprocket. - 6
Test run and final checks
Power the saw and perform a short test cut on soft wood to verify tension and tracking. Listen for unusual sounds or vibrations and watch for chain derailment. Re-tension if needed and recheck alignment after the test.
Tip: If you hear grinding or unusual resistance, power down immediately and re-inspect the tensioner and bar.
Diagnosis: Chain tension feels inconsistent or the chain derails or rides high on the bar
Possible Causes
- highBroken or weak tensioner spring
- mediumDebris or dirt in tensioner pulley path
- lowMisaligned tensioner installation or worn bar guides
Fixes
- easyReplace the tensioner spring or tensioner kit and clean the pulley path
- easyClear debris from the tensioner mechanism and recheck alignment
- mediumInspect and replace worn bar rails or guide bushings
FAQ
Can a broken chainsaw tensioner cause the chain to derail during use?
Yes. A faulty tensioner often leads to chain derailment or uneven tension, especially under load. Correcting the tensioner condition usually resolves the problem.
Yes. A faulty tensioner can cause derailment; fixing the tensioner should resolve it.
Do I need to replace the tensioner and the bar together?
Not always. If the bar is worn or damaged, replacing both can ensure proper alignment and tension. If the bar is in good condition, you may only replace the tensioner and related hardware.
You might replace only the tensioner if the bar is still in good shape.
What’s the difference between a tensioner and the bar guide?
The tensioner applies pressure to keep the chain tight, while the bar guide maintains the chain’s alignment along the bar groove. Both must be in good condition for safe operation.
The tensioner keeps tension; the guide keeps alignment.
Is it safe to DIY tensioner repairs at home?
DIY repairs can be safe if you follow proper safety steps and use compatible parts. If you’re unsure or the saw is under warranty, seek professional help.
DIY can be safe if you follow safety steps and use the right parts; seek help if unsure.
When should you replace a tensioner instead of repairing it?
If the tensioner housing is cracked, the spring is fatigued beyond reliable repair, or the alignment is permanently compromised, replacement is recommended.
Replace the tensioner if the housing is cracked or the spring is fatigued.
What tools are essential for tensioner work?
Common tools include wrenches, screwdrivers, pliers, a torque wrench (as specified), and a replacement tensioner kit compatible with your model.
You’ll need basic hand tools and a model-specific tensioner kit.
Watch Video
The Essentials
- Inspect tensioner regularly for wear and play
- Use correct tensioning technique and hardware
- Replace worn parts promptly to avoid failures
- Test thoroughly after any tensioner repair