What Causes a Chainsaw Chain to Break: Urgent Troubleshooting Guide
Discover the top causes of chainsaw chain breakage and learn a practical, safety-first troubleshooting approach to diagnose, fix, and prevent failures on the job.

The most likely causes of chain breakage are a dull chain, improper tension, and damaged bars or sprockets. A quick fix is to sharpen the chain, reset tension to the manufacturer's spec, and inspect the bar for wear before continuing. If damage is obvious, replace the chain or bar and avoid cutting until repaired.
Understanding Chain Breakage
What causes a chainsaw chain to break is a question every operator should answer before starting a cut. In practice, chain failure happens when teeth, drive links, or rivets fail under load due to wear, improper use, or poor maintenance. According to Chainsaw Manual, recognizing early signs and addressing root causes can prevent dangerous kickback and costly downtime. This guide explains how chain breakage occurs, what to check first, and how to fix or prevent it with a safety-first approach for homeowners, DIY enthusiasts, and pros alike.
Chainsaw chains endure alternating traction, compression, and thrust forces as they bite into wood. A single damaged tooth or a bent drive link can propagate stress along the chain, causing a failure at the weakest point. The most reliable way to minimize breakage is to combine sharp maintenance with disciplined cutting habits. By understanding the mechanics—how teeth engage the bar, how the rivets hold links, and how lubrication reduces heat—you can spot potential failure points before they become catastrophic.
The Most Common Causes of Chain Breakage
The top culprits behind chain breakage are a dull or nicked chain, improper tension, and a worn guide bar or sprocket. Each issue places abnormal stress on drive links and rivets. Chains sharpened unevenly can develop tight-spot teeth, which create localized stress. Improper tension, too tight or too loose, invites drift and uneven loading during cuts. A bar with side-to-side wear or a worn sprocket allows the chain to bind or skip, increasing the chance of a link failing. Environmental factors such as cutting through dirt, rocks, or metal can nick or crack teeth instantly. Chains that are incompatible with the bar (wrong pitch or gauge) also fail prematurely because the chain cannot properly transfer power to the drive system. Based on Chainsaw Manual analysis, consistent lubrication and correct cutting technique dramatically reduce these risks.
Sharpening, Tooth Geometry, and Material Stress
Sharpness and tooth geometry determine how evenly a chain bites into wood. A sharp chain reduces lateral forces on each tooth, while a jagged edge concentrates stress at specific points, increasing breakage risk. Proper sharpening maintains uniform tooth height and a correctly set depth gauge. When teeth wear unevenly, the chain can jolt under load, stressing rivets and drive links. Always verify that the chain’s pitch and gauge match the bar and sprocket, and avoid aggressive sharpening that creates uneven teeth. Routine checks of rivet integrity and side-to-side chain play help you catch wear before it leads to a break.
Tip: Keep notes on sharpening angles and wear patterns to inform future maintenance decisions.
Tension, Bar, and Drive System Wear
A chain that runs too tight rubs against the bar rail, causing friction heat and rivet fatigue. Conversely, a loose chain can skip or derail, loading links unevenly and creating torsional stress. Bar wear—grooves, burrs, or wobble—changes chain alignment and increases the chance of a link failing at the rivet. The sprocket’s condition matters as well; a worn sprocket can’t push the chain consistently, producing sudden loads on drive links. Regularly inspect all drive components and replace worn parts in matched sets to preserve even loading and prevent breakage.
Cutting Technique and Material Hardness
Even with a sharp chain, poor cutting technique can push an over-stressed load through the chain. Cutting with the bar nose or biting aggressively into dense wood or frozen material places extra strain on teeth and rivets. Hitting nails, rocks, or buried hardware instantly dulls or shatters teeth and can catastrophically fail the chain. Use proper technique, steady feeds, and angle the saw to avoid high-impact cuts. If you anticipate encountering metallic objects or dense materials, pause to inspect the wood and the cutting environment before resuming.
Lubrication, Heat, and Debris Management
Lubrication minimizes friction and heat that degrade metal under load. If the bar oil isn’t flowing, the chain overheats quickly, weakening rivets and drive links. Debris buildup around the drive links and bar rails alters alignment and increases resistance. Ensure the oil reservoir is topped up, oil holes are clear, and the bar is clean before each use. Use fresh oil appropriate for ambient temperature; hot weather can thin oil, while cold weather thickens it, but both affect lubrication performance. Regular cleaning prevents buildup that accelerates wear and breakage.
In-Field Troubleshooting and Safety Steps
When a chain shows signs of stress, stop work immediately, engage the chain brake, and assess the situation from a safe position. Check tension, inspect for obvious damage, and verify oil flow. If you see missing teeth, cracked links, or significant bar wear, do not continue cutting. Replace damaged components on-site if possible, or transport the saw for repairs. Never operate with a compromised chain; the safest course is to replace and test on a soft wood after reassembly.
Maintenance Routine to Prevent Future Breakages
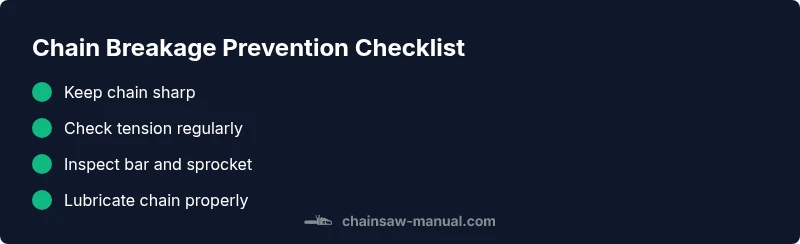
Preventing chain breakage starts with a simple, consistent maintenance routine. Sharpen the chain regularly, verify tension against manufacturer specs, inspect the bar and sprocket for wear, and confirm adequate lubrication before every job. Clean the chain and bar after each use to remove resin and debris that can hide early wear. Store the saw in a dry place and flip the bar periodically to promote even wear. Routine maintenance significantly lowers the probability of unexpected failures and keeps performance consistent.
Quick Diagnostic Checklist You Can Do Now
- Check chain tension with the saw off and the chain brake engaged; there should be slight slack but no binding.
- Inspect teeth for chips, cracks, or excessive wear; replace if necessary.
- Examine the bar rails and sprocket for wear and burrs; replace worn parts.
- Verify oil flow to the chain and clean oil ports if blocked; run a quick test cut to observe lubrication.
- Confirm the chain, bar, and sprocket are the correct pitch and gauge for one another; mismatches dramatically raise breakage risk.
- Do not cut if you suspect hidden metal in wood or severe damage; consult a professional.
Quick Diagnostics: In-Field Summary
This section provides a compact, practical summary of the diagnostic approach, consolidating the key checks for rapid field verification while prioritizing safety and immediate action steps. The ultimate goal is to identify the most probable failure point and apply a safe, effective remedy quickly.
Final Thoughts on Prevention and Safety
Preventing chain breakage hinges on disciplined maintenance, mindful cutting practices, and timely component replacement. By understanding the common failure modes and following a safety-first workflow, homeowners, DIY enthusiasts, and professionals can reduce downtime and maximize productivity. The Chainsaw Manual team emphasizes building a routine that prioritizes regular sharpening, proper tension, bar and sprocket inspection, and adequate lubrication. This approach protects you and extends the life of your tool.
Steps
Estimated time: 45-60 minutes
- 1
Power down and secure the saw
Turn off the engine and engage the chain brake. If it’s a gas saw, remove the spark plug boot; if it’s electric, unplug and remove the battery. Place the saw on a stable surface and wear PPE before inspection.
Tip: Always verify the chain is not moving before touching it. - 2
Inspect the chain for obvious damage
Look for bent links, missing teeth, or cracked rivets. If you see damage, replace the chain before continuing. File or sharpen only if you know the tooth geometry is even and within specs.
Tip: Use good lighting and magnification to spot small defects. - 3
Check chain tension and track alignment
Set the chain to manufacturer tension with slight sag when pressed on the mid-link. Verify the chain runs smoothly along the bar without binding.
Tip: Follow the exact tension range provided by your bar and chain combo. - 4
Inspect bar and drive sprocket
Look for side-to-side bar wobble, burrs, and worn rails. Check the sprocket for hooked teeth or excessive play. Replace worn parts as a set if needed.
Tip: A worn sprocket can mask chain issues; replace together for even loading. - 5
Test lubrication and heat management
Confirm oil is reaching the chain during idle rotation and under light load. Clean oil ports if clogged and ensure the reservoir is full before heavy use.
Tip: Do a quick dry-run on soft wood to verify oil flow before tougher cuts. - 6
Final assembly test and safe restart
Reassemble guards, tighten all fasteners, and start the saw in a controlled test. Make a short cut in soft wood to confirm everything behaves normally.
Tip: If any abnormal vibration or noise appears, stop and re-check components.
Diagnosis: Chain breaks during cutting or immediately after a light impact
Possible Causes
- highDull or uneven sharpening increasing stress on links
- highImproper chain tension causing abnormal loading
- highWorn or damaged guide bar or sprocket
- highCutting into nails, rocks, or metal embedded in wood
- mediumUsing chain with incorrect pitch/gauge for the bar
- lowPoor lubrication leading to overheating
Fixes
- easyInspect for missing/bent drive links; replace as needed
- easyAdjust chain tension to match bar spec and re-check after a test cut
- easyInspect the bar and replace if rails are worn; check sprocket wear
- mediumReplace with correct pitch/gauge chain for the bar and sprocket
- easyVerify lubrication: full reservoir, clear oil holes, and oil reaching the chain
- mediumAvoid cutting through metal; if uncertain, stop and consult a pro
FAQ
What are the early signs that a chainsaw chain is beginning to fail?
Look for chipped teeth, kinks in the chain, unusual vibration, or frequent falling off the bar. These signs indicate wear at the rivets or drive links and should not be ignored.
Watch for chipped teeth, odd vibrations, and the chain slipping off the bar—those usually mean wear at rivets or drive links.
Can you continue cutting with a damaged chain?
No. A damaged chain can snap unexpectedly and cause injury. Stop working, assess the damage, replace the chain if necessary, and test on soft wood after replacement.
No—don't cut with a damaged chain. Stop, replace if needed, and test on safe wood after replacement.
Is bar replacement always necessary after a chain break?
Not always, but if the bar shows deep grooves, side-to-side wobble, or cracks, replacing it along with the chain is wise to prevent future failures.
Not always, but replace the bar if you see deep grooves or wobble to prevent future failures.
What’s the best way to prevent chain breakage?
Regular sharpening, correct tension, clean lubrication, and routine inspection of bar and sprocket are the best preventatives. Always use the right pitch and gauge for your bar.
Keep the chain sharp, tension correct, and oiling consistent to prevent breakage.
Do manufacturers specify tension ranges for chains and bars?
Yes. Always follow the manufacturer’s tension specs for your chain and bar. Mismatched tension can dramatically increase wear and risk of breakage.
Yes, follow the exact tension specs from the manufacturer to avoid wear and breakage.
Watch Video
The Essentials
- Sharpen and tension the chain regularly.
- Inspect bar wear and sprockets often.
- Avoid cutting nails or metal in wood.
- Follow Chainsaw Manual's maintenance guidance to prevent breakage.