Chainsaw Chain Tension: Check & Adjust Safely
Learn to safely check and adjust tension on the chainsaw chain. This guide covers signs of improper tension, tool needs, step-by-step procedures, safety tips, and maintenance to prevent wear and derailment.

With this guide you will learn how to safely check and adjust tension on the chainsaw chain, ensuring it stays within the recommended range for optimal cutting and safe operation. You’ll learn to identify the right tension, perform checks with the bar cover removed, and adjust using the tools you already own, while avoiding overtightening that can cause kickback or chain derailment.
Why tension on chainsaw chain matters
Tension on chainsaw chain is not just about fit; it directly affects safety, control, and cutting efficiency. When the chain sits correctly in the guide bar groove, it tracks smoothly, reduces sprocket wear, and minimizes the risk of derailment during heavy cuts. According to Chainsaw Manual, maintaining proper tension helps prevent kickback and improves lubrication where it counts. Always verify tension with the saw off and the bar cool, using the bar groove as your reference. The tension on chainsaw chain should feel snug yet elastic across the midpoint of the underside; if you can lift the chain away by more than a couple of millimeters, the tension is too loose. If the chain binds or rides high on the bar, it’s too tight and can stall the bar. Start every job with a baseline check so you know what normal tension looks like for your model and chain combination.
How tension affects cutting performance
When the tension is right, the chain sits in the groove with predictable tracking and consistent bite. If the chain is too loose, it can derail, lift off the bar, or clog with debris, causing dangerous kickback and reduced control. If it is too tight, the chain will bind during cuts, increase wear, and place stress on the bar and drive sprocket. The tension on chainsaw chain also affects lubrication; a tight chain reduces effective lubrication and can overheat parts, while an overly loose chain threads through bar oil inconsistently. Practically, you’ll notice smoother starts and cleaner cuts with correct tension, and you’ll hear less audible chatter during heavy bursts of wood removal.
Symptoms of improper tension (loose vs tight)
Loose chain symptoms: frequent derailment, a visible sag in the chain, and a tendency to catch on knots or uneven surfaces. Tight chain symptoms: stiff movement, binding in the bar groove, or a loud, high-pitched whine when the saw spins. In either case, you should stop cutting and reassess tension before continuing. Remember that heat expands the chain slightly; tension should be checked after a few minutes of operation and again when the saw cools. The tension on chainsaw chain should be consistent around the entire loop; if a single section is loose, the overall tension is suspect and needs adjustment.
Safe check method with bar cover removed
Power down the saw, engage the chain brake, and remove the bar cover so you can see the guide bar and drive links clearly. Gently try to lift the chain away from the bar at the midpoint; there should be a small amount of slack, but the chain should not sag freely. Use a finger to feel the tension and watch the drive links seat in the groove as you move the chain. If the chain moves easily or hangs down, it’s too loose; if the chain doesn’t move and feels stiff, it’s too tight. This check works best when the bar is cool and the chain is not lubricated to avoid slippage from excess oil.
Tools and adjustments: tightening vs loosening
To adjust tension, you typically loosen the bar nuts, turn the tensioning screw (or use the appropriate adjustment on your model) to increase or decrease tension, then re-tighten the bar nuts. The goal is a snug fit: the chain should sit in the groove and still have a tiny amount of give in the middle when pressed. After tightening, recheck with the bar cover installed. Always consult the manual for your model because some saws use a side-mill tensioning screw, while others use a top-mounted adjuster. Over-tensioning can over-stress the bar and drive sprocket, while under-tensioning can cause derailment.
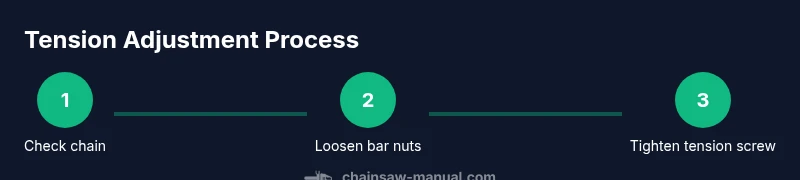
Step-by-step quick procedure for tightening the chain
- Stop the engine, apply the chain brake, and remove the bar cover. 2) With the bar supported, loosen the bar nuts to free the chain. 3) Turn the tensioning screw until the chain has a slight sag in the middle when pressed. 4) Tighten the bar nuts while holding the tension. 5) Refit the bar cover and spin the chain by hand to ensure smooth movement. 6) Start the saw and perform a light cut to verify tension while observing for any binding.
Common mistakes and how to avoid them
A frequent error is using force to push the chain into the groove instead of adjusting tension and rechecking. Another pitfall is ignoring heat buildup; always let the chain cool between checks during a long job. Failing to clean the groove can hide burrs that fool your tension reading. Always refer back to the manual for your model’s recommended deflection range and never assume a universal tolerance across brands.
Maintenance and preventive care for consistent tension
Regular cleaning of the bar groove and drive links helps maintain consistent tension. Lubricate the bar and chain according to the manufacturer’s recommendations, and replace worn drive links, guides, or bar when excessive play is detected. A well-maintained setup reduces the frequency of tension readjustments and extends life for both chain and bar. Document model-specific tension behavior so you can spot changes over time and act promptly.
Authoritative sources
- https://www.osha.gov
- https://www.cdc.gov/niosh
- https://extension.psu.edu
Tools & Materials
- Owner's manual for your saw model(Keep for reference to model-specific tension values)
- Bar/chain gauge or tension tester (optional)(Helpful for quick checks)
- Safety glasses
- Cut-resistant gloves
- Wrench or socket set(Use sizes specified by your bar nuts)
- Screwdriver that fits tension screw
- Clean rag and lubricant(For cleaning bar groove and lubrication)
Steps
Estimated time: 30-60 minutes
- 1
Prepare and secure the saw
Power down the saw, engage the chain brake, and place on a stable surface. Verify you are wearing PPE and the work area is clear before you touch moving parts.
Tip: Always unplug the spark plug or remove ignition for gas-powered saws when performing maintenance. - 2
Remove the bar cover and inspect components
Remove the side cover to expose the bar groove and chain drive links. Look for cracks, burrs, or bent drive links that would affect tension reading.
Tip: Do not operate with damaged bar or chain; replace if needed. - 3
Check current tension with the bar on the bench
Gently press the chain in the middle of the underside; there should be a slight sag when cool. If the chain droops noticeably or binds, tension needs adjustment.
Tip: Note the model-specific deflection you observe for future reference. - 4
Loosen bar nuts and adjust tension
Loosen the bar nuts per your model, turn the tensioning screw to tighten or loosen until the chain fits snugly in the groove with a small amount of slack in the middle.
Tip: Turn gradually and recheck frequently to avoid over-tightening. - 5
Tighten bar nuts, reassemble, and test movement
Retighten the bar nuts securely, reattach the bar cover, and manually spin the chain to ensure smooth movement with no binding.
Tip: Do a quick test on a scrap piece after reassembly. - 6
Safe test and final check
With the saw off, verify the chain tension again after it cools. When running, listen for wobble or binding and adjust if necessary.
Tip: Always test with chain brake engaged during the initial pass.
FAQ
What is the correct tension range for a chainsaw chain?
The correct tension varies by model and bar length. Check your owner’s manual for the manufacturer’s deflection guidance and use a brief, slight slack in the middle as a baseline. Do not rely on a single universal number.
Refer to your owner’s manual for the exact deflection range; there should be a slight slack in the middle when the chain is cool.
How can I tell if the chain is too loose or too tight without tools?
If the chain sags a lot at the middle or derails from the bar, it is too loose. If it binds, is stiff, or won’t move freely, it is too tight. Always verify after cooling and compare to model guidelines.
Look for visible sag for loose tension, or binding and stiffness for tight tension, then adjust according to your model’s guidance.
Can I adjust tension with the bar still attached?
Most models allow tension adjustment with the bar cover removed while the bar is attached. Remove the cover only and follow the model’s procedure. Never adjust while the engine is running.
Yes, but only after removing the bar cover and following model-specific steps; keep the engine off during adjustment.
How often should I check tension during a cutting session?
Check tension before starting and again after extended use or if you notice unusual vibration, binding, or changes in cutting performance. Heat cycling and debris can alter tension.
Check tension at the start and anytime you notice odd behavior like binding or vibration.
What safety precautions should I take when adjusting tension?
Wear PPE, ensure the saw is off and the chain brake engaged, and keep hands away from moving parts. If unsure, consult the manual or seek instruction.
Wear eye protection and gloves, keep the saw off, and do not touch moving parts during adjustment.
Watch Video
The Essentials
- Check tension before cutting, every time
- Maintain a snug but not overtight chain in the groove
- Use safe procedure: bar cover off, then reassemble, test
- Refer to your manufacturer manual for correct deflection