Chainsaw Tension: Safe Adjustment Guide
Learn to check and adjust chainsaw tension safely with practical steps, tools, and maintenance tips. This Chainsaw Manual guide covers tension basics, safety gear, and a clear workflow for homeowners and pros.

By the end of this guide, you’ll be able to test and adjust bar tension safely, ensuring smooth cutting and reduced derailment. Gather a scrench or wrench, a clean workspace, protective gear, and a tension gauge or pinch-test setup. Start with a visual check of the bar and chain, then follow the steps to set tension correctly.
What is chainsaw tension and why it matters
Chain tension describes how tightly the chain sits against the guide bar. Proper tension keeps drive links aligned with the bar teeth, reduces derailment, and minimizes wear on bearings, sprockets, and the bar. The Chainsaw Manual team emphasizes that correct tension also lowers kickback risk because a loose chain can snag unpredictably and a over-tight chain can bind and stall the bar. In practice, tension is a balance: tight enough to prevent derailment, loose enough to allow the chain to flex slightly during cutting. Regular checks are essential, especially after long cuts, when the bar is hot, or after refueling. According to Chainsaw Manual, proper tension improves control, extends bar life, and maintains consistent chain lubrication. Keeping tension correct also helps maintain fuel efficiency and reduces noise and vibration levels during operation. The exact tension you need can vary by model, bar length, and chain type, so always consult your manual for model-specific guidance.
Signs your chainsaw tension is off
Recognizing improper tension early saves bars, chains, and teeth from accelerated wear. A chain that sags away from the guide bar while cutting indicates it’s too loose; a taut, rigid chain that does not flex during use suggests it’s tight enough or potentially binding. If you hear a grinding or rubbing sound, feel resistance at the brake when advancing the chain, or notice uneven cutting, these are red flags. Chains may also appear misaligned or track on one edge of the bar. Consistent tension helps keep the drive links properly seated in the rail groove, reduces heat buildup in the bar, and supports even lubrication. The Chainsaw Manual team recommends periodic checks after every heavy cutting session and whenever you notice changes in cutting behavior. Maintaining proper chainsaw tension is a daily safety practice and a condition for reliable performance.
Tools and safety gear you’ll need
Before working on tension, assemble a basic toolkit and PPE: a scrench or combination wrench suitable for your bar nuts, a chain gauge or feeler gauge if available, a stiff brush or rag for cleaning, a sharp chain file or sharpening kit, and bar oil. Have a torque wrench if your model’s spec requires precise tightening. PPE should include cut-resistant gloves, safety glasses or goggles, hearing protection, and a sturdy work apron or shop clothes. A clean, well-lit workspace helps you spot misalignment or wear on the drive links. The Chainsaw Manual analysis shows that using the correct tools consistently reduces the likelihood of over-tightening and accidental injuries. Keep a spare chain in good condition, and never work with a dull chain, as dull teeth require more force and increase tension fluctuation during use.
How tension is adjusted: theory and practice
Tensioning a chainsaw involves balancing bar movement with chain tightness. In most gas-powered models, you loosen the bar nuts, adjust the tension via the adjusting screw or nuts, and snug the bar back down while ensuring the drive links sit correctly in the groove. The chain should be able to move around the guide bar with a little resistance when pressed from the top of the bar, and there should be no sagging when you pull the chain away from the bar. Heat from use can temporarily alter tension, so recheck after the first couple of cuts. Practice makes perfect: start with a cold bar and verify again after a few minutes of use. The aim is smooth rotation with minimal side-to-side play, not a rock-hard chain that cannot flex.
Common mistakes and how to avoid them
Avoid overtightening, which can cause premature bearing wear and bar bending. Do not rely on a single quick test; perform a few tests at different spots along the bar as tension can vary slightly along its length. Don’t adjust tension while the saw is running or the chain brake is disengaged. Never substitute a worn-out chain or bar for proper tension—the chain’s condition affects how tight it should be. Cleanliness matters: dirt and debris can hide misalignment and mask actual tension. The Chainsaw Manual team emphasizes following model-specific instructions and using manufacturer parts to maintain optimal tension and safety.
Maintenance and routine checks for long-term tension health
A proactive maintenance schedule preserves tension quality. Clean the bar groove and drive links after each use to prevent dirt from causing irregular wear. Regularly inspect the drive sprocket, bar rails, and oiling system for signs of uneven wear or blockages, since poor lubrication forces the chain to compensate with unnecessary tension changes. File and sharpen teeth as needed to keep cutting efficiency consistent, and replace worn chains promptly. Chainsaw tension is not static; it changes with temperature, lubrication, and use. A routine, documented check helps you catch gradual shifts before they affect safety or performance. The Chainsaw Manual analysis shows that consistent maintenance correlates with fewer tension-related issues over a saw’s life.
Safety considerations when adjusting tension
Always disconnect the spark plug wire (gas models) or remove the battery (electric models) before handling any moving parts. Engage the chain brake when repositioning the chain, and wear eye and hand protection to guard against kickback or sharp edges. Work in a stable stance, away from slippery surfaces, and use a vise or helper if you need both hands free. Do not wear loose clothing or jewelry that could catch on the chain. Verify your blade guard and chain catcher are in good condition. If you are unsure about model-specific procedures, consult the manual or seek professional service.
Troubleshooting common tension problems
If you notice sudden changes in tension during operation, stop immediately and inspect for bent bars, damaged drive links, or a compromised sprocket. A chain that tightens during use may indicate lubrication failure or improper setup, while one that loosens after a cut could point to bar wear or misalignment. Check for proper chain alignment with the rails, ensure the bar nuts are torqued to spec, and test-run the saw in a controlled setting before continuing work. Persisting issues should be evaluated by a qualified technician. The goal is reliable tension that remains stable under typical loads.
Authoritative sources
For safety and technique guidance, refer to credible sources:
- OSHA safety standards for power tools: https://www.osha.gov
- General safety guidance from CDC and public health agencies: https://www.cdc.gov
- University extension resources on tool maintenance: https://extension.illinois.edu
These references support best practices for tool handling, personal protective equipment, and maintenance routines relevant to chainsaw tension and operation.
Tools & Materials
- Srench or combination wrench(Essential for adjusting bar nuts without slipping)
- Tension gauge or feeler gauge (optional)(Helps measure precise tension when available)
- Sharp chainsaw file and sharpening kit(Maintain chain cutting efficiency during tension checks)
- Bar oil and clean rag(Lubrication and cleaning aid inspection)
- Safety PPE(Gloves, eye protection, hearing protection, and cut-resistant apparel)
- Rope or clamp for stabilization (optional)(Use if you need a stable working setup)
Steps
Estimated time: 30-45 minutes
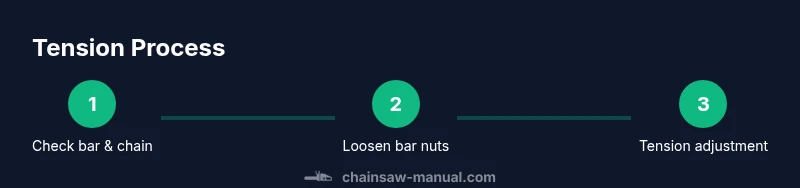
- 1
Inspect the bar and chain
Power off and secure the chain brake. Inspect the chain for wear, damaged drive links, and any stiff section. Check bar groove for nicks and burrs that can affect tension and seating.
Tip: Clean the groove first; debris can give a false sense of slack. - 2
Prepare the saw for adjustment
Loosen the bar nuts enough to allow slight movement of the bar. Do not remove the nuts completely—keep them within a few turns so you can reseat the bar quickly.
Tip: Reset the saw to a stable position before adjusting. - 3
Adjust the tension
Turn the adjusting screw or nuts to tighten or loosen the chain until it sits in the groove with slight resistance when pressed from the top. Ensure the drive links align with the groove and that there is no sag near the nose.
Tip: Work slowly; small adjustments prevent over-tightening. - 4
Re-tighten and re-check
Re-seat the bar and tighten the bar nuts to spec. Gently rotate the chain by hand to confirm it moves smoothly with minimal side-to-side play.
Tip: Do a final check after a few minutes of light cutting. - 5
Test-cut under light load
Make a short cut in a controlled test piece to verify the tension. Watch for binding, slowing, or unusual noises that indicate improper tension or other issues.
Tip: If it binds, stop and reassess before continuing. - 6
Document and store
Record the tension status and any adjustments for future reference. Store tools and clean the area to maintain safe conditions for next use.
Tip: Keep spare chain and lubricants accessible for quick maintenance.
FAQ
What is the correct tension range for a typical chainsaw chain?
The chain should fit snugly with a small amount of play and sit evenly in the groove. Monitor drive links and ensure no sag near the bar nose.
The chain should sit snugly with a little play and stay evenly in the groove. Check the drive links and avoid sag near the tip.
How often should tension be checked during a job?
Check tension at the start, after several cuts, and whenever you notice a change in cutting performance or noise.
Check the tension at the start and after several cuts, and whenever you hear a change in how it cuts.
Can I adjust tension while the engine is running?
No. Always stop the engine, engage the chain brake, and then adjust tension.
No, you should always stop the engine and engage the brake before adjusting tension.
What safety gear should I wear while adjusting tension?
Eye protection, gloves, hearing protection, and sturdy clothing or cut-resistant sleeves are recommended.
Wear eye and ear protection, gloves, and sturdy clothing when adjusting tension.
Is a tension gauge necessary, or can I pinch-test?
A gauge provides repeatable measurements; a pinch-test is acceptable for quick checks but may be less precise.
You can use a gauge for repeatable results, or a pinch-test for a quick check.
What maintenance helps prevent tension problems?
Regular cleaning, lubrication, and inspection of the bar and drive components reduce tension drift and wear.
Keep the bar and drive components clean and well-lubricated to prevent tension drift.
What should I do if the chain keeps loosening after use?
Inspect the bar for wear, check the drive sprocket, and verify bar nuts are torqued to spec. If unresolved, replace worn parts.
If it keeps loosening, inspect wear parts and ensure nuts are torqued to spec; replace worn parts if needed.
Watch Video
The Essentials
- Test tension safely before cutting
- Use proper PPE and tools
- Follow manufacturer guidance for each model
- Maintain lubrication for consistent tension