How to Clean a Chainsaw: A Safe Step-by-Step Guide
Learn how to clean a chainsaw safely with a complete, step-by-step approach that covers air filters, bar and chain, fuel systems, and lubrication for optimal performance.

Learn how to safely clean a chainsaw to improve performance. This step-by-step guide covers the air filter, bar-and-chain area, fuel system, and ignition spots. Gather basic tools, protective gear, and a clean workspace before starting to prevent carb contamination and kickback risk. Follow the sequence below to complete the job in 30-45 minutes.
Why Regular Cleaning Matters for Chainsaw Safety and Performance
Regular cleaning keeps a chainsaw running reliably and reduces the risk of injury. A clean machine cools better, starts more easily, and has fewer clogged passages that can affect fuel flow and exhaust. According to Chainsaw Manual, routine maintenance helps prevent dangerous failures during cutting and extends blade life. By removing sawdust, resin, and dirt from critical areas—air intake, cooling fins, and exhaust—you preserve power and prolong service intervals. This continuous care minimizes heat buildup, reduces wear on moving parts, and keeps your saw ready for demanding work. When you understand which components benefit most from cleaning—air filters, bar oil passages, carburetor inlets, and muffler openings—you build a practical habit that pays off in longer tool life and safer operation. The approach below emphasizes safety, efficiency, and repeatable steps that can be completed on a sturdy bench or the tailgate of a pickup.
Before You Begin: Safety First
Working with chainsaws requires respect for the risk of injury. Wear cut-resistant gloves, safety glasses or a face shield, and hearing protection. Engage the chain brake and place the saw on a stable surface before starting. If you are dealing with a gasoline model, remove the spark plug boot to prevent accidental starting, and let the engine cool completely before touching any internal parts. For electric models, unplug and remove the battery or disconnect the power cord. Keep a clean, well-lit workspace and dispose of dirty rags responsibly. If you feel unsure at any point, pause and consult the owner’s manual. A deliberate, patient approach minimizes risk and ensures you don’t disturb delicate components like the carburetor. A solid safety mindset makes the cleaning task far less risky and more effective.
Overview of the Cleaning Process
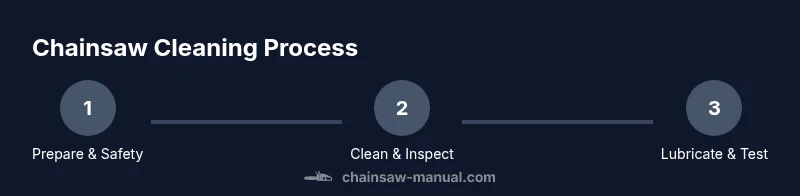
This section outlines the general flow you’ll follow: 1) secure the saw and disconnect ignition to prevent starting, 2) wipe down the exterior and inspect for damage, 3) access and clean or replace the air filter, 4) clean the bar groove and lubricate, 5) inspect the chain and tension, 6) clean the clutch and sprocket area if accessible, and 7) perform a final safety check and test cut. The process is designed to minimize risk while maximizing cleaning effectiveness. Remember, use mild cleaners and avoid soaking sensitive electronics on electric saws. This approach keeps the saw in peak condition without introducing new hazards.
Air Filter and Fuel System Cleaning
Air filtration is a frontline defense against engine wear and poor combustion. Start by removing the air-filter cover and carefully extracting the filter. If the filter is paper-style and excessively dirty, replace it; if it is foam, rinse with warm soapy water, rinse again, then squeeze dry and re-oil as recommended by the manufacturer. For gasoline engines, inspect the fuel line and primer bulb area for signs of cracks or leaks. Wipe away varnish buildup around fuel ports with a soft brush and a lint-free cloth. Avoid using harsh solvents near the carburetor, and never spray cleaner directly into the carburetor while the engine is hot. This careful maintenance helps preserve fuel efficiency and consistent starting.
Bar and Chain Cleaning, Lubrication, and Tension
Lift the bar and chain carefully off the saw and remove large debris from the groove with a brush. Wipe down the drive links and tie straps, then inspect for damaged teeth or stiff links. Clean the oil holes and chain sprocket with a small brush; ensure the oil passages are clear and free of resin. Re-lubricate the chain using fresh bar oil and reattach the bar with the chain at the correct tension—snug enough that you can lift the chain at the midpoint about 1/4 inch. Prevent over-tightening, which can wear the bar, or under-tightening, which causes dangerous whip. A well-lubricated chain cut cleanly and reduces heat buildup during operation.
Sprocket, Clutch, and Exhaust Cleanup
With the bar removed, inspect the sprocket and clutch drum for embedded debris and glazing. Clean any buildup with a soft brush and avoid metal-to-metal contact that could scratch delicate surfaces. Wipe around the exhaust area to remove caked carbon and sawdust, which can impede exhaust flow. If you notice heavy deposits or signs of corrosion, consult a professional for deeper inspection. Keeping the exhaust clean ensures better engine breathing and reduces unburned fuel burning inside the muffler, which can shorten component life. This step helps maintain proper timing and smooth operation.
Preventive Maintenance After Cleaning
Reassemble the saw and apply fresh bar oil. Check the chain tension again after reassembly and perform a light test run on a non-cutting surface to ensure everything spins freely without wobble. Record maintenance in a log and schedule the next cleaning after a specified operating time or number of hours. Regular song of maintenance avoids surprises on the job site. Chainsaw manuals emphasize routine checks for air leakage and seal integrity after cleaning.
Troubleshooting Common Cleaning Issues
If the saw starts hard after cleaning, recheck the air filter and fuel lines for clogs, and ensure there is proper exhaust flow. Sticky throttle linkage or a misadjusted idle can mimic cleaning issues, so verify the carburetor settings according to the service manual. Rust around fasteners or stuck screws may require penetrating oil and careful application with appropriate tools. If you encounter broken plastic components or cracked seals, replace them before resuming use. This section equips you to diagnose common cleaning hiccups without risking safety or further damage.
Final Safety Checklist After Cleaning
Before you put the saw back to work, perform a final safety check: confirm the chain brake is engaged when transporting, ensure the chain has proper tension, verify bar oil is full, and reattach the spark plug cap on gasoline models or reconnect power on electric ones. Inspect all fasteners for tightness and confirm there are no loose parts. Do a short idle test in a safe area and set your choke or power settings according to the manufacturer’s guidance. The Chainsaw Manual team recommends reviewing your maintenance log and planning the next cleaning interval to maintain peak performance.
Tools & Materials
- Screwdriver set (Phillips and flathead)(For removing the chain cover and securing the bar/air filter housing)
- Wire brush or nylon brush(To scrub resin, dust, and carbon from cooling fins and bar groove)
- Rags or lint-free cloths(Used for wiping and drying components)
- Mild degreaser or dish soap(For removing built-up grime from metal surfaces)
- Container of water and a small brush(For foam air-filter cleaning and rinsing)
- Bar oil (fresh)(Used to lubricate the bar and chain during reassembly)
- Safety gloves(Protect hands from sharp edges and hot parts)
- Safety glasses or face shield(Eye protection from debris)
- Hearing protection(Protect hearing during testing)
- Air compressor or blow gun(Optional for blowing dust from tight spaces)
- Spark plug wrench or socket set(Helpful if you need to disconnect ignition for safety)
Steps
Estimated time: 30-45 minutes
- 1
Power down and secure the saw
Disable ignition by removing the spark plug cap on gasoline models or disconnecting power on electric models. Engage the chain brake and place the saw on a stable work surface. This ensures there are no accidental starts while you work.
Tip: If unsure about the ignition, consult the manual before starting. - 2
Remove cover to access air filter
Use the screwdriver to remove the chain cover screws and lift off the cover. Gently move the bar and chain aside without forcing parts. Access to the air filter is now clear for cleaning or replacement.
Tip: Keep screws organized in a labeled tray to avoid misplacement. - 3
Clean or replace the air filter
If the filter is paper, replace it if dirty; if foam, wash with warm soapy water, rinse, dry, and lightly oil before reinstalling. Inspect the filter housing for cracks or gaps that could allow unfiltered air in.
Tip: Do not soak paper filters; this can degrade filtration efficiency. - 4
Wipe and inspect exterior surfaces
Wipe down the saw body, cooling fins, muffler housing, and around the carburetor area. Look for signs of oil leaks, corrosion, or damaged gaskets. Clean off stubborn resin with a brush, then wipe dry.
Tip: Avoid harsh solvents near plastic components; use mild cleaners instead. - 5
Remove bar and chain for cleaning
Take care when handling the chain to avoid cuts. Remove the bar and chain, clean the groove, drive links, and oil holes. Examine the chain for dull, cracked, or stretched links and replace as needed.
Tip: Note chain orientation before removal to ensure correct reassembly. - 6
Lubricate and reassemble the bar and chain
Reinstall the bar and chain, keeping the chain tension appropriate. Apply fresh bar oil and slowly rotate the chain to ensure it spins freely. Refasten the chain cover and ensure all screws are tight but not over-torqued.
Tip: Test the chain tension by lifting the chain at the mid-point; it should lift slightly but return smoothly. - 7
Clean the sprocket, clutch area, and exhaust
Gently brush the clutch drum and sprocket area to remove debris. Clear carbon buildup around the exhaust outlet. Be careful not to dislodge seals or gaskets.
Tip: If you encounter stuck parts, apply light penetrating oil and wait a few minutes before attempting removal. - 8
Final safety checks and test
With the saw reassembled, perform a light idle test away from any cutting tasks. Confirm safe operation and that the saw accelerates smoothly without unusual noise. Refill fuel and oil as needed according to the manufacturer’s guidelines.
Tip: Record the maintenance steps in a log for future reference.
FAQ
Do I need to clean my chainsaw after every use?
Cleaning after use helps prevent buildup that can affect performance and safety. For frequent users, a quick wipe-down and filter check after each job is a good habit. A deeper clean every few uses keeps components in peak condition.
Yes. Regular cleaning after use keeps your chainsaw performing well and helps prevent jams and wear.
Can I use household cleaners on my chainsaw?
Use mild degreasers or dish soap mixed with water. Avoid harsh solvents near sensitive components like the carburetor and seals. Always rinse and dry thoroughly to prevent corrosion.
Stick to mild cleaners and avoid harsh chemicals near critical parts.
Is it necessary to remove the bar and chain for cleaning?
Removing the bar and chain during cleaning allows access to the groove, oil holes, and drive links for thorough cleaning and inspection. Reinstall with proper tension after cleaning.
Yes, removing the bar and chain gives you a complete look at moving parts.
How often should I replace the air filter?
Replacement depends on usage; inspect for tears and dirt. If the paper filter shows heavy soiling, replace it. Foam filters can be cleaned, dried, and oiled as directed by the manufacturer.
Check the air filter regularly and replace or clean as needed.
What are signs of a dirty exhaust or clogged fuel line?
Symptoms include reduced power, hard starting, misfiring, or unusual smoke. If you suspect clogging, inspect the exhaust outlet and fuel lines, and consult a professional if necessary.
Look for power loss and starting trouble as signs of buildup.
What safety checks should I perform after cleaning?
Confirm chain tension, chain brake functionality, and that the bar oil reservoir is full. Do a controlled idle test away from cutting tasks and ensure no unusual noises or vibration.
Always verify tension and safety features before use.
Watch Video
The Essentials
- Start with safety: disconnect ignition and secure the saw.
- Clean ventilation-critical parts—air filter, cooling fins, exhaust—before anything else.
- Inspect the bar, chain, and sprocket for wear and proper tension.
- Lubricate properly and reassemble with care to prevent kickback risks.
- Document maintenance to support consistent, safe operation.