How tight should chain be on chainsaw: a practical guide
Learn how to properly tension a chainsaw chain with step-by-step instructions, testing methods, and safety tips. This guide from Chainsaw Manual covers why tension matters, how to test, common mistakes, and maintenance routines to keep your chain in prime condition.

The chain should be snug on the bar with only a slight give. It must engage the drive sprocket and bar nose and rotate freely by hand with some resistance. After tensioning, test by gently pulling the chain at the midpoint to ensure it stays engaged but doesn’t bind. According to Chainsaw Manual, correct tension minimizes kickback risk and protects the bar.
Why Chain Tension Matters
Proper chain tension is a safety and performance cornerstone of any chainsaw use. When the chain is too loose, drive links can jump off the bar, causing kickback, derailment, or even loss of control. If the chain is too tight, the bar and drive sprocket endure excessive load, leading to unnecessary wear, heat buildup, and reduced cutting efficiency. The Chainsaw Manual team emphasizes that correct tension minimizes kickback risk and protects the bar, chain, and engine. In practice, tension should hold the chain snug to the bar without binding as the chain cycles around the bar nose. You should be able to rotate the chain by hand with a small amount of resistance while keeping the drive links engaged with the bar nose. Adapting tension to your bar length and chain type matters, and model-specific guidance from the manual should be followed.
Common conditions—bar length variations, chain pitch, and even temperature changes—can influence tension. Always start with the manufacturer’s recommended procedure and verify tension after any maintenance. Regular checks help you detect wear or damage that could alter tension, such as a stretching chain or a worn guide bar. Keeping tension consistent improves cutting performance and reduces the likelihood of dangerous kickback during felling, limbing, and bucking tasks.
How Chain Tension Works on Different Bar Types
Chain tension interacts with bar design, drive sprockets, and chain pitch. Longer bars demand a slightly looser feel to accommodate more chain movement around the nose, while shorter bars can feel stiffer if over-tightened. The drive sprocket must clearly engage the chain links without binding, and the bar nose should receive consistent feed as you cut. Bar rails can wear unevenly, creating localized slack or bind points; regular inspection of the rails and drive links helps you adjust tension accurately. In all cases, use the tension adjustment mechanism specified by the model’s manufacturer. Chains with different pitch sizes may require slightly different amounts of tension, so always refer to the owner’s manual for your exact model.
Understanding your particular bar length, chain gauge, and pitch will help you set a baseline tension. When in doubt, perform a mid-bar tension check and adjust incrementally to avoid overstressing the chain or bar.
Signs Your Chain Needs Tensioning
Several indicators point to the need for tensioning. A visibly sagging chain, drive links not engaging the nose, or the chain catching on the underside of the bar are red flags. If you hear extra noise or feel a tug against the bar as the chain moves, tension is likely too loose. Conversely, a chain that does not move freely around the bar, or one that binds when you rotate the chain by hand, indicates it is too tight. Additionally, frequent derailments or the chain jumping off the guide bar during cutting strongly suggest uneven tension or bar wear. Regularly examine the chain tension as part of your routine safety checks, especially after re-installation of a bar or after replacing the chain.
Safety Checks Before Adjusting Tension
Always begin with safety in mind. Park the saw on a stable surface, engage the chain brake, and ensure the engine is off before touching the chain. Wear cut-resistant gloves and eye protection. If you will operate the saw after adjustments, start it briefly in a safe, open area to confirm the chain feeds smoothly, but do not run it for extended periods while checking tension. Keep hands away from the chain at all times, and never attempt tensioning while the engine is running. For model-specific guidance, consult the manual and use the correct tensioning tool.
Having the right PPE and a clear work area dramatically reduces the risk of injury when adjusting chain tension.
How to Test Tension Properly (No Tools)
To test tension safely without tools, press the chain gently away from the bar at its midpoint with a gloved finger. The chain should remain engaged with the bar and not sag excessively; you should feel a slight resistance when moving the chain. If the chain lifts away easily or binds, re-tension and re-test. When testing, keep your hands away from the nose of the bar and away from the cutting edges. This test helps you gauge whether the tension is within a safe, functional range before performing a more thorough adjustment.
Common Mistakes and How to Avoid Them
Common mistakes include over-tightening, under-tightening, and skipping a re-check after tightening. Over-tightening causes excessive wear on the bar and chain and increases fuel consumption, while under-tightening raises the risk of derailment and kickback. Another frequent error is failing to tighten the bar nuts after tensioning, which can lead to loosening during use. Always re-check tension after re-tightening the bar nuts and confirm the chain’s engagement with the bar’s nose. Finally, neglecting to lubricate the chain after adjustment can cause heat buildup and accelerated wear.
Routine Maintenance for Consistent Tension
Incorporate chain tension checks into your regular maintenance routine. Before each use, inspect for wear on the drive links, guide bar rails, and the nose sprocket. After replacing a chain or bar, re-check tension as described by the manual. Periodically clean the tensioning screw and side plate to prevent debris buildup that can masquerade as slack. If you notice persistent tension changes without obvious wear, consult a service professional to assess the bar, drive sprocket, and chain alignment.
Tools & Materials
- Owner's manual for your chainsaw model(Provides model-specific tension specs and procedure.)
- Tensioning wrench or scrench(Used to loosen bar nuts and adjust the tensioning screw.)
- Flat-head screwdriver or Phillips screwdriver(Alternative tool for tensioning screw on some models.)
- Bar nuts wrench or socket(Necessary to loosen and retighten bar nuts safely.)
- Cut-resistant gloves(Protect hands when handling the chain.)
- Safety glasses or goggles(Eye protection during adjustments and testing.)
- Chain oil and clean rag(Optional for cleaning the chain area and lubricating after tensioning.)
Steps
Estimated time: 25-40 minutes
- 1
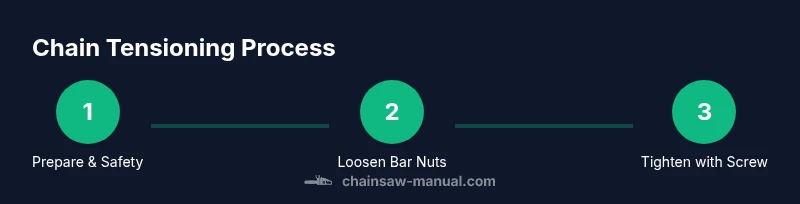
Prepare the saw and safety setup
Place the saw on a stable surface, engage the chain brake, and wear PPE. Ensure the engine is off and the bar is cool before touching any moving parts. This initial safety check helps prevent accidental starts and injuries during adjustment.
Tip: Never attempt tensioning with the engine running. - 2
Loosen the bar nuts
Loosen the bar nuts just enough to allow the bar to move slightly. Do not remove them completely; you want the bar to stay aligned with the chassis as you adjust tension.
Tip: Only loosen enough to free the bar; overtightening loosened nuts can damage threads. - 3
Access the tensioning screw
Locate the tensioning screw on the side plate and determine its turning direction for tightening. If your model uses a clutch cover or a different access point, consult the manual for exact steps before proceeding.
Tip: On some models, you may need to remove the clutch cover first. - 4
Tighten the chain with the tensioning screw
Turn the tensioning screw clockwise in small increments to take up slack. After each increment, check for even tension across the bar and ensure the chain engages the nose as it rotates.
Tip: Avoid over-tightening; small adjustments are safer for your bar and drive sprockets. - 5
Check tension at the midpoint
With the chain still engaged, gently test tension at the chain’s midpoint by lifting it slightly away from the bar with a gloved finger. A properly tensioned chain should not sag and should show slight resistance when moved.
Tip: If the chain sags, tighten a bit more and re-test. - 6
Re-tighten bar nuts and verify
Tighten the bar nuts securely after tensioning, then re-check the chain tension to ensure it remains correct. A misaligned bar can cause uneven tension and premature wear.
Tip: Double-check that the bar nose remains properly engaged after tightening. - 7
Lubricate and perform a light test
Apply bar oil and run the saw for a short, controlled interval in a safe area to distribute lubrication. Stop and inspect tension again; address any changes before continuing with work.
Tip: Watch for unusual heat or smoking, which signals excessive tension or lubrication issues.
FAQ
How tight should the chain be on a chainsaw?
The chain should be snug on the bar with slight resistance when moved by hand, and it should stay engaged with the drive sprocket and bar nose. Avoid both sagging and overtightening.
The chain should be snug on the bar with a little resistance when you move it by hand, staying engaged with the drive sprocket and nose. Avoid sagging or being too tight.
What tests confirm proper tension?
A mid-bar lift test is common: gently lift the chain at the midpoint with a gloved finger. It should not sag, and you should feel light resistance when moving it. Re-check after tightening.
Use a mid-bar lift test: lift the chain at the midpoint gently. It should not sag, and there should be light resistance when you move it.
What happens if the chain is too tight?
Over-tightening increases bar and sprocket wear, causes excess engine load, and can lead to heat buildup or chain breakage.
If the chain is too tight, it wears the bar and sprocket faster and can overwork the engine, causing heat and possible breakage.
What happens if the chain is too loose?
A loose chain can derail, throw off the bar, or cause kickback. It also reduces cutting efficiency and safety.
A loose chain can derail, throw off the bar, and increase kickback risk, lowering cutting efficiency.
Can tension vary with temperature?
Yes. Metal expands with heat and contracts in cold, so check tension across operating temperatures and re-tension if necessary.
Temperature changes can affect tension, so re-check when conditions change.
How often should you check tension?
Check tension before each use and after any bar or chain replacement. Periodic checks during heavy use are also prudent.
Check tension before every use and after replacements, and during heavy work as needed.
Watch Video
The Essentials
- Check tension before every use.
- Keep the chain engaged with the bar nose, not overly tight.
- Use model-specific guidance from the manual for adjustments.
- Re-test tension after tightening and lubrication.