How to Adjust Chainsaw Chain: A Safe, Step-by-Step Guide
Learn how to adjust a chainsaw chain safely with a practical, step-by-step approach. This guide covers tools, safety, testing tension, and post-adjustment maintenance for reliable cutting performance.

Goal: Learn to adjust chain tension on a chainsaw safely and effectively. You’ll need the correct wrenches, a tensioning tool, and PPE, plus the saw’s manual for model-specific notes. This quick answer introduces key steps: secure the saw, loosen bar nuts, set tension, verify slop, and recheck after startup. Proceed slowly, checking the chain's resistance and alignment as you go.
Why proper chain tension matters
A chainsaw chain must be neither too loose nor too tight. Proper tension ensures smooth cutting, reduces the chance of derailment or dropping drive links, and prolongs bar and motor life. If the chain is too loose, it can sag and catch on the bar, leading to dangerous kickback or chain derailment. A chain that's too tight causes excess friction, increases fuel consumption, and may snap the drive links or damage the bar ribs. The correct tension also helps maintain adequate lubrication; when tension is right, the drive links stay engaged with the bar groove and drive sprocket, allowing the chain to rotate freely with minimal side-to-side play. For safety, always perform tension adjustments with the saw off and secured. We'll walk through a consistent approach that applies to most common bar lengths, while noting model-specific differences you may find in your Chainsaw Manual. By the end you will know how to check tension quickly and confidently before each cut, which reduces wear and improves control.
Safety prerequisites before adjusting
Before you touch the chain, put on the right PPE and isolate the tool. Stop the engine, engage the chain brake, and set the saw on a stable, non-slip surface. Remove the spark plug cap only if you are working on a gas-powered unit and you need to prevent accidental starts; otherwise keep hands away from moving parts. Keep bystanders clear and work in a well-ventilated area. Have a clean workspace and use a stiff brush or rag to remove wood chips from around the bar and chain. A slow, methodical approach reduces the risk of injury and helps you notice if something is off. If the saw has a quick release side plate, use the appropriate screwdriver to loosen the plate while keeping your fingers away from the chain. These steps create a safe baseline so you can adjust tension without surprises.
Tools and materials you'll need
Having the right tools at hand makes tension adjustment quick and safe. The core items are a bar nuts wrench or scrench, a screwdriver compatible with your saws tensioning arrangement, and a tensioning tool if your model supports it. A good pair of gloves protects your hands from sharp links, and safety glasses protect your eyes from wood chips. Keep hearing protection handy, and work on a stable surface to prevent slips. Wipe down the bar and chain with a clean rag to remove debris that can hide a misalignment. Finally, have your owner's manual nearby for model specific torque specs or order of operations. Having these items ready before you start minimizes delays and helps you complete the adjustment with clean, deliberate moves.
Step-by-step overview
The tension adjustment follows a simple sequence that fits most chainsaws. Start by securing the saw and removing the side cover to access the tensioning mechanism. Then loosen the bar nuts to relieve pressure on the bar. Using the tension adjustment screw or repositioning the bar, apply gentle tension until the chain sits snug in the groove with a slight resistance to movement. Refit the side cover and tighten the bar nuts in a cross pattern to seat the bar evenly. Finally, manually rotate the chain to confirm smooth rotation with minimal side-to-side wobble. If you notice binding, back off and recheck alignment; proper lubrication should be ensured after adjustment. Always re-check tension after starting the engine and running a brief test cut.
Verifying tension and safe operation after adjustment
Once tension is set, inspect the chain's fit along the entire bar. With the saw off, gently pull the chain away from the bar at the midpoint; there should be a small amount of play but the chain should not sag significantly. Rotate the chain by hand to ensure the drive links engage the bar and sprocket without binding. Reattach the cover, start the engine at idle, and allow it to reach normal operating speed while the chain remains stationary. Listen for unusual noises or heat and watch for smoke; if anything seems off, stop and re-check. After you have verified safe operation, apply fresh bar oil and inspect for any wear on the bar groove or drive links.
Authority Sources
- OSHA Safety and Chainsaw Guidelines: https://www.osha.gov
- NIOSH Safety Resources: https://www.cdc.gov/niosh/
- General Safety Guidance: https://www.cdc.gov
Tools & Materials
- Bar nuts wrench or scrench(Fits bar nuts on most chainsaws)
- Screwdriver or hex key(Use the correct head for your saws tensioning arrangement)
- Chain tensioning tool (optional)(Some models include built-in tensioner)
- Gloves(Cut-resistant preferred)
- Safety glasses(Eye protection)
- Hearing protection(PPE for long sessions)
- Rag for cleaning(Wipe oil and chips from bar and chain)
- Bar oil(Optional, for after adjustment lubrication)
- Owner manual(Model-specific torque specs and steps)
- Stable work surface(Use a workbench or sawhorses)
Steps
Estimated time: 15-25 minutes
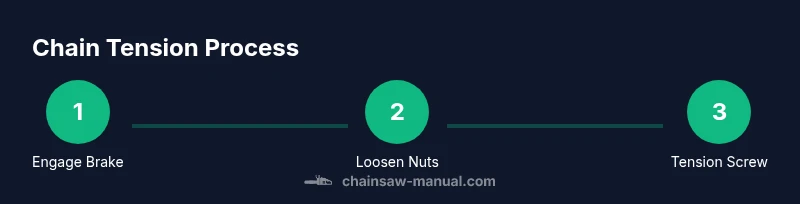
- 1
Engage the chain brake
With the saw powered off, activate the chain brake to prevent chain movement during the adjustment. This keeps your hands and bar safe while you set up.
Tip: Always verify the brake engages fully before continuing. - 2
Secure the saw on a stable surface
Place the saw on a flat, non-slip surface or a dedicated stand. A stable base reduces movement and helps keep the bar aligned as you work.
Tip: If available, clamp the saw lightly to prevent vibration without deforming the bar. - 3
Loosen the bar nuts
Using the correct wrench, loosen the upper and lower bar nuts just enough to relieve pressure on the bar. Do not remove them completely yet.
Tip: Keep fasteners together in a tray to avoid losing them. - 4
Turn the tension screw to apply tension
Turn the tension adjustment screw or reposition the bar to apply tension. Make small, steady turns and check the chain fit frequently. The goal is a snug chain that does not sag but can still be moved by hand with light resistance.
Tip: Make micro-adjustments and test frequently to avoid overtightening. - 5
Check tension and alignment
With the chain under light tension, rotate the chain by hand to ensure it sits in the bar groove and around the drive sprocket evenly. If there is binding, loosen a touch and recheck.
Tip: If your model uses a side plate, ensure the plate seats evenly. - 6
Tighten the bar nuts and re-check
Reinstall and snug the bar nuts in a cross pattern to evenly seat the bar. Then re-check the tension by rotating the chain and performing a brief idle test. If the chain settles or loosens, repeat adjustments.
Tip: Avoid overtightening; over-tensioning can strain bearings.
FAQ
What happens if the chain is too loose?
A loose chain can derail or come off the bar during cutting, increasing the risk of injury. It also wears the drive sprocket and bar groove more quickly. Always recheck tension after any adjustment.
A loose chain can derail and injure you; ensure proper tension after adjustments.
What happens if the chain is too tight?
An overly tight chain creates excess friction, reduces efficiency, and can damage the bar or bearings. If you feel resistance binding or heat, loosen slightly and recheck.
Too tight can cause damage; back off a touch and recheck.
Do I need to remove the side cover to adjust tension?
Most adjustments require removing or loosening the side plate to access the tensioning mechanism. Some models offer an integrated tensioner, but always consult the manual for your specific saw.
Often you access tension via the side cover; check your manual for your model.
Can I adjust tension on both gas and electric chainsaws the same way?
The general method is similar, but the fasteners and plates may differ by model. Always follow your model's manual and use the correct tools.
The approach is similar, but check your model for tool type and torque specs.
How often should I recheck tension during cutting?
Recheck tension after the first few cuts, and again if you hear binding, notice chain wobble, or the bar heats up. Regular inspections help prevent accidents.
Recheck after initial cuts and any signs of issue.
Watch Video
The Essentials
- Secure the saw before touching the chain
- Aim for a snug yet movable chain
- Follow model specific guidance in your manual
- Test tension after startup and during first cuts
- Maintain a clean, safe work space