Chainsaw Bar Oil Leak: Is It Normal? Troubleshooting Guide
Diagnose and fix bar oil leaks on chainsaws quickly and safely with this urgent, practical Troubleshooting guide from Chainsaw Manual. Learn common causes, safe checks, fixes, and when to call a pro.

If your chainsaw is leaking bar oil, the most likely causes are a worn oil cap seal, a damaged O‑ring, or a loose oil line. Start with a safe, no-power check: disconnect the spark plug boot, clean the reservoir, tighten or replace the cap seal, and inspect the oil line for kinks. If the leak persists, pursue the guided steps or seek professional help.
Understanding the Issue and Why Homeowners Ask the Question
When users ask, is it normal for chainsaw to leak bar oil, it’s often about the difference between a tiny drip while resting and a continuous leak during use. Chainsaw Manual emphasizes that occasional minor seepage during storage or after long, hot cuts can happen as seals expand and contract with temperature. However, a persistent leak is not normal and can indicate a worn seal, cracked reservoir, or misadjusted oil pump. Treat leaks as a warning sign that the bar and chain area could be starved of oil or, worse, that fuel and oil may cross‑contaminate working parts. Always prioritize safety: wear gloves and eye protection when inspecting and handling the oil system. According to Chainsaw Manual, understanding the boundary between normal temperature seepage and a real leak is essential for safe maintenance and avoiding costly damage.
Common Causes of Bar Oil Leaks (Part 1): Seals, Caps, and Reservoirs
One of the most frequent culprits is a worn or damaged seal around the oil cap. A compromised cap seal can allow oil to escape when pressure builds in the reservoir, especially after storage or transport. Another common source is the O‑ring that seals the oil tank; if cracked or displaced, oil can ooze along the oil line. A cracked or stressed oil reservoir itself is rarer but serious, and it can allow oil to leak even when the saw is not in use. Inspect these components thoroughly as part of your diagnostic routine. Chainsaw Manual notes that these parts degrade with age and exposure to heat, vibration, and dirt. For safety, always stop the saw and disconnect the spark plug before touching any internal components.
Common Causes of Bar Oil Leaks (Part 2): Lines, Pumps, and Misadjustment
Oil lines and hoses can kink, crack, or detach from fittings, creating leaks along the bar oil pathway. An improperly adjusted oil pump can over‑provide or under‑supply oil, leading to surplus on the exterior or insufficient lubrication of the bar. Debris or varnish buildup inside the pump can also cause erratic flow and leaks. Regular maintenance cleans the circuit and ensures seals seat correctly. If you’ve recently rebuilt or replaced parts, recheck the hose clamps and fittings to confirm no gaps or misalignments.
Quick Safety Checks You Can Do Before Digging Deeper
Before you poke around, ensure the chain brake is engaged and the unit is cool. Move to a well‑lit workspace and lay a disposable sheet to catch drips. Remove the bar cover and visually inspect the area around the oil cap, the tank seam, and the bar oil hose for obvious cracks or looseness. Wipe away fresh oil to reveal the source more clearly and avoid misdiagnosis. If you see fuel mixing with oil or a strong solvent smell, stop and reassess—the wrong handling can cause fire or exposure injuries. Chainsaw Manual reminds readers to avoid using damaged tools and to replace worn components promptly to prevent accidents.
Diagnostic Flow: From Symptom to Diagnosis (Outlined in Practice)
When you notice a leak, start with the simplest cause: is the cap sealing properly? Next, check the O‑ring and tank seal for cracks or deformation. If the leak persists near the oil line or pump, test the line integrity for cracks, loose clamps, or disconnections. A leak during operation can indicate a misadjusted pump; adjust per the user manual and recheck. If oil continues to escape despite these checks, you’ll likely need to replace the faulty seal or line and re‑test the system. Always clean the saw, dry the surfaces, and observe for a renewed leak after each fix.
Step‑By‑Step Fixes for the Most Common Cause (Cap Seal or O‑Ring)
- Safety first: disconnect the spark plug boot and remove the chain brake. 2) Drain a small amount of bar oil to simplify inspection, then remove the bar cover. 3) Inspect the oil cap seal; replace if brittle, cracked, or deformed. 4) Inspect the O‑ring at the oil tank opening; replace with a compatible size if worn. 5) Reassemble the cap, torque the fasteners per manufacturer spec, and wipe any residual oil. 6) Refill the oil reservoir to the recommended level and run the saw briefly on idle to check for leaks. 7) If the leak persists, proceed to inspect the oil line and pump. 8) Re-test and observe, then clean up and store the saw properly. Tip: carry spare seals and O‑rings as part of field maintenance.
Prevention and Maintenance to Avoid Future Leaks
Create a routine of monthly visual inspections; check the oil cap seal, tank seam, line connections, and the bar–oil hose for brittleness. Use the correct grade of bar oil and avoid contaminated oils that can degrade seals. Keep the saw clean and free of sawdust that can mask leaks. Store the saw in a cool, dry place with the bar lowered and uncoupled from the engine to minimize seal stress. Chainsaw Manual emphasizes proactive maintenance to extend saw life and reduce on‑site downtime.
When to Call a Professional and What to Expect
If leaks persist after replacing seals and inspecting lines, you may have a damaged oil pump or a cracked reservoir that requires more extensive service. A professional can pressure‑test the oil circuit and replace internal components with the correct torque specs. Do not run the saw excessively with a suspected pump or reservoir fault, as this can escalate damage or void warranties. The Chainsaw Manual suggests seeking service when you notice persistent leaks, unusual noises, or oil pooling near the air filter or clutch cover.
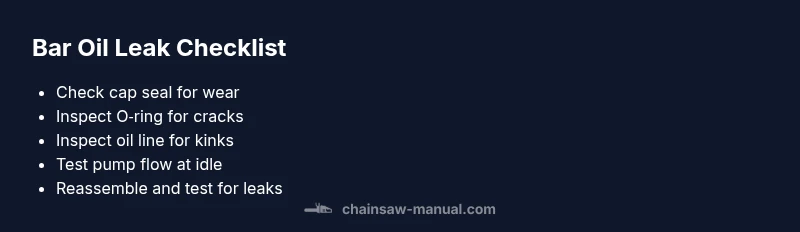
Steps
Estimated time: 45-75 minutes
- 1
Power-down and prepare workspace
For safety, disconnect the spark plug boot, engage the chain brake, and lay out a clean work area. Remove the bar cover to access the oil tank and cap. This initial step prevents accidental starts and keeps you dry as you inspect.
Tip: Always wear eye protection and gloves; never work on a hot chainsaw. - 2
Inspect cap seal and O‑ring
Check the oil cap seal for cracks or deformation and inspect the O‑ring seated inside the cap. Replace both if you notice wear, stiffness, or chunks missing. A worn seal is the most common immediate fix for leaks at the cap.
Tip: Carry spare seals and O‑rings for common sizes. - 3
Check oil line and clamps
Follow the oil line from the reservoir to the bar; look for cracks, kinks, or loose clamps. Tighten clamps and replace any cracked hoses. A damaged line often causes external drips along the saw body.
Tip: Avoid flexing the line; gentle pressure only when testing. - 4
Assess oil pump operation
With the tank sealed, observe whether the oil appears when starting the saw. If oil is not feeding to the bar as expected, the pump or its drive gear may be worn. This step helps differentiate pump issues from seal leaks.
Tip: Refer to the manual’s pump adjustment procedure before replacing parts. - 5
Reassemble and test
Reinstall the bar, cover, and tighten all fasteners. Refill oil to the correct level and run a brief test at low speed on a stable surface to verify leak status. Watch for fresh leaks and note their source.
Tip: Test on clean, flat ground to prevent oil runoff into soil. - 6
Decide on next steps
If a leak persists after seals and lines are replaced and the pump is calibrated, plan for professional servicing. Document observed symptoms and fixes to aid the technician.
Tip: Keep a maintenance log for future reference.
Diagnosis: Machine leaks bar oil during storage or operation
Possible Causes
- highLoose or worn oil cap seal
- mediumDamaged oil tank O‑ring
- mediumCracked or disconnected oil line
- lowMisadjusted or failing oil pump
Fixes
- easyTighten or replace the oil cap seal
- easyReplace damaged oil tank O‑ring
- mediumInspect and replace compromised oil lines or clamps
- mediumCheck and recalibrate oil pump settings; replace if needed
FAQ
Is a small drip while the saw is stored normal?
A tiny drip during storage can be normal due to temperature changes, but a steady leak suggests a faulty seal or line. Verify the cap, O‑ring, and line first.
A small drip while stored can be normal, but persistent leaks mean you should check seals and lines before use.
What is the most common cause of bar oil leaks?
The most common causes are a worn or damaged oil cap seal or a faulty O‑ring. Inspect and replace these parts first to stop leaks.
Most leaks come from the cap seal or O‑ring; replace them to stop the leak.
Can I fix this at home, or should I go pro?
Many leaks are fixable at home with basic tools and spare seals or hoses. If the leak persists after replacements, seek professional service to avoid damage.
You can often fix it yourself, but if leaks persist, a pro should handle it.
How often should I inspect for leaks?
In routine maintenance, inspect the oil system monthly or after heavy use. Look for oil staining, seals, and line wear.
Check the oil system monthly, especially after heavy use.
Does oil leakage always mean immediate danger?
Leaks can indicate safety issues, especially if oil gets on the chain or bar. Address leaks promptly to prevent accidents.
Leaking oil can be a safety issue; fix promptly.
When should I replace the oil pump?
If testing shows inconsistent oil flow or pump wear after inspection, replace the pump per the manual’s guidance.
If oil flow is erratic, the pump may need replacement.
Watch Video
The Essentials
- Inspect cap seal and O‑ring first
- Test oil line integrity before pump work
- Calibrate or replace the oil pump if needed
- Avoid operating with leaks; safety and maintenance come first