How to Tell if Your Chainsaw Bar is Bent: A Practical Guide
Learn safe, practical steps to determine whether your chainsaw bar is bent, how to measure runout, and when to replace or repair for optimal performance.

You can tell if a chainsaw bar is bent by checking alignment with the guide bar eye and sprocket, looking for warp when the chain moves, and measuring side-to-side runout. Start with a straight edge or ruler, and compare both ends of the bar against the nose and adjust if needed. If misalignment exceeds a small tolerance, the bar is bent.
Why a Bent Chainsaw Bar Demands Attention
For anyone who uses a chainsaw, a bent bar is more than a cosmetic flaw. A bent bar can cause poor chain tracking, increased vibration, uneven cutting, and accelerated wear on the chain and sprocket. If you want to know how to tell if chainsaw bar is bent, start with a careful inspection before you resume work. A bent bar can lead to kickback and snag hazards, which increases risk to the operator. In this guide, we differentiate between a slight bend that can be corrected and a more serious bend that requires replacement. According to Chainsaw Manual analysis, even minor warp can alter tension and guide bar alignment, making accurate measurements essential for safe operation. Remember: safety gear, lockout procedures, and a calm work environment are part of the process.
Symptoms That Indicate a Bend
- Uneven bar wear on the upper and lower rails, especially near the nose.
- The chain does not track evenly and tends to ride high or push inward on one side.
- Increased vibration or a chattering feel when cutting, especially with lighter woods.
- The bar nose looks visibly bent or tucked inward when viewed from the front.
- Tension appears inconsistent across the drive sprocket and bar tip during operation. These symptoms, taken together, suggest a bend. If only one symptom is present, recheck with precise measurements before deciding on replacement. Chainsaw Manual’s experience shows that early detection prevents downstream damage to the chain and powerhead.
Safe Visual Checks You Can Do
- Power off the saw, engage the chain brake, and allow the bar to cool if it has been in use.
- Remove the chain following the tool’s safety procedure to isolate the bar for inspection.
- Lay a straightedge along the bar and compare both ends to the center and the nose for obvious warp.
- Look for gaps or light visible between the straightedge and the bar rails when viewed from the side.
- Check the chain oiling holes and the bar groove for uneven wear that might accompany bending. These checks are non-destructive and reduce the risk of injury while you assess the situation. If you detect any warp beyond easy correction, plan the next steps with caution.
How to Measure Runout and Alignment
- Start with a clean, dry bar. Place a straightedge along the flat surface of the bar.
- Use a feeler gauge or caliper to quantify any side-to-side runout at the nose, mid-bar, and near the mounting holes.
- Compare measurements from opposite ends of the bar. A small, manufacturer-specific tolerance is typical; if you notice a noticeable deviation, the bar may be bent.
- Check alignment against the drive sprocket: the bar should sit parallel to the chain’s path and ride smoothly in the groove.
- If runout is present, recheck after loosening and retightening the bar nuts to ensure the issue isn’t a mounting misfit. Accurate measurement reduces guesswork and guides the decision to straighten, replace, or service the bar. These steps reflect best practices from Chainsaw Manual’s approach to safe, precise inspection.
Common Causes of Bent Bars
Bars bend primarily from impact or improper mounting. Drops, hitting hard debris, or striking a rock while cutting can create localized warp near the nose or along the rails. Heavy use, especially under load, can also fatigue the bar and cause creeping bend over time. In some cases, an over-tightened chain can pull the bar against the nose, causing subtle warp that worsens with continued use. Understanding these causes helps you prevent future bends by enforcing proper technique, mounting, and routine maintenance. Chainsaw Manual notes that preventive checks after every hard cut can catch early signs of bending before performance degrades.
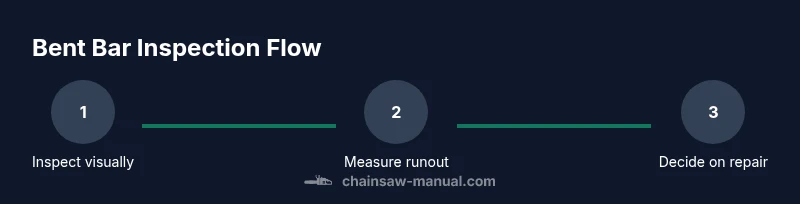
Step-by-Step: Inspecting and Correcting (or Replacing) the Bar
- Prepare the saw for inspection: power off, engage the chain brake, and remove the spark plug boot for safety; keep the chain and bar clean. The goal is to create a stable inspection environment. Tip: Work on a non-slip surface and use a clamp if available.
- Remove the chain and guide bar cover; place the bar on a flat, level surface to view from the front and sides. Tip: Use gloves to protect your hands from sharp edges.
- Visually inspect for obvious bends at the nose and mid-bar; compare both sides to a straightedge. Tip: Mark suspected areas with chalk for rechecking after adjustments.
- Measure runout with a straightedge and feeler gauge at multiple points; document any deviation beyond the bar’s tolerance. Tip: Recheck after adjusting mounting bolts to rule out misalignment.
- If a bend is confirmed, evaluate repair options: straightening may be possible if warp is light, while heavy bending generally requires replacement. Tip: A bent bar can reduce cutting efficiency and increase risk, so plan replacement if in doubt.
- Reassemble carefully: reinstall the bar and chain, verify tension, and perform a light test cut in a safe, controlled environment. Tip: Monitor for unusual vibration or tracking changes during the test cut. Estimated total time: 60-90 minutes.
When to Seek Professional Service
If the bend is severe, or if straightening would require specialized equipment, it’s safer to replace the bar rather than attempt a DIY fix. A professional service can verify structural integrity and recommend compatible bars and bars with the correct nose design for your saw. Safety is paramount; don’t cut with a suspected bent bar just to save time or money. Chainsaw Manual recommends consulting a qualified technician when in doubt to avoid kickback risks and engine damage.
Maintenance to Prevent Bar Bends
- Inspect the bar after each tough cut or impact incident and again after storing the saw; capture early signs of warp.
- Store the saw with the bar supported and the chain cover in place to prevent accidental bending during transport.
- Use proper technique: avoid striking hard objects with the bar tip and maintain proper chain tension to reduce stress on the bar.
- Clean the bar groove and oiling holes regularly to prevent debris buildup that can skew alignment readings.
- Replace bars showing signs of fatigue, excessive wear, or repeated warping, rather than attempting repeated straightening. Following these practices reduces the likelihood of bends and extends bar life, saving downtime and maintenance costs in the long run.
Final Verification After Reassembly
Before resuming work, perform a final verification: re-check runout, alignment, and track with a test cut on a controlled material. If any symptoms persist—excess vibration, poor chain tracking, or unusual noise—revisit the inspection steps or consider replacing the bar. This final check ensures the saw operates safely and efficiently. Chainsaw Manual emphasizes that consistent follow-up checks promote safer cuts and longer bar life.
Tools & Materials
- Straightedge or metal ruler(Long enough to span the bar; helps verify straightness)
- Caliper or runout gauge(For precise side-to-side measurements)
- Chalk or marking pencil(Mark suspected warp areas for recheck)
- Torque wrench or hex wrenches (Allen keys)(To loosen/tighten bar mounting bolts safely)
- Gloves(Protect hands from sharp edges)
- Safety glasses(Eye protection during inspection and testing)
- Clamps or a stable work surface(Keep the bar steady during checks)
- Replacement bar (optional)(If bend is severe, replacement is safer)
Steps
Estimated time: 60-90 minutes
- 1
Power off and secure the saw
Turn off the engine, engage the chain brake, and remove the spark plug boot if needed. Ensure the bar cannot move during inspection. A stable setup prevents accidental starts and injuries.
Tip: Double-check that the chain brake is engaged before touching the bar. - 2
Remove the chain and cover
Loosen the bar nuts and slide off the chain and cover. This exposes the bar rail and groove for accurate inspection.
Tip: Work slowly to avoid injuring yourself on sharp chain links. - 3
Visual inspection with straightedge
Place a straightedge along the bar surface and look for gaps or warping at the nose and rails. Mark any suspect areas with chalk.
Tip: Compare both sides of the bar to identify true warps rather than perspective distortion. - 4
Measure runout at multiple points
Using calipers or a runout gauge, measure side-to-side deviation at the nose, mid-bar, and near the mounting holes. Compare results to the manufacturer tolerance.
Tip: Document measurements for future reference and to track progression over time. - 5
Decide on repair vs. replacement
If deviation is small and localized, it may be correctable; larger warps typically require replacement to maintain safety and efficiency.
Tip: Avoid attempting major straightening with improvised tools. - 6
Reassemble and verify
Reinstall the bar and chain, re-tension, and perform a controlled test cut on clean, safe material. Observe tracking and vibration closely.
Tip: If anything feels off, stop and re-check instead of pushing through a test cut.
FAQ
What is considered a bend in a chainsaw bar?
A bend is a warp in the bar's straight plane that causes misalignment with the chain and guide groove. Even small warps can affect tracking and increase kickback risk, so you should verify using measured runout and straightedge checks.
A bend is a warp in the bar that can mess with tracking and safety; use runout checks to confirm.
Can a bent bar be straightened?
Light warps may be corrected with careful straightening and re-tightening of mounting hardware, but many bars are designed to be replaced once bent. Do not apply heavy bending forces yourself.
Light bends might be fixable, but if in doubt, replace the bar for safety.
How often should I inspect the bar for bends?
Inspect the bar after any heavy impact, after a difficult cut, or before every major project. Regular checks help catch warp early and prevent unsafe cuts.
Check the bar after hard cuts and before big jobs.
Is a bent bar dangerous to use?
Yes. A bent bar can cause unpredictable cutting behavior and kickback, increasing the chance of injury. Replace or repair following manufacturer guidance.
Yes—don’t use a bent bar; replace or service it first.
What tools are best for checking bent bars?
A straightedge for visual checks and a caliper or runout gauge for precise measurement are the most reliable tools. Ensure you follow proper safety procedures.
Use a straightedge and a ruler or gauge for precise checks.
Should I replace the bar if it was bent once?
If the bar has bent once, evaluate the degree of warp and any accompanying wear. Replacing with a new bar is often the safest choice to ensure optimal performance.
Consider replacement if warp and wear are significant.
Watch Video
The Essentials
- Inspect with the saw powered off and secure.
- Use straightedge and runout gauge for accuracy.
- Small bends may be repairable; severe bends require replacement.
- Prevent bends with proper technique and maintenance.