When to Replace Chainsaw Bar: Signs and Replacement Steps
Learn how to tell when to replace your chainsaw bar, inspect wear indicators, and follow safe replacement steps. A practical guide for homeowners and professionals from Chainsaw Manual.

Definition: This guide defines when to replace a chainsaw bar and outlines the main wear indicators and safety considerations. You will learn to assess groove wear, bar straightness, warping, and tracking issues, plus how to compare bar life against typical usage. By the end, you’ll know when to replace the bar or schedule preventive maintenance.
What qualifies as a replacement: defining the issue
When to replace chainsaw bar? This question guides safe and efficient work. In practice, a bar should be considered for replacement when wear or damage compromises cutting performance, increases the risk of kickback, or threatens the bar’s structural integrity. According to Chainsaw Manual, you should replace the bar when wear or damage creates safety risk and reduces control. Look for significant groove wear that narrows the groove, a bar that is bent, twisted, or cracked, and nose or weld damage that affects tracking. If you notice increased chain derailment, frequent snatching, or excessive heat during use, these are strong indicators to inspect the bar closely and consider replacement. Remember that a new bar can improve fuel efficiency, reduce chain wear, and restore smooth cutting. This section defines the threshold events and sets expectations so you can decide quickly rather than reactively. The aim is to keep you safe and productive while maintaining the saw’s performance across tasks such as pruning, storm cleanup, or firewood preparation.
Wear indicators you cannot ignore
Wear shows up in several forms, and recognizing them early saves time and money. Key indicators include groove wear that creates burrs or sharp edges inside the groove, bars that no longer sit flat or track straight, and a nose that has become rounded or mushroomed. A bar that has developed cracks in the neck or rail, or has a twisted or bent body, is a clear signal to stop using it and replace it. Uneven bar wear can cause the chain to climb, dig, or bind, increasing the risk of kickback. Heat discoloration on the bar or excessive bar oil consumption can also point to internal wear. If you regularly replace your chain but still experience poor tracking, the bar may be the culprit. These signs should be assessed alongside overall saw condition and the work you do most often.
When to replace vs. repair: evaluating risk
This section discusses whether replacement is required or if repair is feasible. Routine maintenance like cleaning grooves and straightening minor bends might extend life, but persistent wear compromises performance. If the groove edge is uneven, the bar shows significant bending, or the bar surface has cracks, replacement is prudent. Safety considerations drive this decision: a worn bar can cause uneven chain tension, derailment, or kickback during cuts. For homeowners doing occasional yard work, replacing a worn bar is often more economical than chasing frequent problems, while professionals may prefer timely replacement to avoid downtime. The Chainsaw Manual recommends evaluating both the cost of downtime and the risk of a failed cut when deciding whether to replace now or later. In any case, ensure you replace with an appropriate model and verify proper fit and lubrication before returning to work.
How to inspect groove wear and bar straightness
To assess when to replace chainsaw bar, start with a careful physical check. Remove the chain and lay the bar on a flat surface to confirm it sits flat along its length. Look for bend or twist by sight along the straight edge of the bar; if you notice the bar wobbles or the groove edges are uneven, replacement is likely needed. Next, inspect the groove itself for deep grooves or rounded, scalloped edges—these reduce the groove’s ability to guide the chain. Check for cracks or heat discoloration along the bar rail, and inspect the nose for mushrooming. Finally, compare the bar’s wear against the chain’s drive links; a mismatch can indicate the bar life has reached its limit. Document any observed damage and plan a replacement if multiple indicators appear.
Replacement timing and decision thresholds
Deciding when to replace a bar often comes down to a combination of wear signs, safety, and efficiency. If the bar shows persistent tracking problems after alignment attempts, or if repairing the bar would require extensive material work, replacement is the prudent choice. This is especially true when working in environments with dirty wood, sand, or grit that accelerates wear. Always verify you have a compatible replacement bar that matches chain pitch, gauge, and drive link count. A well-timed bar replacement minimizes downtime and reduces the likelihood of chain damage or kickback during demanding tasks like storm cleanup or heavy pruning.
How to replace the bar: preparation and setup
Preparation starts with safety: power down the saw, disconnect the spark plug or remove the battery, and engage the chain brake. On a stable surface, remove the chain and old bar, then inspect the sprocket and guide groove for wear. Install the new bar, re-thread the chain, tension it within the manufacturer’s spec, and lubricate the bar and chain with fresh bar oil. Spin the bar by hand to verify smooth rotation and proper tracking before making a test cut on scrap wood. If anything binds or tracks poorly, stop and re-check alignment. This block outlines the core steps you’ll perform in the step-by-step section to ensure a proper, safe replacement.
Maintenance to extend bar life between replacements
To maximize bar life, clean the groove and oil passages after use, flip the bar sides regularly to promote even wear, and keep the oiling system free of debris. Use fresh bar oil and avoid using dirty or recycled oil. Regularly inspect the bar’s wear gauge and replace the bar when the groove edges or rail show signs of significant wear or damage. Proper storage and routine maintenance reduce downtime and extend the life of both bar and chain. By treating the bar as a critical wear item, you maintain cutting efficiency and safety across jobs.
How to choose the replacement bar: size, type, and compatibility
Choosing the correct bar depends on model compatibility, chain pitch, rail gauge, and length. Match the bar length to your typical cutting tasks and ensure the bar’s drive links align with the chain. The groove shape and nose design should suit the style of work you do, whether pruning, felling, or cleanup. Always verify model-specific mounting hardware and screw patterns. When in doubt, consult the saw’s manual or the manufacturer’s support resources to confirm bar type and length before purchase.
What happens after replacement: testing and break-in
After installation, test the setup on a small, controlled piece of wood. Check for smooth cutting, stable tracking, and consistent oil flow. Listen for unusual sounds that indicate misalignment, and re-check chain tension after a few minutes of operation. The break-in period is short but important: gradually increase the workload while monitoring performance and safety cues. If everything runs cleanly, you can return to regular use with improved efficiency and safer operation.
Tools & Materials
- Replacement chainsaw bar(Ensure correct length and mounting type for your saw model)
- Replacement drive chain (optional)(Only replace chain if it shows wear or you’re performing a bar replacement)
- Scrench / hex wrench set(Use correct tools for bar screws)
- Bar oil(Refill before reassembly; use fresh, appropriate oil)
- Bar cleaning brush or rag(Remove debris from groove, oil passages)
- Go/No-Go bar gauge (optional)(For assessing groove wear precisely)
- Personal protective equipment (PPE)(Safety glasses, gloves, hearing protection)
Steps
Estimated time: 60-90 minutes
- 1
Power down and prepare
Turn off the saw, disconnect the spark plug or remove the battery, and engage the chain brake. Move the unit to a stable, well-lit work area and gather your replacement bar and tools. This minimizes risk and ensures you won't be interrupted during the swap.
Tip: Double-check that the saw cannot start and secure the bar area to prevent movement. - 2
Remove the chain and old bar
Loosen the bar nuts and release chain tension. Remove the chain from the bar and slide the old bar away from the saw. Keep track of any spacers or washers for correct reassembly.
Tip: Take a photo of how the chain sits on the bar for reference when installing the new bar. - 3
Inspect the bar and drive sprocket
With the bar off, inspect the groove rails, drive sprocket area, and bar nose for wear, cracks, or mushrooming. Clean the groove and passageways so debris doesn’t contaminate the new bar.
Tip: If the sprocket shows wear, inspect both bar and sprocket together to decide if replacement is needed. - 4
Install the new bar and re-route chain
Place the new bar into position, guide the chain around the drive sprocket, and engage the bar rails. Re-tighten the bar nuts loosely to allow leveling before final tensioning.
Tip: Do not overtighten the bar nuts; you’ll tension the chain after spinning the bar. - 5
Tension and align the chain
Tension the chain to the manufacturer’s specification and check alignment by rotating the bar by hand. Ensure the chain sits smoothly in the groove and tracks evenly along the bar.
Tip: A properly tensioned chain should have a slight lift at the midpoint when pulled. - 6
Oil, test run, and adjust
Fill the bar oil reservoir and run the saw briefly to verify oiling and tracking. Make any minor tension or alignment adjustments as needed after the initial test cut.
Tip: Watch for consistent oil spray; inconsistent flow may indicate a blocked oil passage. - 7
Final inspection and cleanup
Re-check all fasteners, test on scrap wood, and clean the work area. Record replacement date and bar model in your maintenance log for future reference.
Tip: Note any unusual sounds or vibration; address them before heavy use.
FAQ
How can I tell if my bar is worn out?
Look for deep groove wear, bent or warped bars, nose mushrooming, cracks, and poor chain tracking. If multiple indicators appear, replacement is advisable.
Check for groove wear, bending, cracking, and poor tracking. If several indicators are present, consider replacing the bar.
Can I cut with a damaged bar?
No. A damaged bar can cause dangerous kickback or chain derailment. Stop using the saw and replace the bar as soon as possible.
No—do not cut with a damaged bar. Replace it to stay safe.
Is replacing the bar easier than replacing the chain?
Bar replacement is a straightforward process when you have the right bar and tools. If the chain is dull or damaged, consider replacing both to restore optimal performance.
Replacing the bar is straightforward if you have the right tools; replace the chain if it’s worn too.
How often should I replace the bar?
There’s no fixed interval. Replace when wear or damage affects performance or safety, or when regular maintenance can no longer restore proper operation.
There isn’t a set timeline; replace when wear or damage affect safety or performance.
What safety gear should I wear during replacement?
Wear eye protection, gloves, and hearing protection. Use a stable work surface and secure the saw to prevent accidental starts.
Wear eye protection, gloves, and hearing protection during the replacement.
Do I need to replace the chain at the same time as the bar?
Not always. Inspect the chain for dullness or damage. Replace it if necessary for safe operation, otherwise you can replace the bar alone if the chain is still usable.
Not always; inspect the chain and replace only if needed.
Watch Video
The Essentials
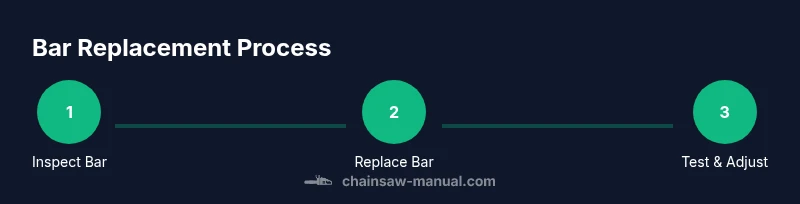
- Inspect for wear and damage before replacing.
- Replace the bar when groove wear or warping compromises safety.
- Follow a safe, step-by-step replacement process.
- Ensure bar compatibility and proper lubrication after replacement.