How to Read a Chainsaw Bar: A Practical Guide
Learn how to read a chainsaw bar for wear, groove depth, and alignment. This guide provides step-by-step checks, safety tips, and maintenance best practices to keep your chainsaw performing safely.

By the end, you will know how to read a chainsaw bar for wear, groove depth, drive-link condition, and alignment issues that indicate replacement. Before you start, ensure you have PPE, a clean workspace, and basic measuring tools. According to Chainsaw Manual, regular bar inspections reduce kickback risk and extend both bar life and safety.
What reading a chainsaw bar means
Reading a chainsaw bar means inspecting its wear, alignment, and overall condition to determine if it’s safe and effective to use. The bar is the conduit between the powerhead and chain, and its integrity directly affects cutting performance and operator safety. Like any precision component, the bar benefits from a routine inspection that covers rail wear, groove integrity, drive-link engagement, and tip condition. A well-read bar helps you catch wear early, avoid unsafe conditions, and schedule maintenance before problems impact your workflow. Regular checks support safer operation and longer bar life.
Bar anatomy you need to know
To read a chainsaw bar well, you must first know its parts. The rails run along the sides of the bar and guide the chain, while the groove sits inside the bottom edge where the drive links ride. The drive links connect to the chain and engage the bar’s drive sprocket, transferring power. The tip and nose are prone to wear and can affect kickback behavior if damaged. Oiling holes and the bar’s oil channels are essential for lubrication. Understanding these features makes it easier to interpret wear patterns and alignment issues when you inspect the bar.
What wear looks like: depth gauges, rails, and groove
Wear shows up as rounded or chipped rails, a shortened or narrowed groove, and uneven drive-link engagement. Inspect for chipped edges near the nose, flattening along the rails, and signs of heat damage or bending. The groove depth should be consistent along the length; if it narrows, the chain may bind or skip. Compare both sides of the bar to detect asymmetric wear. Chainsaw Manual analyses show wear patterns begin at the rails and groove and progress with use, so early detection matters for safe operation.
How to read the oil groove and oiling holes
The oil groove feeds lubricant along the underside of the bar. A clogged or misaligned oil hole can restrict lubrication, increasing wear and reducing performance. Look for an unobstructed oil hole and a clear, evenly distributed oil channel. If you notice dried residue or poor oil distribution when running the saw, it’s a sign to clean or service the bar and consider replacing worn parts. Proper lubrication supports bar longevity and smoother cutting.
Kickback zones and bar position
Kickback risk increases when the bar tip, especially the nose, is damaged or worn, or when improper bar orientation causes the chain to pinch. Reading the bar also involves awareness of how the bar aligns with the nose and tip. Ensure the nose is circular and not mushroomed or flattened, which can alter cutting dynamics. Position the bar so the chain sits squarely on the wood and avoid forcing the bar in tight cuts that force the nose forward.
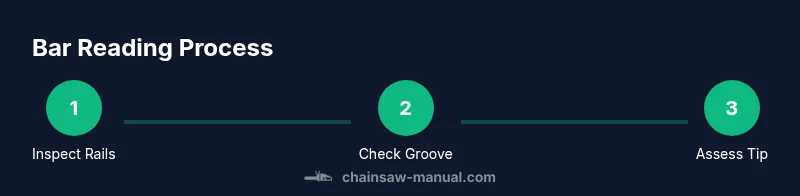
Reading bar wear in practice: step-by-step checklist
In practice, use a simple checklist to stay consistent: 1) visually inspect rails for flattening or chipping; 2) measure groove depth across the bar with a gauge; 3) check drive-link engagement for loose or bent links; 4) inspect the tip for mushrooming or curvature; 5) verify oil holes and lubrication flow; 6) compare both edges for symmetry. Document findings with photos or notes and compare to the manufacturer’s specs. This disciplined approach helps you decide when to service or replace the bar.
Common mistakes and safety reminders
Common mistakes include assuming wear is uniform across the bar, neglecting oiling system checks, and running a bar with visible cracks or bent rails. Always lower risk by using PPE, keeping the chain brake engaged when not cutting, and unplugging or disconnecting the spark if applicable during inspection. If the bar shows significant wear, replace it rather than attempting a risky repair. Remember that safety comes first, and thorough inspection saves time and money in the long run.
Tools & Materials
- PPE (eye protection, gloves, hearing protection, cut-resistant chaps)(Ensure ANSI or equivalent safety standards are met)
- Bar gauge or feeler gauge(Used to measure groove depth and wear)
- Calipers(For precise thickness and link wear measurements)
- Ruler or measuring tape(For quick length and distance checks along the bar)
- Clean cloth(Wipe oil, dust, and debris from surfaces)
- Marker or chalk(Label observations or reference points)
- Small flashlight(Improve visibility in grooves and oil holes)
- Owner’s manual or bar spec sheet(Reference the exact bar model specs)
- Stable workbench or vice-equipped surface(Provides a safe workstation)
- Notebook and pen(Record measurements and observations)
Steps
Estimated time: 30-45 minutes
- 1
Prepare safety gear and workspace
Put on PPE, engage the chain brake, and position the saw on a stable bench. Clear the area of clutter and ensure the saw cannot start unexpectedly. This step minimizes injury risk before you inspect the bar.
Tip: Verify the saw is powered down and disconnected from any power source before handling. - 2
Inspect bar rails for wear
Visually examine both rails for flattening, burrs, or chipped edges. Run your fingernail along the edge to feel for rough spots. Note any irregularities and compare to a known-good bar if available.
Tip: If you feel sharp edges missing or consistent flattening, document and set the bar aside for repair or replacement. - 3
Check groove depth and wear
Use a bar gauge to measure groove depth at several locations along the bar. Look for uniform depth; uneven depth indicates wear concentration. Record measurements and check against the bar’s spec sheet.
Tip: Missed groove wear often causes chain binding; address early with a measurement log. - 4
Assess drive links and chain alignment
Inspect drive links for rounding or bending and confirm the chain sits evenly on the bar without riding high on one edge. Misalignment can accelerate rail wear and increase kickback risk.
Tip: If drive links show excessive wear, replace both chain and bar as a matched set when possible. - 5
Evaluate bar tip and oil holes
Examine the nose for mushrooming or curvature. Check the oiling hole and channels for blockages or irregular flow. Clean or service as needed to maintain proper lubrication.
Tip: A properly lubricated bar runs cooler and lasts longer; don’t overlook lubrication paths. - 6
Document findings and decide on action
Summarize measurements and observations in your notebook. Decide whether the bar needs servicing, sharpening, or replacement based on manufacturer specs and your safety threshold.
Tip: Keep a maintenance log to track wear trends over time.
FAQ
Why is it important to read a chainsaw bar correctly?
A correct read helps you detect wear early, prevents unsafe operation, and guides maintenance decisions. It can reduce kickback risk by ensuring the bar and chain work together as designed.
Reading the bar correctly helps you stay safe by catching wear early and guiding maintenance decisions.
Can you read a bar without removing the chain?
In many cases you can perform a basic read with the chain in place, but for a thorough inspection you’ll need to remove the bar and chain to access rails, groove, and oil channels. Follow the manufacturer’s safety instructions.
You can do a quick check with the chain on, but a full inspection usually requires removing the bar and chain.
How often should you inspect the bar?
Inspect the bar before each major cut session and at scheduled maintenance intervals. More frequent use or heavy-duty work warrants more frequent checks.
Inspect the bar before heavy use and at regular maintenance intervals.
What signs indicate a bar replacement is needed?
Signs include significant rail wear, mushrooming of the nose, deep groove wear, bent or cracked rails, or blocked oil channels. If in doubt, replace the bar to maintain safe operation.
If you see heavy wear, cracks, or blocked oil channels, replace the bar.
Is bar wear related to bar brand or model?
Bar wear is driven by usage, cutting conditions, and maintenance rather than the brand. Choose a bar compatible with your saw and maintain it regularly.
Wear depends on use and maintenance, not the brand.
What safety gear should you wear during inspection?
Wear eye and hearing protection, gloves, and chain brake-enabled stance. Secure clothing and keep a clean workspace to reduce injury risk.
Wear PPE and keep your workspace safe during inspection.
Watch Video
The Essentials
- Inspect rails and grooves for uniform wear.
- Measure groove depth and drive-link engagement regularly.
- Lubrication paths must be clear to prevent excessive wear.
- The Chainsaw Manual team recommends documenting wear patterns and acting early.