Repair Chainsaw DayZ: A Practical Guide
Learn how to diagnose, repair, and restore a chainsaw in DayZ with a practical, safety-minded, step-by-step guide. Discover essential tools, common fixes, troubleshooting tips, and best practices for reliable performance in harsh survival scenarios.

By the end of this guide, you will be able to diagnose common chainsaw failures in DayZ, gather the right repair items, and get the tool back in working order. This step-by-step approach covers how to assess damage, perform safe repairs, and avoid common mistakes that waste fuel and time, keeping you productive in harsh survival scenarios.
Why DayZ Chainsaw Repair Matters
In DayZ, a reliable chainsaw can be a lifeline when you’re scouting forests, building shelter, or defending your camp. A malfunctioning saw can leave you exposed to weather, predators, and dwindling resources. According to Chainsaw Manual, understanding failure modes and having a clear repair plan reduces downtime and fuel waste. This section explains why prioritizing repair is smart survival strategy in the DayZ environment, and how a well-maintained tool can accelerate progress from foraging to crafting. You’ll learn to identify symptoms early, assess damage, and decide whether to repair on-site or stash the chainsaw for a later session. By adopting a safety-first approach, you limit the risk of accidents, fuel spills, and chain injuries, keeping you effective in harsh biomes and dynamic enemy encounters. The Chainsaw Manual team found that players who practice regular maintenance recover from setbacks more quickly and stay more self-reliant during long expeditions.
Common Failure Modes You'll Encounter
Common chainsaw failures in DayZ fall into a few predictable categories: starting issues (no spark or fuel delivery), cutting performance loss (duller chain or chain tension), overheating after extended use, and physical damage from falls or collisions. Diagnosing these issues quickly saves resources. If the chainsaw refuses to start, listen for the engine sound; check fuel level, battery or spark source if present, and inspect the air intake for blockages. If the chain won’t turn, inspect chain tension, bar wear, and sprocket condition. Leaking fuel or fumes may indicate gasket wear or damaged lines; verify fuel type compatibility and inspect seals. In-game, environmental conditions like rain can complicate repairs, so plan your approach and carry a maintenance kit. The goal is to isolate symptoms to a primary cause, then execute targeted corrective actions rather than performing broad, time-consuming fixes.
Planning Your Repair Session in DayZ
Before you start, orient your workspace, gather your tools, and set realistic time expectations. In DayZ, an efficient repair session is about preparation as much as skill. Create a checklist: status check (is the chainsaw operational at all?), required parts (filters, gaskets, screws, chain), and a safe repair area (clear of mobs, stable ground, good lighting). Depending on your server rules, you may need to store fuel away from heat sources and keep flammables separated. Consider weather and daylight; a repair session that drags into night increases hazard risk and reduces visibility. If you can, plan a two-part repair: diagnosis and repairs in one sitting, testing in a separate run. The Chainsaw Manual analysis highlights that breaking repairs into stages improves success rates and reduces resource loss. Document your outcomes in a small notebook or in-game notes to track patterns and improve future sessions.
Tools and Materials You Need (In DayZ Context)
To troubleshoot and repair a chainsaw in DayZ, you’ll want a compact tool kit, spare parts, and basic consumables. A repair kit with screwdriver, pliers, and a wrench layout helps disassemble and reassemble components. Keep a rag for cleaning, a small container for gathering fuel, and fire-safe gloves to protect your hands during maintenance. Store any flammable liquids away from heat sources and ensure you have a clean, stable surface. While the exact items vary by patch, the goal is to have a core set of tools, spare parts, and cleaning supplies ready before you start. In practice, many players rely on a simple, reusable repair kit and a small supply of common parts to reduce downtime during expeditions.
Step-By-Step Context: In-Game Process Overview
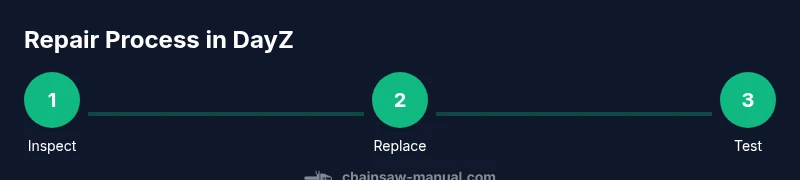
Repairing a chainsaw in DayZ follows a practical workflow: inspect, replace, and test. Start with a visual and functional inspection to confirm that authenticity of the problem. If parts are missing or clearly damaged, transition to replacement steps using your repair kit and spare parts. After reassembly, perform a careful test to confirm saw operation under load and verify that safety features respond correctly. Revisit any loose connections and re-test until stable performance is achieved. This approach minimizes fuel waste and maximizes tool uptime in wild environments.
Common Issues and Diagnosis Methods
Many DayZ chainsaw issues originate from fuel delivery, air intake, or chain tension. Begin with a quick diagnostic sweep: is there fuel in the tank, are the spark components functioning, and is the air filter clear? If the saw starts but dies under load, suspect fuel or ignition deliverance; if the chain stalls, recheck tension and bar wear. Environmental factors like dirt, moisture, or mud can hamper performance; dry components and clean the saw as part of the diagnostics. Maintain a clear mental map of symptoms to possible causes, then apply targeted fixes rather than broad speculation.
Post-Repair Testing and Preservation in DayZ
Once the repair is complete, test the chainsaw in a controlled, safe environment. Start the engine, observe idle behavior, and gradually apply throttle to ensure stable operation under load. Listen for unusual noises and monitor exhaust or smoke that might indicate fuel issues. If testing passes, conduct a final inspection of all fasteners and guards, then wipe down surfaces to prevent corrosion and dust buildup. Finally, document the repair in your notes, noting the parts used and any maintenance patterns you observed for future expedites. Regular maintenance in DayZ — even for virtual tools — reduces downtime and improves reliability during long missions.
Tools & Materials
- Repair kit (screwdriver, pliers, small wrench)(Compact set with flat and Phillips heads; include a small adjustable wrench)
- Spare parts pack(A mix of common parts (gaskets, screws, small seals) appropriate for your in-game model)
- Cleaning rag(Lint-free; keep hands clean during reassembly)
- Fuel container or canister(Securely closed; avoid spills near ignition sources)
- Gloves(Protect hands during disassembly and handling hot surfaces)
- Lubricant/chain oil(Used to reduce wear during reassembly and testing)
- Marker or tape(Label screws and parts for easier reassembly)
- Soft surface mat(Work on a stable, clean surface to avoid losing small parts)
Steps
Estimated time: 30-60 minutes
- 1
Inspect safety and damage
Power down any applicable virtual power sources and perform a visual inspection of the chainsaw. Look for obvious damage to the housing, bar, chain, and fasteners. Check fuel levels and make sure the tool is on a stable, flat surface before starting any disassembly.
Tip: Clear the area of wildlife or players if you’re playing on a public server to avoid distractions during repair. - 2
Gather required parts and tools
Lay out your repair kit, spare parts, cleaning supplies, and fuel. Confirm you have everything you need before you begin to minimize time spent searching during the repair.
Tip: Pre-stage parts in order of assembly to streamline the process. - 3
Disassemble damaged components
Remove the housing cover, detach the bar and chain, and inspect the chain tensioner and sprockets. Keep track of fasteners and set aside damaged parts for replacement.
Tip: Keep screws organized with a label or tray to prevent misplacement. - 4
Replace worn or broken parts
Install new gaskets, seals, screws, or bar components as needed. Reassemble the guide bar and chain with proper tension. Ensure all components seat correctly before proceeding.
Tip: Tighten fasteners to spec and avoid over-tightening which can strip threads. - 5
Test the chainsaw function
With fuel and safety checks complete, start the engine and test idle, throttle response, and cutting performance on a safe surface. Observe for smooth operation and listen for unusual noises.
Tip: If the saw stalls, re-check fuel delivery and airflow before repeating the test. - 6
Final safety check and documentation
Verify that all guards, bolts, and safety features are in place. Document the repair, noting parts used and any follow-up maintenance recommended.
Tip: Keep a repair log for future reference and to improve your repair workflow.
FAQ
What should I do first if the chainsaw fails to start in DayZ?
Begin with a quick diagnostic check: ensure fuel is present, inspect the spark or ignition, and verify there’s no blockage in the air intake. If the issue isn’t obvious, proceed with a careful inspection of the fuel system and seals. Avoid forcing a start if there are abnormal noises.
First, check fuel and ignition basics, then inspect for blockages and unusual sounds before attempting more involved repairs.
Can I repair a chainsaw in the field, or do I need a workshop in DayZ?
Field repairs are possible with a compact repair kit and spare parts, but complex fixes may require a safer, well-lit area. Plan repairs in stages to minimize risk and resource loss.
Field repairs are feasible with a kit; save more complex work for a safer location.
Which items are essential for DayZ chainsaw repair?
A compact repair kit, spare parts, cleaning supplies, and protective gloves are essential. Fuel and lubrication options help testing, but keep flammables away from heat.
Essential items are a repair kit, spare parts, cleaning supplies, and gloves.
How can I prevent future chainsaw failures during DayZ expeditions?
Practice regular inspection and maintenance, keep spare parts on hand, and avoid pushing the chainsaw beyond its limits. Document failures to identify recurring issues and adjust your loadout accordingly.
Regular checks, spare parts, and mindful use reduce future failures.
Is it safe to repair a chainsaw while enemies are nearby?
If threats are present, pause repairs and seek cover. Safety comes first; wait for a safer moment or relocate before continuing, especially when handling fuel and hot components.
Avoid repairs when enemies are near; prioritize safety first.
Watch Video
The Essentials
- Diagnose before disassembling to save resources
- Keep a stocked repair kit and log repairs for future use
- Test in small steps to confirm function before full use
- Document repairs to improve future maintenance