Repair Chainsaw: Safe DIY Fixes & Common Problems Homeowners
Learn safe, practical steps to diagnose and repair common chainsaw issues. This guide covers tools, step-by-step tasks, safety alerts, and maintenance tips for homeowners and pros.

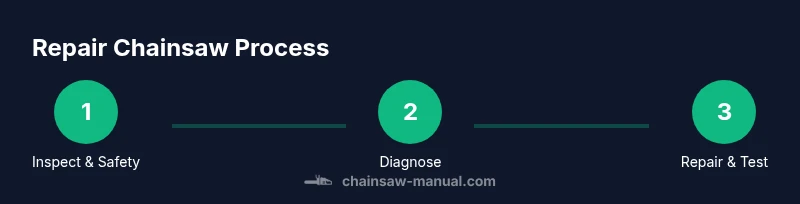
In this guide you will learn to diagnose and repair common chainsaw problems with safety first in mind. You’ll follow a practical, step-by-step workflow to identify root causes, perform essential maintenance, replace wear parts, and verify operation before use. The approach emphasizes correct tools, proper disassembly, and safe reassembly to reduce the risk of kickback and fuel-related hazards.
What repair chainsaw typically involves and safety-first approach
Repairing a chainsaw is a practical skill for homeowners and professionals, but safety must come first. The process usually starts with a thorough inspection to identify obvious wear or damage, followed by a plan to restore function using genuine or high-quality equivalents. Expect to address fuel and ignition pathways, air intake, and moving parts such as the bar, chain, and clutch. Always isolate power (or remove the spark plug boot) and secure the saw to prevent accidental starts. Documenting what you observe helps when sourcing parts and reassembly. According to Chainsaw Manual, a safe repair begins with a clean workspace, the right tools, and a clear plan before you touch any components.
Common symptoms and safe diagnosis
Identifying symptoms quickly helps you separate minor upkeep from major repairs. Common issues include hard starting, rough idle, loss of power under load, smoking, unusual noises, or a chain that won’t engage. Start with the simplest explanations: fuel contamination, dirty air filter, stale gas, or a clogged fuel filter. Check the spark plug for wear or fouling, inspect the air intake for obstructions, and listen for irregular compression. If a symptom points toward the carburetor or ignition system, proceed with caution and consult service literature. Chainsaw Manual analysis shows that a structured diagnostic approach reduces guesswork and increases repair success.
Safety-first: PPE, lockout, and workspace setup
Before you touch the saw, equip proper PPE: cut-resistant gloves, eye protection, hearing protection, and steel-toe boots if possible. Work in a well-ventilated area away from open flames. Use the chain brake when testing or rotating the bar, and never operate the saw on a loose surface. Keep a fire extinguisher or a bucket of sand nearby in case fuel spills occur. A stable bench or stand helps keep the saw at a comfortable height and reduces the risk of slips. Safety-minded preparation is the foundation of any successful repair.
Essential tools and replacement parts you'll need
Gather a basic repair kit: screwdrivers (Phillips and flat), metric wrenches, a torque wrench, pliers, a carburetor cleaner spray, replacement spark plug, replacement air filter, fuel filter, fuel line clamps, and a tuned bar and chain if necessary. Have a set of replacement gaskets, seals, and small parts as needed. For carburetor work, consider a rebuild kit and precise cleaning solvents. Always verify compatibility with your saw’s model and year to avoid incorrect parts that could worsen problems.
Cleaning, inspection, and maintenance basics
Clean the saw thoroughly to reveal hidden wear. Wipe down all surfaces, remove the chain and bar, and inspect the clutch, sprocket, and drive shaft for wear. Check the fuel system for leaks, inspect fuel lines for cracks, and replace the fuel filter if it looks degraded. Lubricate the bar and chain properly, ensuring chain tension is correct when reinstalled. A well-lubed system reduces friction, wear, and heat buildup, extending saw life and improving performance. Establishing a routine maintenance check after every job is a prudent habit for durability.
Stepwise troubleshooting overview (high-level view)
A methodical workflow helps you narrow down faults efficiently. Start with safety checks, then inspect the fuel system, air intake, and ignition. If a single symptom persists, isolate the suspect component (fuel, spark, air, or compression) and test with known-good substitutes when possible. Document each test, note observed behavior, and proceed with controlled disassembly only as needed. This approach minimizes unintended damage and keeps you aligned with best practices from Chainsaw Manual.
When to seek professional service and safe disposal guidelines
Some repairs exceed DIY scope, such as deep carburetor work, crankcase reseal, or internal engine inspection. If you detect persistent compression loss, unusual internal noises, or fuel system hazards, consult a qualified technician. For disposal, follow local regulations for fuel and battery disposal, and recycle metal parts where possible. When in doubt, ask a professional for guidance to avoid dangerous outcomes. Chainsaw Manual emphasizes safe, responsible decisions in all repair scenarios.
Quick-reference safety and maintenance checklist
- Always disconnect the spark source and secure the chain brake before handling.
- Use the correct parts and torque specs; never improvise fasteners.
- Work in a well-ventilated space away from flames; have a fire extinguisher nearby.
- Document steps and parts used for easier future maintenance.
- Test saw after reassembly with PPE and chain brake engaged.
Tools & Materials
- Screwdrivers (Phillips and flat-head)(Phillips #2 and flat-head for screws and covers)
- Combination wrench set(Metric sizes for most saws)
- Torque wrench(Critical for fastener torque specs)
- Carburetor cleaner spray(For delicate passages and jets)
- Replacement spark plug(Check gap as per manual)
- Replacement air filter(Keep air path clean for optimal combustion)
- Replacement fuel filter and fuel line clamps(Optional if lines show wear)
- Rags and solvent(Clean surfaces and wipe hands)
- Bar oil and bar oil can(Maintain bar lubrication during test)
- Lubricant for chain and bar(Apply evenly to prevent overheating)
- Shop towels and waste container(Dispose of contaminated materials properly)
- Safety PPE (gloves, eye protection, hearing protection)(Essential for every repair)
Steps
Estimated time: 90-150 minutes
- 1
Power down and secure saw
Disconnect the spark plug boot or battery and engage the chain brake. Place the saw on a stable surface, preferably a workbench with non-slip padding. Verify that there is no fuel present in the intake area and that your workspace is well-ventilated.
Tip: Take a photo of disconnect points before removal to ease reassembly. - 2
Inspect and clean air and fuel pathways
Remove the air filter housing and inspect the filter for dirt or damage. Clean or replace the air filter as needed. Check the fuel line for cracks or leaks and replace the filter if present in your saw's design.
Tip: Work gently around the carburetor; avoid metal-to-metal contact that can damage passages. - 3
Check ignition components
Remove the spark plug and inspect for fouling or wear. Clean the plug or replace it if needed, and check the gap with a feeler gauge according to your model's specification.
Tip: Ground the spark plug on the cylinder head while testing the ignition from the ignition module. - 4
Evaluate compression and seals
If compression seems low, consider professional testing or a compression gauge check. Look for signs of valve, piston, or seal wear that could indicate deeper problems.
Tip: Do not force components; use proper tools to avoid damaging seals. - 5
Inspect carburetor and fuel system
If fuel delivery is suspect, remove the carburetor and clean jets with carb spray. Replace the fuel filter if present and inspect the fuel tank for varnish or contaminants.
Tip: Use a rebuild kit only if you have the manual and the instructions to avoid misadjustment. - 6
Assess the chain, bar, and clutch
Inspect the bar groove for wear, check chain tension and sharpness, and inspect the clutch for wear or damage. Replace worn parts and reassemble with correct orientation.
Tip: Lightly lubricate the bar tips before testing to prevent overheating. - 7
Reassemble and test safely
Reinstall all components, reconnect the spark plug boot, and test with the chain brake engaged. Start with short idle runs to confirm smooth operation before.load testing at full throttle.
Tip: Never run the saw without adequate lubrication and protective gear.
FAQ
Can I repair a chainsaw myself, or should I hire a professional?
Many homeowners can handle basic maintenance and minor repairs if they follow safety protocols and manuals. Complex carburetor work or internal engine repairs are better left to a professional.
Yes, you can do many repairs yourself if you stay within safe limits; for complex issues, consult a professional.
What are the most common repairs homeowners can safely perform?
Replacing spark plugs, cleaning or replacing air and fuel filters, adjusting chain tension, cleaning the carburetor, and inspecting the bar and chain for wear are typically within safe DIY scope when done carefully.
Most homeowners handle spark plugs, air and fuel filters, and chain tensioning safely with the right tools.
How do I diagnose a chainsaw that won't start?
Check fuel quality, spark plug condition, air filtration, and carburetor cleanliness. Ensure the choke and throttle linkages function correctly and that the ignition system delivers a spark.
Start by checking fuel, spark, and air; then inspect the carb and ignition for issues.
Is it safe to run the chainsaw with a dirty air filter?
No. A dirty air filter restricts air flow, causing poor performance and potential engine damage. Clean or replace it before use.
No—clean or replace a dirty air filter before operating the saw.
How often should I service a chainsaw to prevent repairs?
Follow the manufacturer's maintenance schedule and look out for signs of wear. Regular cleaning, lubrication, and inspection reduce the likelihood of major repairs.
Follow the manual's schedule and watch for wear so you can catch issues early.
Is it safe to repair a fuel system without experience?
Fuel system work can be hazardous. If you’re unsure, consult the manual and consider professional help to avoid spills or fire risk.
Fuel work can be risky; if unsure, seek professional guidance.
Watch Video
The Essentials
- Identify root causes with a safe, methodical approach
- Follow safety-first steps before disassembly
- Use the correct parts and proper torque
- Test the saw with chain brake engaged after repair
- Maintain a proactive maintenance routine