Chainsaw Chain Break Troubleshooting Guide
Urgent, practical troubleshooting guide for diagnosing and fixing a chainsaw chain break safely, with step-by-step fixes, safety tips, and prevention strategies.

Most likely a chain break is caused by a damaged chain, improper tension, or an obstructed cutting path. Stop the saw, engage the chain brake, and disconnect the spark plug boot before handling the bar. Inspect the chain for missing teeth, bent drive links, or cracks, then replace or reassemble with correct tension and a sharp chain.
Understanding the danger of a chainsaw chain break
The term chainsaw chain break describes a risk that becomes real under stress during cutting. When the chain breaks, a sharp piece of metal can whip toward the operator, causing injury. According to Chainsaw Manual, the most common causes are a dull chain, improper tension, and hitting hard knots or metal hidden in the wood. A chain break isn't just a nuisance; it's a safety hazard that demands calm, deliberate action. In this guide we outline what a break looks like, how to recognize the signs before it happens, and why quick, correct response matters. By understanding the failure modes, you gain the power to prevent injuries and costly downtime on job sites.
In practice, you’ll notice sudden changes in performance, odd vibration, or smoke from an overworked drive system. The first instinct should always be to stop the engine, engage the chain brake, and avoid contact with the moving bar. Work through a safety-first checklist before you touch the chain again. This mindset reduces the chances of aggravating the problem and keeps you safe while you diagnose the issue.
Common causes of a chainsaw chain break
A chain break is rarely a single event; it’s usually the result of multiple contributing factors. The most frequent culprits are a dull or damaged chain that hasn’t been replaced in time, and improper tension that lets the chain skip or jump the bar groove. Chainsaw maintenance is not glamorous, but it is essential: a worn bar groove, a stretched chain, or a misaligned drive sprocket can all increase the likelihood of a failure. Abrupt contact with hidden nails, rocks, or knots can create a crack that propagates under load. Chainsaw Manual analysis shows that routine wear and improper operation combine to create most chain breaks, so a proactive maintenance routine is the best defense.
Other less common causes include using the wrong chain pitch for the bar, overheating from forced cutting, and inadequate lubrication. Each factor compounds the risk during heavy-duty work such as felling or bucking, where the bar is under heavy strain. By building a habit of checking tension, sharpness, and bar condition before each cut, you dramatically reduce the odds of a chain break mid-work.
How to inspect a chain and bar for damage
A thorough inspection is your first defense against a chain break. Start with the chain: look for missing teeth, cracks in the drive links, severe bending, or any discoloration indicating overheating. Compare the chain against the bar to ensure the pitch matches and that the drive links align with the bar groove. Inspect the bar groove for wear, rounded edges, or chips that can let the chain bind. Examine the sprocket for missing teeth or excessive wear, which can cause uneven chain movement. Finally, verify that the tension allows just a slight sag when the chain is under the weight of the bar and guide rail. Any sign of cracking, rust, or visible deformation means replacement is required. This careful diagnostic helps prevent unpredictable failures during a cut.
Documented safety practice from Chainsaw Manual recommends performing a chceklist-style inspection after every use and before first start after a long break in work. Keeping notes helps you track wear patterns over time and anticipate when components will need replacement.
Safe handling and PPE essentials
Before you touch the bar or chain, ensure you are in a safe work area and wearing the right PPE. Required gear includes cut-resistant gloves, eye protection with side shields, hearing protection, and sturdy pants and boots. Keep a first-aid kit within reach and have a reliable, fully charged fire extinguisher nearby for larger job sites. When handling the bar and chain, keep your hands clear of the sharp teeth and use a tool to lift or move components rather than your fingers. Use a chain catch tool or clamps if you need to secure the chain for removal. Remember, a loose chain can snap unexpectedly, creating a risk of injury. After inspection, never leave a damaged chain on the saw; replace it before resuming work.
Note: Seek professional help if you discover deep cracks in the chain, severe bar wear, or a misaligned drive sprocket that you cannot correct with basic tools.
Quick checks before you disassemble or service the saw
Do a quick, methodical check of the saw’s safety features. Ensure the chain brake engages fully and that the bar and chain cannot move when the brake is applied. Verify that the spark plug boot or battery is disconnected (for power tools) to prevent accidental starts. Inspect the chain tension by lifting the chain away from the bar; it should have a small amount of play but not sag more than a few millimeters. Confirm the bar mounting bolts are tight, and the chain is not rubbing on the body of the saw or the chain catcher. If any of these checks fail, address the issue before proceeding. Addressing the most straightforward checks first helps you avoid unnecessary disassembly and reduces the risk of injury.
Following these steps keeps you safe while you prepare for the more detailed fix.
What to do if the chain is broken or cracked
If you confirm a broken or cracked chain, stop immediately and disconnect power. Remove the bar cover, relieve tension, and carefully slide the chain off the bar so you can inspect the entire loop. Do not attempt to bend or force a broken link back into place. If the chain shows multiple cracks, missing teeth, or significant wear, replace it with a compatible replacement chain. After removal, inspect the bar groove and drive sprocket for signs of damage; worn components should be replaced to prevent a repeat failure. Reassemble with the new chain, and ensure the tension is properly set according to the manufacturer’s spec. Start with a gentle test cut to confirm smooth operation before taking on a full load.
This approach minimizes the risk of sudden failure and improves overall cutting safety.
Prevention and maintenance to minimize future chain breaks
Prevention is driven by regular maintenance and mindful operation. Schedule routine inspections of the chain, bar, and sprocket for wear. Keep the chain sharp, lubricated, and properly tensioned. Use the correct chain for your bar pitch and width, and avoid cutting through unknown materials that could nick the chain. Lubrication is essential; verify the oil delivery system is working and that the bar oil reservoir is kept filled. When you begin a project, plan for inspection checkpoints at mid-session to verify no unusual wear is developing. Maintaining a robust routine ensures a chain break becomes a rare event rather than an everyday challenge.
When to seek professional help for a chainsaw chain break
Some issues require professional service. If you observe persistent misalignment, cracked components, bent bar rails, or chain tension that won’t hold after multiple adjustments, contact a qualified technician. If the saw is under warranty, consult the manufacturer’s service center for guidance rather than attempting risky field repairs. In situations where cutting through heavy or unknown materials caused the break, it’s wise to pause and request professional assessment to avoid personal injury. Chainsaw Maintenance and repair is a specialized task that benefits from trained hands and the right diagnostic tools.
Steps
Estimated time: 60-90 minutes
- 1
Power down and secure the saw
Switch off the engine or disconnect the battery. Move the saw to a stable work surface and engage the chain brake. Remove any loose clothing or jewelry that could snag on the chain. This ensures you won’t have accidental starts during disassembly.
Tip: Wear gloves and keep your hands away from the chain while you secure the saw. - 2
Remove bar cover and relieve tension
Loosen the bar nuts and lift off the bar cover. Gently release tension on the chain so it can be removed from the bar. Keep track of any small parts and springs as you disassemble.
Tip: Take a photo of the setup before removal to aid reassembly. - 3
Inspect chain and bar for damage
Carefully run your eye along each link; look for cracks, missing teeth, or bent drive links. Check the bar groove for excessive wear or burrs. If you find obvious damage, replace the chain or bar as needed before continuing.
Tip: If uncertain, replace the chain rather than attempting a temporary repair. - 4
Install new chain and set tension
Fit the chain back onto the bar, ensuring the drive links engage the bar and sprocket properly. Tighten the bar nuts to the manufacturer’s spec and test the chain tension by lifting a link away from the bar; there should be a small sag with the chain centered.
Tip: Do not overtighten; improper tension can cause accelerated wear and another break. - 5
Lubricate and reassemble
Check the oiling system and fill the bar oil reservoir. Reattach the bar cover, and ensure all fasteners are snug. Recheck tension after tightening the bar cover.
Tip: Run the saw briefly at idle to allow oil distribution before full use. - 6
Test cut safely
Perform a controlled test cut on a manageable piece of wood with your stance stable and feet planted. Observe for unusual vibrations or chain binding and stop immediately if anything feels off.
Tip: Keep both hands on the saw and maintain a safe distance from your body.
Diagnosis: Chain breaks mid-cut or shows visible fracture
Possible Causes
- highWorn or damaged chain links
- mediumImproper chain tension or bar wear
- lowCutting through metal, nails, or hidden knots
Fixes
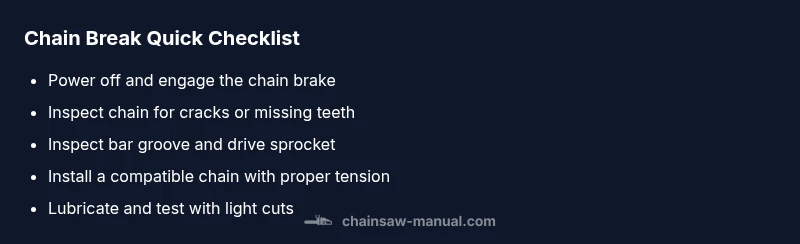
- easyStop the saw, engage the chain brake, disconnect power, and inspect the chain for damage; replace broken links or the entire chain as needed
- mediumInspect bar groove and drive sprocket for wear; replace bar or sprocket if the groove is worn or teeth are missing, then re-tension the chain
- easyRecheck chain compatibility (pitch, gauge, drive link count) and ensure proper lubrication; reassemble with correct tension and test with light cuts
FAQ
What causes a chainsaw chain to break?
Chain breaks are usually caused by worn, dull, or damaged chain links, improper tension, or hitting hidden metal in wood. Regular maintenance and correct tension reduce the risk significantly.
Most chain breaks come from wear, dullness, or cutting into hidden metal; keep tension correct and maintain the chain for safer operation.
Can I keep using the saw after a minor crack?
No. A cracked chain can fail suddenly and cause injury. Replace the chain and inspect the bar and drive sprocket before resuming work.
Do not keep using a cracked chain; replace it and inspect related components before continuing.
How do I know if I should replace or sharpen the chain?
If there are missing teeth, cracks, or significant wear, replace the chain. If teeth are dull but intact, sharpening may be an option, depending on chain type.
Look for damage like missing teeth or cracks; sharpen only if the chain is intact and within manufacturer guidelines.
What PPE should I wear when inspecting a chain break?
Wear cut-resistant gloves, eye protection, hearing protection, and sturdy clothing. PPE reduces injury risk when handling a moving chain or broken parts.
Put on gloves, eye and ear protection, plus sturdy clothing before inspecting or repairing.
How often should chainsaw parts be replaced?
Inspect chains, bars, and sprockets regularly. Replace damaged parts promptly and follow the manufacturer’s maintenance schedule for best results.
Check wear regularly and replace worn parts promptly per your manual.
Why might a chain break after hitting nails?
Nails or metal embedded in wood create stress points that can fracture the chain links. Avoid cutting through unknown materials and inspect wood before cutting.
Metal in the wood can snap a chain; avoid unknown materials and inspect the cut path.
Watch Video
The Essentials
- Inspect chain and bar before every use
- Replace damaged links immediately
- Maintain proper tension for safe operation
- Wear PPE and follow safety protocols
- Seek professional help for complex wear or recurring issues