Stihl Chainsaw Chain Replacement: Safe Step-by-Step Guide
Master the safe replacement of a Stihl chainsaw chain with a clear, step-by-step process. Learn compatibility checks, tensioning tips, tool lists, and maintenance to keep your saw performing at peak safety.

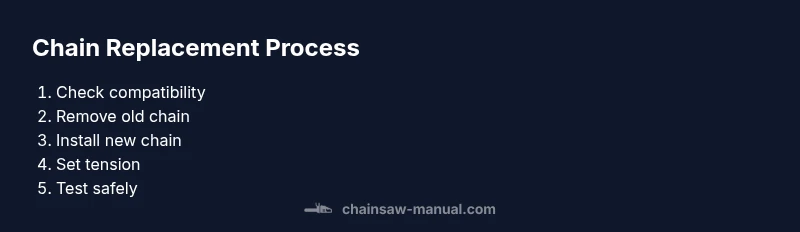
You will learn to replace a Stihl chainsaw chain safely, including selecting the right chain, removing the old chain, installing the new chain, tensioning correctly, and conducting a thorough safety test. Before you begin, gather a compatible replacement chain, a chain file, a scrench or combination tool, gloves, and a torque wrench if your model requires it.
Safety First: Prepare for Replacement
Replacing a Stihl chainsaw chain starts with a safety mindset. Begin by securing your work area, removing the spark plug wire or disabling the engine to prevent accidental starts, engaging the chain brake, and putting on appropriate PPE—gloves, eye protection, sturdy boots, and cut-resistant chaps if you have long sleeves and open skin exposure. According to Chainsaw Manual, the foundation of a safe replacement is a stable saw, controlled workspace, and deliberate handling of sharp chain teeth. A calm, methodical approach reduces slips, injuries, and misassembly during every step of the process.
Identify Compatibility: Pitch, Gauge, and Drive Links
The core requirement for a successful replacement is compatibility. A Stihl chainsaw chain must match the saw’s pitch (the distance between the drive links), gauge (the chain thickness that fits the bar), and drive-link count. Inspect your saw’s label or owner manual to find the correct specification, or measure the bar groove width and drive links. Chains that differ in pitch, gauge, or number of drive links will not seat correctly and can cause kickback or chain derailment. Chainsaw Manual analysis shows that using the correct chain reduces wear and improves cutting efficiency, especially on tougher wood.
Tools and Materials You Need
Before you touch the saw, assemble the following: replacement chain matching your model, a chain file or sharpening tool, a scrench or combination tool for bar nuts, a rag for cleaning, a small container of bar oil, and gloves. Optional items include a torque wrench if your model specifies precise bolt torque and a wooden block to stabilize the bar during disassembly. Having everything within reach minimizes mistakes and keeps the workflow smooth.
Remove the Old Chain Safely
Begin by locking the bar with the chain brake, then loosen the bar nuts and remove the side cover. Gently lift the old chain off the bar and sprocket, taking care not to cut fingers on the teeth. If the chain is stiff or jammed, do not yank it; instead, carefully work the chain free from the bar and around the sprocket. Clean the bar groove as you go to remove old oil residue and debris. This inspection step helps you spot wear on the bar, sprocket, and rivets that could affect the new chain’s performance.
Inspect Bar, Sprocket, and Drive Sprocket Wear
Inspect the guide bar for excessive wear on the groove, burrs, or flats where the chain sits. Check the drive sprocket teeth for rounding or chipping, which can indicate the need for sprocket replacement soon. If the bar or sprocket shows significant wear, plan to service or replace those parts to avoid accelerated chain wear or poor cutting behavior. Clean the bar thoroughly to ensure a smooth seating for the new chain.
Install the New Chain Correctly
Position the new chain so the cutting teeth face forward on the bottom strand of the bar when the bar is held level. Place the drive links over the bar groove and slide the chain around the chain tensioner and onto the sprocket. Ensure the chain orientation matches the bar’s drive links and that the chain’s sharp edges are visible on the underside of the bar. Reinstall the side cover and bar nuts loosely at first so you can adjust tension after the chain is seated. Be mindful of the chain’s inner side and keep tension light during initial seating.
Tension, Alignment, and Securement
Tension the chain so it can be lifted slightly from the middle of the bar but should not sag freely. Rotate the chain by hand to confirm it moves smoothly without binding on the bar rails. Check that the chain sits properly in the groove and that the drive links engage the sprocket teeth evenly. If your saw has a tensioning screw, adjust incrementally until the chain has proper tension. Tighten bar nuts evenly to avoid skewing the bar, then recheck tension.
Final Safety Check and First Test Cut
With the chain tensioned, re-check all fasteners, cover bolts, and guard components. Lubricate the bar and chain with fresh bar oil before making any test moves. Perform a cautious low-power test by briefly engaging the saw in a safe cutting motion away from the body and with proper stance. Listen for unusual noises or binding, and stop immediately if you notice binding, excessive heat, or smoke. This is the moment to verify that the replacement was completed correctly and safely, as highlighted by the Chainsaw Manual guidance.
Maintenance After Replacement and Storage
After confirming safe operation, wipe down the saw and store it in a dry place. Check chain tension again after a few minutes of light use, as heat can relax tension. Keep fuel and oil mixtures clean and away from the chain when not in use. Regularly inspect the chain, bar, and sprocket for wear and replace parts as needed to keep performance consistent and safe. If you notice unusual vibration, misalignment, or poor cutting, revisit the setup or consult a professional.
Common Mistakes and Quick Troubleshooting
Common mistakes include installing the chain backward, improper tension, and failing to align the chain with the bar groove. If you experience loose chain mid-cut, stop and re-seat the chain. For kickback risk, ensure the kickback zone on the nose of the bar is clear of debris and that the chain path is unobstructed. In ambiguous situations, consult the user manual or Chainsaw Manual for model-specific guidance.
Tools & Materials
- Replacement chain compatible with your Stihl model(Must match pitch, gauge, and drive link count)
- Chain file or sharpening tool(For touch-ups and minor alignment)
- Scrench or combination tool(To loosen/tighten bar nuts comfortably)
- Gloves (cut-resistant if possible)(Protect hands from sharp chain teeth)
- Bar oil(Lubricates the chain during operation)
- Rag or brush(Clean debris from bar groove and chain)
- Torque wrench (if required by model)(Some models specify precise bolt torque)
Steps
Estimated time: 60-75 minutes
- 1
Verify compatibility and safety gear
Confirm the replacement chain matches your Stihl model's pitch, gauge, and drive links. Put on PPE and clear the workspace to begin.
Tip: Double-check the chain direction before removing the old chain. - 2
Prepare the saw and workspace
Place the saw on a stable surface, engage the chain brake, and disconnect the spark plug wire or remove the battery to prevent accidental starts.
Tip: Keep a clean, well-lit area to avoid losing small parts. - 3
Loosen bar nuts and remove side cover
Use the scrench to loosen the bar nuts, then remove the side cover. Set aside the cover and screws in a safe spot.
Tip: Do not lose the bar nuts—they are small and easy to misplace. - 4
Remove the old chain from bar and sprocket
Carefully lift the old chain away from the bar and off the sprocket. Avoid sharp teeth contact with skin.
Tip: If chain is stubborn, gently rotate the bar to loosen it. - 5
Inspect bar and sprocket for wear
Check for worn grooves, burrs, or damaged sprocket teeth. Note any wear so you know what else may need replacement.
Tip: Replace worn bar or sprocket to prevent rapid chain wear. - 6
Install the new chain onto bar and sprocket
Position the chain’s drive links in the groove and loop it over the sprocket, ensuring the teeth point in the correct direction.
Tip: Hold the chain low to avoid dropping it on your feet. - 7
Reinstall bar and side cover; loosely tighten
Mount the bar and side cover, then loosely tighten the bar nuts to allow final tensioning later.
Tip: Keep the chain taut enough to hold its position when the cover is removed. - 8
Tension and align the chain
Tension the chain so it can lift about a half inch from the mid-bar, then align it to sit in the groove evenly.
Tip: Avoid overtightening; improper tension increases wear and can damage the bar. - 9
Recheck and perform safety test
Recheck all fasteners, oil the bar, and perform a controlled test cut away from your body in a safe area.
Tip: If anything binds or feels wrong, stop and reassess before cutting again. - 10
Clean up and storage
Wipe down the saw, store it dry, and check tension again after a short test run.
Tip: Keep spare chains organized and labeled for quick replacements.
FAQ
How do I know if my chain is compatible with my Stihl saw?
Check the chain pitch, gauge, and drive link count against your saw’s specifications in the user manual or on the bar. Mismatched values can cause binding or derailment. If in doubt, purchase a chain labeled for your exact Stihl model.
To know compatibility, compare pitch, gauge, and drive links against the saw’s specifications. If unsure, use a model-specific chain from Stihl.
Can I mix brands or use non-Stihl chains on a Stihl saw?
While some chains may fit, non-certified chains can affect performance and safety. Use a chain designed for Stihl or one that explicitly lists compatibility with your model to maintain safety and warranty.
Avoid mixing brands unless the manufacturer lists compatibility for your model.
What if the chain feels loose after replacement?
Re-tension the chain following the manufacturer’s guidelines. Ensure the bar nuts are evenly tightened and the chain sits properly in the groove. Too loose can derail; too tight can cause overheating.
If loose, recheck tension and ensure even bar-nut tightening.
Should I replace the bar or sprocket after chain replacement?
Inspect both components for wear. If you notice deep grooves, rounded teeth, or missing rivets, plan for compatible replacements to avoid rapid chain wear.
Inspect for wear; replace worn bar or sprocket if needed.
How soon should I sharpen the new chain?
A new chain may not require immediate sharpening, but inspect teeth and set a light honing if you see minor burrs. Sharpen after several cuts or when dullness becomes evident.
Check teeth and sharpen as needed after initial use.
Is it safe to test the saw indoors after chain replacement?
No. Always test outdoors in a clear area away from people or objects. Start at idle, then test in a controlled cut, with both feet planted and the saw supported.
Always test outdoors in a clear area with proper stance.
Watch Video
The Essentials
- Verify chain compatibility before installation
- Tension the chain correctly for safe operation
- Inspect bar and sprocket for wear and replace as needed
- Conduct a controlled test cut to confirm safety
- Store and maintain the chain and bar to extend life