Replace Chainsaw Chain: A Safe, Step-by-Step Guide
Learn how to replace a chainsaw chain safely and accurately with a compatibility check, proper tension, and maintenance tips from Chainsaw Manual. This practical guide covers choosing the right chain, tools, safety steps, and post-install care.

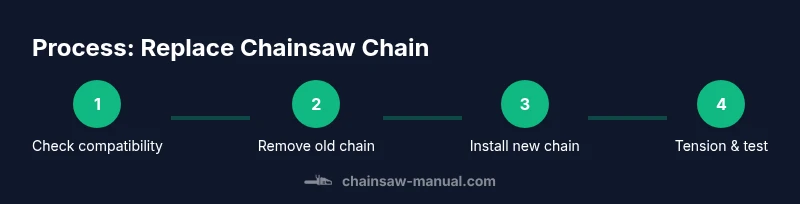
Goal: Learn to replace a chainsaw chain safely and correctly. You’ll verify chain compatibility (pitch, gauge, drive links), gather essential tools, remove the old chain, install the new one, tension it properly, and test the saw with safety checks. This guide emphasizes PPE, locking the chain brake, and avoiding common mistakes that can injure you or damage the saw.
Why replacing a chainsaw chain matters
A worn or damaged chain reduces cutting efficiency and increases the risk of kickback or saw binding. Replacing the chain when it shows signs of wear is a fundamental safety precaution and keeps your chainsaw performing as designed. According to Chainsaw Manual, maintaining sharp, properly matched components is essential for predictable control and clean cuts. Before you reach for a new chain, evaluate its condition and confirm you have the right replacement. This isn't just about speed; it's about reducing stress on the motor, extending bar life, and keeping workflows safe around wood, sap, and moisture. In professional settings, technicians inspect the chain daily and replace when any tooth is chipped, the drive links are worn, or the chain is stretched beyond the manufacturer’s tolerance. Homeowners should perform a quick visual check after every use and schedule a full replacement if you notice significant stiffness, skipped teeth, or uneven spacing. With the right approach, replace chainsaw chain steps up performance while minimizing the chance of dangerous kickback or binding during tough wood work.
Understanding chain compatibility: pitch, gauge, drive links
To successfully replace a chainsaw chain, you must match three core specifications: pitch, gauge, and the number of drive links. Pitch is the distance between corresponding points on adjacent drive links and determines how the chain meshes with the drive sprocket. Gauge refers to the width of the chain that sits in the bar groove; using a gauge that’s too wide or narrow causes poor tracking and uneven cuts. Drive links are the nubs that interface with the bar groove and guide the chain along the bar. The new chain must align with the bar’s groove width and the sprocket’s size, and you should count drive links to ensure compatibility with the bar length. In short, a mismatched chain can wear the bar prematurely, reduce performance, and increase the risk of dangerous kickback. Chainsaw Manual emphasizes checking these specs against your saw’s model and the bar you’re using.
Inspecting the bar and drive sprocket for wear
Before installing a replacement chain, inspect the bar and drive sprocket for wear. Look for rounded or chipped bar grooves, excessive burrs, or a sprocket with missing or worn teeth. A bar with deep grooves or a worn sprocket can cause poor chain engagement and accelerated chain wear. If you notice excessive side-to-side bar movement, bar bentness, or a sprocket with visible wear, address those issues before installing a new chain. Also check the bar’s length and whether the groove width matches the replacement chain. Performing this inspection helps prevent premature chain tension problems and ensures you get the full benefit of a fresh chain. Chainsaw Manual recommends replacing worn bars or sprockets in tandem with the chain when wear is evident.
Safety prerequisites before starting the replacement
Safety comes first when replacing a chainsaw chain. Put on cut-resistant gloves, eye protection, and hearing protection. Engage the chain brake and place the saw on a stable, non-slip surface. If your model allows, disconnect the spark plug boot (for gasoline saws) to prevent accidental starts during maintenance. Remove the bar cover, loosen the bar nuts per your model’s instructions, and prepare a clean workspace free of twigs and debris. Keeping the bar and chain clean, organized, and properly supported reduces the chance of pinching or slipping during removal and installation. Chainsaw Manual underscores the importance of these steps to protect hands and eyes while you work.
Signs you should replace a chainsaw chain
A chain may need replacement even if it isn’t completely dull. Look for chipped or cracked teeth, bent drive links, visible stretching, or excessive side-to-side looseness after tensioning. A chain that produces chipped wood, uneven cuts, or frequent tooth snagging is often a sign that replacement is warranted. Keep an eye on the chain’s tension: if the chain sits high in the bar groove or binds when moved by hand, replacement is likely needed. Regular visual checks after each use help catch wear early, keeping operation smooth and safe. Chainsaw Manual notes that timely replacement improves cutting efficiency and reduces motor strain.
Maintenance after replacement to extend chain life
After installing a new chain, re-check tension with the saw resting on a stable surface. The chain should have a small amount of vertical slack but should not sag when the bar is rotated. Lubricate the chain regularly with bar oil and keep the bar groove clean to prevent debris buildup that can jam the chain. Periodically sharpen the chain according to the manufacturer’s recommendations to maintain performance. Cleaning the bar groove, wiping off residue, and avoiding prolonged contact with dirt will extend chain life and keep cuts clean. Regular maintenance adds safety margins and helps you achieve more reliable results over time.
How to store and dispose of worn chain
When you replace a chain, dispose of the worn links properly according to local regulations. Store the new chain away from moisture and dust in a dry container. If you have multiple chains, label them with the intended bar length and pitch to avoid confusion. Regularly inspect stored chains for rust or stiff links, and rotate stocks to ensure you’re using the oldest stock first. This practice helps reduce waste and ensures a ready replacement when needed.
Tools & Materials
- Replacement chainsaw chain(Match pitch, gauge, drive links; ensure chain length fits bar length)
- Bar cover and bar nuts wrench(Wrench or socket that fits your saw's bar nuts)
- Chain breaker or compatible tool(For removing/installing drive links if necessary)
- Screwdriver or torx driver(Lifts and repositions bar cover as needed)
- Protective gloves(Cut-resistant if possible; leather gloves for grip)
- Safety glasses or goggles(Eye protection against metal chips)
- Hearing protection(Ear defenders or ear plugs)
- Bar oil(Keep chain lubricated during testing and use)
- Lint-free rag or brush(Clean bar groove and chain residue)
- Sharpener/file (optional)(Use for last-minute touch-ups if needed)
Steps
Estimated time: 20-40 minutes
- 1
Stop, secure, and prepare
Power off the saw and engage the chain brake. Place the unit on a stable, non-slip surface. Put on cut-resistant gloves and eye protection before handling the chain or bar.
Tip: Always disconnect the spark plug boot to prevent accidental starts during maintenance. - 2
Loosen bar nuts and remove bar cover
Use the appropriate wrench to loosen the bar nuts. Remove the bar cover and set it aside with the screws in a safe container. Keep track of washers or spacers that may be present.
Tip: Support the bar gently to avoid springing or dropping it; avoid bending the bar during removal. - 3
Inspect the old chain and bar
Take a moment to visually inspect the chain and bar: look for chipped teeth, stretched chain, and grooves that feel rough. Check the bar groove width and sprocket engagement to ensure compatibility with the new chain.
Tip: If you notice excessive wear on the bar or sprocket, plan to replace them along with the chain. - 4
Remove the old chain
Loosen tension so the chain can slide off the bar. Lift the chain away from the bar and remove any drive links from the groove. Handle the chain carefully to avoid cutting yourself.
Tip: Avoid bending or kinking the chain; set it down on a protective surface until disposal. - 5
Install the new chain
Place the new chain around the bar and through the tensioning system. Ensure the drive links align with the bar groove and that the teeth face the correct direction of rotation. Confirm that the chain sits evenly in the groove.
Tip: Double-check orientation: the cutting teeth should point toward the tip of the bar in the correct direction. - 6
Tension, reassemble, and test
Tighten the chain so there’s a slight sag in the middle of the lower span. Reattach the bar cover, snug the nuts, and perform a cautious idle test away from wood. Start the saw and observe a light, controlled rotation before attempting to cut.
Tip: Never force the saw; if the chain binds, recheck tension and alignment before proceeding. - 7
Clean up and finalize
Wipe off any oil or debris from the saw, organize tools, and store any spare parts properly. Perform a quick safety check and document the replacement if you maintain a maintenance log.
Tip: Keep a log of the replacement date and pattern to simplify future maintenance.
FAQ
When should I replace my chainsaw chain?
Replace the chain when you notice chipped teeth, stretched links, or increased skinning of wood. If the chain cannot be tensioned properly or tracks poorly, replacement is recommended.
Replace the chain when teeth are damaged or it won’t tension correctly, then proceed with a proper installation.
Can I sharpen instead of replacing?
Shapening can delay replacement, but if wear is extensive or the chain is stretched, replacement yields better performance and safety. Always assess chain condition first.
Sharpening helps if the chain is dull, but deep wear or stretched links usually means a replacement is better.
How do I know the correct pitch and gauge for my saw?
Check the owner’s manual or the original chain’s packaging for the exact pitch and gauge. If you’re unsure, bring the old chain to a professional or use model-specific references.
Look up your saw’s model details to confirm pitch and gauge before buying a replacement.
Is it safe to replace a chain on a hot engine?
No. Allow the engine to cool, and disconnect the spark plug lead to prevent accidental starts. Replacing a chain with a hot saw can cause burns and injure you.
Let the saw cool and disconnect the spark plug before starting work.
Do I need to loosen bar nuts before replacement?
Yes. Loosen the bar nuts just enough to free the bar, then replace the chain. Recheck and retighten after reinstalling the bar to ensure safe operation.
Loosen the bar nuts to remove the bar and chain, then retighten after the installation.
How often should I replace a chainsaw chain?
Replacement frequency depends on usage, wood type, and maintenance. Regular inspections after each use help determine the right replacement timing.
Regular checks after use will guide when it’s time to replace.
Watch Video
The Essentials
- Verify pitch, gauge, and drive links match the bar.
- Use proper PPE and secure the saw before starting.
- Tension the chain correctly and test before cutting.
- Inspect bar and sprocket to prevent premature wear.