How to Remove Chain from Husqvarna Chainsaw: Step-by-Step
Learn how to safely remove the chain from a Husqvarna chainsaw with a clear, step-by-step guide, safety tips, and maintenance advice from Chainsaw Manual.

Goal: safely remove the chain from a Husqvarna chainsaw for maintenance, replacement, or cleaning. Before you start, disconnect spark plug, wear PPE, and secure the saw. Remove the side panel, loosen the bar nuts, and slide the chain off the drive sprocket. Reassemble the bar and tension the chain to factory spec. If the chain is oily, wipe the bar groove before reinstalling. According to Chainsaw Manual, following these steps minimizes risk of injury.
Safety prerequisites for chain removal
Removing a chainsaw chain requires disciplined safety routines. Always wear cut-resistant gloves, eye protection, and hearing protection. Ensure the saw is completely powered off, the chain brake is engaged, and the spark plug wire is disconnected to prevent accidental starts. Work on a stable, level surface away from children and pets. According to Chainsaw Manual, following these safety steps reduces the risk of serious injury during maintenance. Let all moving parts come to a complete stop before touching the bar or chain, and never attempt removal if the bar or engine is hot. Establish good lighting and keep a clean work area to avoid slips or dropped components. Proper PPE and a controlled workspace set the foundation for a successful, safe chain removal.
Understanding the chain and bar assembly on Husqvarna models
Husqvarna chainsaws share common components: the drive sprocket, the guide bar, the side cover, and a tensioning mechanism. The chain sits in the groove of the bar and engages the drive sprocket under the side cover. While model variations exist, the general process of removing and reinstalling the chain follows the same safety sequence: relieve tension, remove the cover, and free the chain from the bar and sprocket. This knowledge helps you anticipate potential sticking points and reduces the chance of damaging the bar oil passages or sprocket seal. Chainsaw Manual emphasizes understanding these parts to avoid misalignment during reassembly and to ensure proper chain tension after replacement.
Preparing the workspace and tools
Before you touch the saw, gather necessary tools and prepare your workspace. A clean, dry surface makes it easier to lay out small parts and prevent loss. Have safety gloves, eye protection, and a dry rag ready. A screwdriver or socket wrench will loosen screws on the side cover, and a chain brake key may be handy on some models. Keep a pen and note card nearby to record any wear you observe on the chain or bar. Chainsaw Manual notes that preparation reduces last-minute scrambles and helps you stay focused during the removal process.
Removing the side cover and loosening the bar nuts
Start by locating and removing the screws or nuts that secure the side cover. Once the cover is removed, check the bar nuts and loosen them just enough to relieve tension. As you loosen, listen for any cracking or unusual resistance, which could indicate blade burrs or a stiff tensioner. If the cover remains stubborn, pause and re-check that the saw is off and the chain brake is engaged. This step-by-step approach minimizes the risk of dropping the cover or losing small screws.
Detaching the chain from the drive sprocket
With the cover off and the chain relaxed, slide the chain off the drive sprocket carefully. Do not pull the chain forcefully, which can bend the guide bar or jump teeth. If the chain is stuck due to pitch or oil buildup, gently rotate the bar to free it, using a rag to wipe away debris as you go. Be mindful of the sharp drive links—keep fingers clear and work away from the teeth. Inspect for tight spots or stiff links that may have developed from use.
Inspecting and cleaning the chain and bar before reinstall
This is a great moment to inspect for damaged links, missing drive links, loose rivets, and bar wear. Clean oil residue from the chain and wipe the bar groove. Check the sprocket for wear and decide whether replacement is needed. If you notice significant wear or bent components, replace the chain or bar as necessary. Cleaning and inspecting now prevents premature failure after reinstallation and helps maintain safe operation.
Reinstalling the chain with correct tension
Position the chain over the bar with the drive links aligned to the sprocket and the orientation matching the arrow on the chain. Reattach the side cover and snug the bar nuts while the chain is still loose. Then slowly rotate the chain by hand to check for smooth movement around the bar. Finally, set the correct tension per the manufacturer’s specification—typically a slight sag midway along the underside of the chain, with the chain not so tight that it binds. A proper tension ensures efficient cutting and reduces wear.
Safety checks and test run after reassembly
With the chain back in place and the cover secured, perform a final safety check. Verify that the chain brake engages properly and that the chain moves smoothly with light finger pressure. Reconnect the spark plug only after you are certain there are no loose parts. Do a short idle test away from any obstacles to ensure the chain doesn’t contact the blade guard or clothing. If any abnormal noise or resistance appears, stop and re-evaluate the installation.
Common mistakes and troubleshooting tips
Common mistakes include neglecting to remove the spark plug, over-tightening the bar nuts, and failing to secure the chain brake. These issues can lead to incomplete disengagement, chain derailment, or kickback risk. Troubleshooting often involves re-checking tension, ensuring correct orientation of the chain, and verifying that the sprocket is clean and free of burrs. If you experience persistent binding, consult the user manual and consider professional service for safety-critical parts.
Tools & Materials
- Safety gloves(Cut-resistant, snug fit, non-slip palms)
- Safety glasses or goggles(Impact-resistant lenses; side shields preferred)
- Hearing protection(Ear muffs or plugs based on environment)
- Screwdriver or socket wrench(Appropriate bit for side cover screws)
- Dry rag or cloth(Wipe oil and pitch from bar and chain)
- Replacement chain (optional)(If you're removing for replacement, have a matched chain ready)
- Owner's manual for your Husqvarna model(Model-specific tension specs and rotor notes)
- Bar cleaning brush or old toothbrush(Use to clean bar groove and oil passages)
Steps
Estimated time: 25-40 minutes
- 1
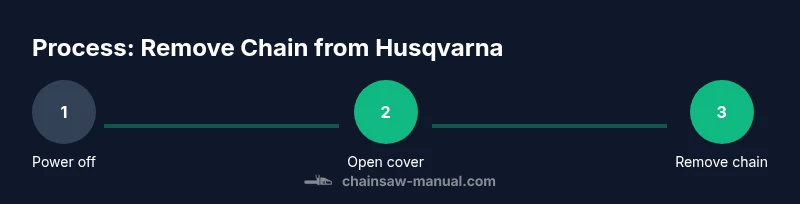
Power off and secure the saw
Power off the saw and disconnect the spark plug wire. Place the unit on a stable surface and engage the chain brake. Let it cool if recently used. This initial safety check prevents accidental starts.
Tip: Always assume the chain is sharp; keep your hands away from the bar edge. - 2
Open the side cover
Use the screwdriver or socket wrench to remove the screws holding the side cover. Gently lift the cover to reveal the chain and bar. Keep track of screws and washers for reassembly.
Tip: If screws resist, apply a light penetrating oil and wait 1–2 minutes before retrying. - 3
Loosen the bar nuts
Loosen the bar nuts enough to relieve tension but do not remove them completely yet. If the chain is too tight, you may need to rotate the bar slightly to access the chain.
Tip: Loosen evenly to avoid warping the bar or misalignment. - 4
Relieve chain tension
With the cover off, gently rotate or move the bar to relieve tension on the chain. Do not force the chain free; apply just enough movement to free links from the bar groove.
Tip: Use a rag to protect fingers from sharp links. - 5
Remove the chain from the drive sprocket
Slide the chain off the drive sprocket, keeping the chain intact. If needed, rotate the bar to align the chain to exit smoothly. Be mindful of sharp links and teeth.
Tip: Support the chain to prevent it dropping into the saw’s internal area. - 6
Inspect and prepare for reinstall
Examine the chain, bar, and sprocket for wear or damage. Clean oil deposits and pitch from the bar groove with a rag or brush. If worn parts, plan replacements before reassembly.
Tip: Note any wear patterns to guide replacement decisions. - 7
Reinstall the chain with proper tension
Position the chain on the bar with the drive links aligned to the sprocket. Reattach the side cover and snug the bar nuts. Check tension by manually rotating the chain; ensure a slight sag midway.
Tip: Follow manufacturer tension specs—too tight or too loose reduces performance and safety. - 8
Test and verify
Reconnect power only after securing all parts. Perform a light idle test away from people or objects to ensure the chain moves smoothly. If there is resistance or unusual noise, stop and recheck.
Tip: Always perform a final functional check before resuming work.
FAQ
Can I remove the chain without removing the bar?
In most Husqvarna models, you need to remove the side cover and loosen the bar nuts to relieve tension before detaching the chain. The bar can usually stay in place if you can access the chain clearances, but some setups require removing the bar entirely.
Generally you must remove the side cover and loosen the bar nuts to release tension before removing the chain.
What safety gear should I wear during chain removal?
Wear cut-resistant gloves, eye protection, and hearing protection. Ensure the chain brake is engaged and the saw is powered off before starting.
Wear gloves, eye protection, and hearing protection, and make sure the saw is off and the chain brake is engaged.
How do I check chain tension after reinstalling?
Reinstall the chain with a slight sag when pushed midway along the underside. Manually rotate to verify smooth movement without binding.
After reinstalling, check for a slight sag and smooth rotation by hand.
What if the chain won’t come off easily?
Recheck tension and cover alignment. Ensure the drive links are oriented correctly and there’s no pitch buildup causing sticking. If stubborn, retrace steps and recheck safety features.
If it won’t come off, recheck tension and alignment; don’t force it.
How often should I clean the bar groove after removal?
Clean the bar groove and oil passages after every removal or maintenance session to prevent pitch buildup and ensure smooth reinstallation.
Clean the bar groove after every maintenance session.
Watch Video
The Essentials
- Power off and secure the saw before touching the chain
- Follow model-specific tension specs for safe reinstall
- Inspect the chain, bar, and sprocket for wear
- Test run safely after reassembly to confirm proper operation