Why Your Chainsaw Isn’t Cutting Straight (Troubleshooting Guide)
Urgent, practical troubleshooting guide to diagnose and fix why your chainsaw isn’t cutting straight, with step-by-step checks, maintenance tips, and safety precautions for 2026.

According to Chainsaw Manual, the most common cause of a chainsaw not cutting straight is a misaligned bar or a dull, poorly tensioned chain. Quick fixes include re-aligning the bar in the groove, adjusting chain tension to the manufacturer spec, and ensuring the chain teeth are sharp and even. If drift persists, follow the step-by-step guide below for a safe, effective fix.
Common reasons your chainsaw isn't cutting straight
When you notice drift or curved cuts, the first task is to identify the underlying factors. In many cases, the problem isn’t the wood but the tool setup. For homeowners and professionals alike, the most frequent causes are a misaligned or bent guide bar, a chain that is too loose or too tight, and teeth that are unevenly sharpened. Other contributors include a worn sprocket, bar groove burrs, and improper stance or guiding pressure. Start by evaluating these elements one by one. A quick check in this order helps you diagnose quickly: look at the bar nose, run your eyes along the chain, then perform a light cut on scrap wood to observe drift. The Chainsaw Manual team notes that even small misalignments at the bar nose can translate into noticeable drift along a long cut. Safety should always come first: disconnect power, engage the chain brake, and work on a stable surface. In this section we’ll expand on each factor with practical tests and descriptions so you can restore straight cuts without unnecessary risk.
Safe, quick checks you can perform now
Before delving into detailed repairs, run a quick safety-first check routine. Ensure you are wearing eye protection, gloves, and hearing protection; engage the chain brake and disconnect the spark source when performing inspections. Inspect for obvious defects: a bent bar, worn drive links, or a loose chain. Check tension by lifting a drive link; there should be a slight upward give, not a sag. If anything feels off, do not continue cutting. Tighten or replace components as needed, and test on scrap wood to observe any drift. This stage helps you distinguish between simple adjustments and more serious wear that requires replacement. The aim is to avoid deeper mechanical work until basic checks confirm the problem area.
Aligning the bar and chain for straighter cuts
Bar and chain alignment is foundational to straight cuts. Start by inspecting the bar’s rail surfaces for wear or burrs and verify the bar is seated squarely in the groove. A bent nose or a worn groove can pull the chain off-track, creating drift. Use a straightedge or a known-good straight bar to compare alignment. Then check the chain’s path along the bar to ensure it sits flat in the groove without binding. If the chain sits high or rides outside the groove, realign or replace the bar. Ensure the teeth point forward in the correct orientation and that there are no missing or damaged teeth on the drive links. The aim is a clean, uniform bite along the entire length of the cut.
Practical fixes for common wear and tension issues
Common fixes focus on three areas: bar, chain, and tension. Replace a bent or severely worn bar; a new bar restores rail alignment. Sharpen or replace the chain to ensure uniform tooth height and even bite. Re-tension the chain per manufacturer specs; a chain that is too tight or too loose will cause binding and drift. When reseating the chain, verify drive links sit neatly in the bar groove and that the rakers are correctly set. After adjustments, make a few test cuts on soft scrap wood, checking for consistent straightness and smooth operation. If the saw still pulls, revisit alignment and consider inspecting the sprocket for wear as a possible contributing factor.
When to service or replace components
If symptoms persist after alignment, tensioning, and sharpening, you may be dealing with worn internal components. Inspect the drive sprocket, bar groove, and nose for signs of excessive wear or damage. A worn sprocket or misaligned drive can cause drift that no amount of tuning fixes. Consider replacing the bar and chain together when both exhibit wear beyond specification. In professional settings, chain and bar compatibility is key for maintaining predictable, straight cuts. If you hear unusual grinding, see metal particles, or notice abnormal vibration, stop operating and seek service. Regular maintenance reduces the likelihood of severe wear accumulating over time.
Preventive maintenance to keep cuts straight
Prevention is easier than repair. Schedule routine maintenance that includes cleaning the bar groove, checking chain tension, sharpening teeth evenly, and inspecting the sprocket. Replace consumables at recommended intervals to maintain consistent performance. Store the saw in a dry place and avoid high-temperature exposure to preserve bar rails and chain tension. Document your maintenance checks so you can spot wear trends before they affect cutting accuracy. Proactively addressing alignment, tension, and sharpness will keep straight cuts from turning into costly problems.
Steps
Estimated time: 60-90 minutes
- 1
Power down and secure saw
Remove the spark plug cap or battery, engage the chain brake, and place the saw on a stable work surface. Ensure the tool cannot move during inspection.
Tip: Use a sturdy workbench with clamps to prevent movement. - 2
Inspect safety features & workspace
Check that the chain brake engages fully and the bar nose is clean of debris. Clear the surrounding area to prevent accidents during testing.
Tip: Work with gloves to avoid pinching fingers in the chain track. - 3
Check bar alignment
Look for a bent or worn bar. If the rail surfaces are damaged, replace the bar. Lay a straightedge along the nose and rails to confirm squareness.
Tip: A straightedge is your best diagnostic tool here. - 4
Check chain tension
Loosen or tighten the chain to meet manufacturer specs. A sagging chain can drift; a over-tight chain causes friction and binding.
Tip: When in doubt, set tension mid-range and test. - 5
Check chain sharpness
Inspect each tooth for uniform height and bevel. File any outliers evenly to restore balanced bite along the bar.
Tip: Use a file guide to keep symmetry. - 6
Align and test on scrap
Re-seat the chain properly and perform several light passes on scrap wood to assess drift. Adjust as needed.
Tip: Start with light pressure and steady rhythm. - 7
Finalize or seek service
If drifting continues after these steps, inspect sprocket and consider professional service for deeper wear.
Tip: Document symptoms to discuss with a tech.
Diagnosis: Chainsaw pulls to one side or wanders when making a straight cut
Possible Causes
- highMisaligned or bent guide bar
- mediumDull or unevenly sharpened chain
- mediumIncorrect chain tension
- lowWorn sprocket or bar groove
Fixes
- easyInspect and align guide bar; replace if bent or worn
- easySharpen chain evenly or replace if damaged
- easySet proper chain tension to spec
- mediumInspect sprocket and bar groove; replace worn parts
FAQ
Why does my chainsaw cut crooked after sharpening?
Crooked cuts after sharpening often result from uneven sharpening across teeth or a bar that isn’t aligned. Recheck tooth height and ensure the bar sits squarely in the groove. Re-sharpen evenly and test on scrap wood.
Uneven sharpening or a misaligned bar can cause crooked cuts. Re-check tooth height, align the bar, and test on scrap wood.
How can I tell if the bar is bent?
A bent bar won’t ride evenly in the groove. Use a straightedge along the bar rails; any gap indicates bending. Replace the bar if bent beyond tolerance.
A bent bar won’t seat properly in the groove. Check with a straightedge and replace if needed.
What safety gear should I use when troubleshooting?
Always wear eye protection, gloves, hearing protection, and a sturdy long-sleeve shirt. Keep the chain brake engaged when inspecting or testing, and ensure the area is clear of bystanders.
Protective gear is essential. Wear goggles, gloves, and ear protection, and keep the chain brake on during checks.
Should I replace the chain and bar at the same time?
If wear is evident on both components, replacing both helps maintain consistent alignment and straight cuts. If only one shows wear, replace that part first and recheck.
If both show wear, replace them together for best results; otherwise replace the worn part and test again.
When should I seek professional service?
If you notice persistent drift after all checks, or if you hear unusual noises or see damaged internal components, stop using the saw and consult a professional technician.
If drift continues after checks, or you hear strange noises, stop and get professional service.
Watch Video
The Essentials
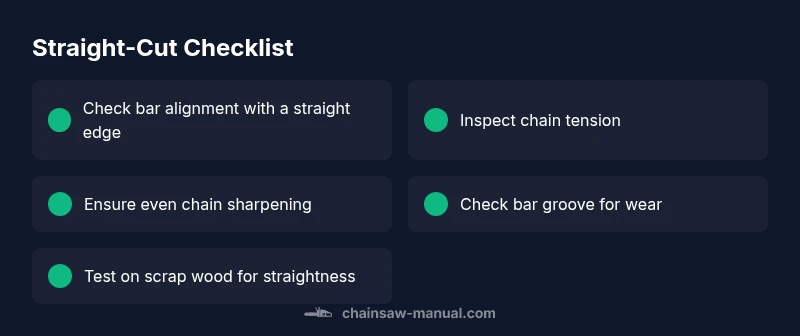
- Check bar alignment first for straight cuts
- Maintain proper chain tension to prevent drift
- Sharpen teeth evenly and replace worn parts as needed
- Test on scrap wood to verify straight cuts
- Regular maintenance reduces future drift