How to Sharpen Chainsaw Without Removing the Chain
Learn to sharpen a chainsaw without removing the chain using a filing guide on the bar. Safe, practical steps, proper tools, and maintenance tips to restore cutting efficiency while preserving chain tension.

You can sharpen a chainsaw blade without removing the chain by using a proper filing setup on the full guide bar. You’ll need a round file, a compatible filing guide, a depth-gauge tool, PPE, and a steady work surface. This guide walks you through a safe, on-bar sharpening process to restore tooth sharpness while preserving chain tension and alignment.
Why Sharpen on the Bar Matters
According to Chainsaw Manual, sharpening on the bar without removing the chain is a practical, time-saving technique for routine maintenance. When you’re equipped with the right tools and a careful routine, you can restore tooth geometry and cutting efficiency while the chain remains mounted, preserving tension and alignment with the drive sprocket. This approach minimizes downtime and reduces the risk of introducing misalignment during reassembly. It also helps you spot wear patterns on individual teeth in real time, so you can tailor your filing to how the saw actually cuts. While this method is accessible to homeowners and professionals alike, it demands careful technique, a stable setup, and strict safety practices. In the sections that follow, we’ll cover how to set up, what to file, and how to verify the chain remains true while it stays mounted on the bar. This is a practical skill that reinforces safe, productive chainsaw use.
Tools and Materials for On-Bar Sharpening
Before you start, gather everything you need. The essential toolkit includes a round file sized to your chain pitch, a compatible filing guide to maintain angle and depth accuracy, a depth-gauge tool to keep rakers correct, and a sturdy vise or clamp to secure the bar during work. You’ll also want a clean cloth, a brush for debris, and appropriate PPE: safety glasses or goggles, cut-resistant gloves, and hearing protection if you’re in a noisy area. Optionally, have a tension gauge to verify chain tension after sharpening and a spare file to account for wear. Chainsaw Manual analysis shows that using matched file sizes with a guide yields more consistent results and lowers the risk of uneven filing. Keep lubricating oil and a spare chain nearby for quick maintenance. Maintain a dry, cool blade to prevent heat damage to the steel and the bar.
- Note: Keep the work area clean and well lit; a tidy workspace reduces mistakes and keeps you safer during on-bar sharpening.
Setting Up Your Workspace
Find a stable, well-lit area. Engage the chain brake and secure the bar with a vise or clamps designed for bar work, making sure the chain cannot move during filing. Wipe the saw clean and inspect for any loose components. Position yourself so you have direct access to all teeth and can see the file’s bite as you work. Keep the bar cool; if it’s warm, pause between teeth to avoid heat buildup, which can affect metal hardness and bar integrity. Arrange the files in order and keep the teeth organized so you know which tooth to file next. By establishing a clean, controlled environment, you reduce mistakes and maintain safety throughout the process.
- Safety tip: never file while the chain is loose or the bar is unstable, as slips can cause serious injury.
Filing Technique: Angle, Gullet, and Per-Tooth Filing
Start with the cutters: place the file at the standard angle relative to the tooth face and use long, smooth strokes to restore the cutting edge. File each tooth in sequence, keeping the same angle and applying steady pressure so all teeth are sharpened evenly. Pay attention to the depth gauges—these control how much material is removed and influence cutting performance. Use the filing guide to ensure your contact with the tooth face remains consistent, avoiding over- or under-filing. When you reach the gullet area, keep the file steady and avoid twisting. After a complete pass on every tooth, check for consistency on both sides. The goal is uniform edge geometry across the chain for predictable cutting.
Handling Depth Gauges and File Sizes
Depth gauges (rakers) set how much wood each tooth removes; you adjust them with the depth gauge tool and a fine file as needed. Match your file diameter to your chain pitch; a mismatch can lead to incorrect filing or uneven cutting. Check for burrs along the tooth edges and remove them gently with a light pass of the flat file if needed. After filing, re-check chain tension and inspect the bar groove for debris. A properly set depth gauge helps prevent clogging and kickback, especially during long or heavy cuts. If the gauge looks worn, replace it before proceeding to avoid inaccurate sharpening.
Maintenance Steps After Sharpening
Clean the groove, remove burrs, and re-lubricate the bar and chain before use. Wipe the chain to remove filings and ensure the rivets and drive links are intact. Inspect the drive sprocket and drive links for wear, replacing as needed. Re-tension the chain according to your saw’s manual, and run a quick test cut in a soft material to verify performance. Store the saw in a dry, cool place after use and note any wear patterns you observed for future reference. Regular, on-bar sharpening keeps your saw ready for work without the hassle of chain removal.
Common Mistakes and How to Avoid Them
Over-filing reduces tooth height and weakens cutting efficiency. Uneven filing leads to asymmetrical teeth that pull or bind. Skipping depth-gauge checks results in teeth that are too high or too low. Not securing the bar can cause slips and injuries. Always work methodically, check your work frequently, and stop if something feels off. Regular comparisons with a known-good tooth will help you maintain uniformity and avoid common pitfalls.
Safety Considerations and PPE
Always wear eye protection and cut-resistant gloves; hearing protection is recommended in busy work zones. Keep bystanders away and ensure the chain brake is engaged when making adjustments. If the saw becomes hot, let it cool before continuing and avoid forcing components. Work with a firm stance and maintain balance to prevent slips. Proper PPE and a safe workspace are essential to performing on-bar sharpening without removing the chain.
Tools & Materials
- Round file (size matched to chain pitch)(Select a file diameter that matches your chain pitch; wrong size can under- or over-file.)
- Filing guide(Keeps angle consistent across all teeth.)
- Depth-gauge tool(Used to check and set raker height.)
- Bar vise or clamps(Secures the bar to prevent movement.)
- PPE (gloves, safety glasses, hearing protection)(Protects hands, eyes, and hearing during filing.)
- Clean rag and brush(Keeps debris off the bar and teeth during work.)
- Tension gauge (optional)(Helps verify correct chain tension after sharpening.)
- Lubricant or bar oil(Re-lubricate chain after sharpening to minimize wear.)
Steps
Estimated time: Total time: 20-40 minutes
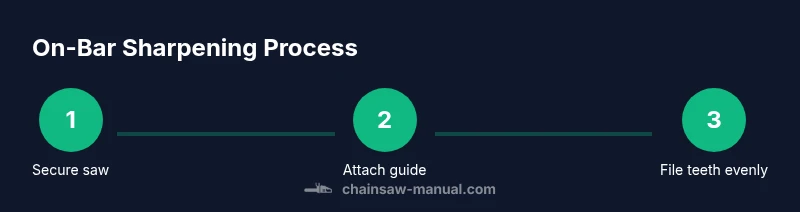
- 1
Secure the saw and prepare workspace
Place the saw on a stable, non-slip surface and engage the chain brake. Use a clamp or vise to secure the bar so the chain cannot move during filing. Clear debris and ensure you have good lighting and a comfortable stance. This step reduces the risk of accidents and enables precise filing.
Tip: Keep your non-dominant hand away from the teeth and use a stable stance to prevent slips. - 2
Attach and align the filing guide
Attach the filing guide to the bar so it runs along the tooth face and sits evenly against the bar. Confirm the guide is parallel to the chain and that it doesn’t wobble when you apply pressure. Proper alignment ensures consistent angles across all teeth.
Tip: Check alignment from multiple angles and adjust before you touch any tooth. - 3
Position the file and brace the tooth
Set the round file in the guide at the correct contact point on the tooth face. Hold the file steady with both hands, keep the file vertical to the tooth plane, and prepare for light, controlled strokes. Ensuring a stable brace reduces wobble and improves edge quality.
Tip: Avoid overtightening your grip; a relaxed hand reduces tremor and improves control. - 4
File each tooth evenly
File all cutters with long, smooth strokes, maintaining a consistent angle for every tooth. Alternate sides to balance wear and check the fit with the depth-gauge after a few teeth. Don’t over-file; you want to restore sharpness, not remove excessive material.
Tip: Count teeth filed to maintain uniform wear across the chain. - 5
Check and adjust depth gauges
Use the depth-gauge tool to verify raker height; remove metal only as needed to bring the gauge flush with the tooth base. If worn, replace the gauge or re-tune with the proper gauge tool. Correct depth gauge settings improve feed rate and prevent kickback.
Tip: Never skip depth checks; inaccuracies can change cutting behavior dramatically. - 6
Test cut and finish
Re-tension the chain if needed and perform a light test cut in soft wood to verify performance and smoothness. Inspect for any burrs and remove with a light touch if necessary. Wipe the bar and chain, then apply a thin coat of bar oil before the next use.
Tip: A quick test cut confirms consistent filing before heavy-duty work.
FAQ
Can you sharpen a chainsaw without removing the chain?
Yes. With the right tools and technique, you can sharpen the chain while it remains mounted on the bar. This preserves tension and reduces downtime, provided you follow safety steps and verify depth gauges after filing.
Yes, you can sharpen on the bar with proper technique. Always follow safety steps and check depth gauges afterward.
What file size should I use for on-bar sharpening?
Choose a round file that matches your chain pitch and use a filing guide to keep angles consistent. A mismatched file can lead to uneven teeth and unsafe cutting.
Pick a file that matches your chain pitch and use a guide to keep the angle consistent.
How often should you sharpen on-bar in practice?
Sharpen when performance declines, when the saw struggles to cut, or after noticeable dulling. Regular quick checks during maintenance help you catch dull teeth early.
Sharpen whenever cutting slows or drags; check teeth regularly.
Is on-bar sharpening safe for beginners?
Yes, with careful setup, PPE, and slow, deliberate filing. Beginners should practice on a stable surface and verify each tooth’s angle before proceeding.
Yes, but go slowly and wear PPE to stay safe.
Will on-bar sharpening affect bar alignment?
If performed with a proper filing guide and stable setup, alignment remains correct. Check chain tension and drive links after sharpening to confirm.
With a guide and stable setup, alignment stays correct; re-check tension afterward.
Watch Video
The Essentials
- Sharpen on-bar safely with a proper filing setup.
- Maintain consistent angles and inspect depth gauges regularly.
- Secure the bar and wear PPE at all times.
- Verify tension and perform a test cut before heavy work.