Proper Way to File a Chainsaw: Sharpening Guide 2026
Learn the proper way to file a chainsaw with a safety-first, step-by-step sharpening guide from Chainsaw Manual. Covers file types, angles, depth gauges, and long-term maintenance for homeowners and pros.

The proper way to file a chainsaw involves selecting the right round file and guide, securing the bar, and maintaining consistent angles while filing each cutter. Use light, steady strokes, check the depth gauge, and alternate sides to keep the chain even. Finish with deburring and a final inspection before use.
Why filing a chainsaw matters
A sharp chainsaw cuts more efficiently, reduces fuel consumption, and minimizes kickback risk. The proper way to file a chainsaw keeps performance high and safeties intact. Regular sharpening maintains chain geometry, prevents tooth chatter, and extends bar life. According to Chainsaw Manual, a well-tuned chain transfers energy smoothly from the bar to the wood, reducing user fatigue and improving control. Dull teeth require more force, generate extra heat, and can cause binding or accidental digs. This section explains when to file, what you’re protecting, and how filing fits into a practical maintenance routine that keeps your saw ready for tough work. Homeowners, DIY enthusiasts, and professionals benefit from a consistent approach that prioritizes safety and reproducible results.
Understanding file types and sharpening angles
The proper way to file a chainsaw relies on choosing the right file and maintaining consistent angles. Most chains use a round file sized to match the chain pitch, paired with a filing guide to preserve the top-plate angle. A depth gauge tool ensures each tooth sits at the correct height above the guide bar. Flat files are sometimes used to clean burrs or deburr the rivets and raker sections. When selecting files, match the diameter to the chain pitch and assess the file for burrs or glazing, replacing it when worn. If your chain has a coating for corrosion resistance, remove it before sharpening to get accurate readings. Chains with varied tooth shapes may require a slightly different approach, but the core principle remains: restore a clean, even edge without altering the chain’s geometry.
Preparing your work area and safety gear
Set up a stable workspace with a vise or clamps to hold the bar firmly. Work in a bright environment and wear safety glasses, cut-resistant gloves, and hearing protection as needed. Keep filings contained in a dedicated tray to prevent metal shavings from scattering. Maintain proper chain tension before starting to prevent derailment or pinching during filing. Light lubrication helps dissipate heat and keeps filings from sticking to metal. If you’re working on an electric saw, unplug it or remove the battery to minimize the risk of accidental starts. A clean, organized space reduces mistakes and promotes a safer sharpening session.
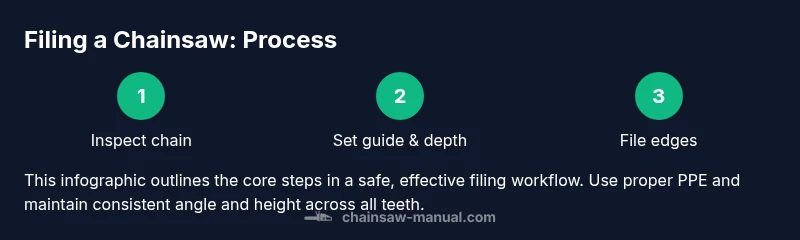
Step-by-step fundamentals for filing (high-level overview)
This overview introduces the core actions in the proper way to file a chainsaw. 1) Inspect the chain for dull teeth, chipped cutters, or raised rivets. 2) Secure the saw and set up the filing guide to maintain the correct angle. 3) File each cutter with smooth, even strokes, staying at a consistent height above the top plate. 4) Alternate sides to preserve symmetry and even wear across the chain. 5) Check the depth gauge after filing and remove burrs. 6) Wipe the chain clean and re-check tension before returning to work. These steps form the foundation of a safe, effective sharpening session.
Common mistakes and how to avoid them
Avoid over-filing, which lowers the depth gauge height and increases kickback risk. Do not file while the saw is hot or after prolonged use, as heat can dull teeth faster. Slow, deliberate strokes beat rushing, which creates uneven wear. Never switch directions mid-tooth; maintain a consistent filing direction to preserve geometry. Keep the filing guide aligned with the tooth edge and avoid tilting it, which would misalign the angle. Finally, inspect the drive links for wear and replace them if they show signs of damage rather than trying to compensate with extra filing.
Maintenance after filing and long-term care
After filing, wipe down the chain and apply a light oil to prevent rust and heat buildup. Re-tension the chain according to your bar and saw specifications, and keep the bar rails clean from filings. Store sharpening tools in a dry, organized space to avoid corrosion or loss. Periodic inspections of the drive sprockets, rivets, and depth gauge help maintain performance between sharpenings. With a routine that combines proper filing technique, appropriate tool selection, and safe handling, your saw stays reliable for longer and reduces the likelihood of costly downtime.
Tools & Materials
- round file (matching chain pitch)(Choose the correct diameter for your chain pitch; inspect for burrs and replace if worn)
- filing guide(Keeps the file at the correct angle relative to the top plate)
- depth gauge tool(Ensures each tooth height above the guide is correct)
- file handle(A secure grip improves control and reduces hand fatigue)
- flat file(Optional for deburring rivets and smooth edge cleanup)
- safety glasses(Protect eyes from flying metal filings)
- gloves(Non-slip gloves for a firm grip; avoid loose fabric)
- workbench vise or clamp(Secures the bar for stable filing)
Steps
Estimated time: 25-40 minutes
- 1
Inspect chain and secure setup
Begin by visually inspecting each cutter for dullness, chips, or warping. If any tooth looks damaged, defer sharpening and replace the chain. Secure the saw in a stable vise, ensure the bar is clean, and tension the chain according to manufacturer guidance.
Tip: Take a few test strokes on a spare tooth to confirm grip and alignment before proceeding. - 2
Position filing guide and depth gauge
Attach the filing guide to the tooth at the correct height and ensure the depth gauge sits flush against the bar rail. The goal is to maintain a consistent height across all teeth so the top plate edges remain uniform.
Tip: Double-check the guide’s alignment after any minor movement to prevent angled wear. - 3
File the cutter edges
Use smooth, unbroken strokes with the round file, keeping the edge of the file aligned with the reciprocal angle of the tooth. File on one side of the chain, then switch to the other side to maintain symmetry.
Tip: Do not force the file; let the file do the work with light, consistent pressure. - 4
Maintain depth gauge and edge height
Periodically check the depth gauge as you file to ensure each tooth remains at the correct height. If the gauge reads high, file accordingly; if low, you’ve filed too much and must re-evaluate tooth height.
Tip: A quick re-check after every few teeth saves time later. - 5
Alternate sides evenly
Rotate filing surface between left and right sides to avoid uneven wear and to preserve chain balance. Equal attention on both sides helps prevent tracking issues during use.
Tip: Mark the side you finish on to avoid skipping sides. - 6
Deburr and clean
Remove any burrs along the edge with a light pass of the file or flat file if needed. Wipe away filings and inspect for nicks or damaged tips. Lubricate the chain lightly with oil to reduce heat buildup.
Tip: Never file past the tooth height target; over-filing weakens the chain. - 7
Re-check tension and test cut
Re-tension the chain after filing and clean the bar rail. Make a light test cut on a soft piece of wood to verify smooth operation and cutting efficiency before resuming work.
Tip: If it binds or catches, stop and re-check alignment and tension. - 8
Store tools and document maintenance
Wipe tools dry, apply a thin coat of oil to prevent rust, and store in a dry place. Note the chain’s date of sharpening for future reference and plan the next maintenance session accordingly.
Tip: Keep a small sharpener log to track wear patterns over time.
FAQ
What is the proper way to file a chainsaw?
Filing requires a round file matched to the chain pitch, a filing guide to keep angles consistent, and a depth gauge to control tooth height. Work in a well-lit space with PPE, then alternate sides for even wear.
Use a round file with a guide and depth gauge, file evenly on both sides, and wear PPE for safety.
How do I know when my chain needs filing?
If cutting becomes sluggish, requires more pressure, or teeth look dull, it’s time to file. Inspect for chips or rounding along the cutter edges before proceeding.
If it cuts slowly or you feel more resistance, it’s time to file.
Can I use a bench grinder instead of filing?
Grinders can overheat and alter tooth geometry, which increases kickback risk. Filing preserves the chain’s designed profile and is the recommended method.
A grinder can damage the chain; filing keeps the shape correct.
What PPE should I wear when filing?
Wear safety glasses, cut-resistant gloves, and hearing protection as appropriate. Keep loose clothing away from the chain.
Protect your eyes and hands, and secure loose clothing.
How often should I file during a job?
File as soon as you notice dullness or reduced performance. In frequent cutting, check and file periodically to maintain efficiency.
Check often and file when you notice reduced performance.
Is it necessary to file the depth gauge separately?
Yes. The depth gauge sets the tooth height above the top plate. If you file only the teeth, insufficient gauge control can lead to ineffective cutting and kickback.
Yes, check and adjust the depth gauge when filing.
Watch Video
The Essentials
- Use the correct file size and guide to maintain geometry.
- File with steady, light strokes and alternate sides evenly.
- Regularly check depth gauge and tension for safe operation.
- Keep tools organized and protect yourself with proper PPE.
- Document maintenance and re-sharpen when performance declines.