3d Printable Chainsaw: Safe, Practical DIY Guide for Home Use
A comprehensive, safety-first guide to designing, printing, and validating non-load-bearing 3d printed components and accessories for chainsaws. Learn material choices, testing workflows, and best practices for home DIY and professional use.

This guide shows how to plan, design, print, and validate safe, non-load-bearing 3d printed components for a chainsaw. It emphasizes safety-first thinking, material choices, testing workflows, and realistic expectations—focusing on guards, jigs, training aids, and non-structural accessories rather than any load-bearing parts. PPE and workspace safety come first.
Understanding the scope of a 3d printable chainsaw
A "3d printable chainsaw" typically refers to non-load-bearing components, training aids, guards, clamps, or accessory parts that can be prototyped with a 3D printer. It is essential to distinguish between components that carry mechanical load and those that do not. In practice, most safe, practical applications involve non-structural items that help with ergonomics, safety training, or workflow efficiency. The Chainsaw Manual team emphasizes safety-first thinking: never substitute printed parts for critical components like the bar, sprocket, or drive system. This section explains why the distinction matters and how it informs design decisions, testing plans, and risk assessment. Readers should view 3d printing as a tool for prototyping and education, not a replacement for validated, certified hardware.
- Practical outcomes include guards, holsters, jigs, mock-ups, and storage aids.
- Always consult local safety regulations and manufacturer guidelines before applying printed parts to real work.
- The goal is to reduce risk by supporting safer operation with enhanced visibility and training options.
Design principles for safe, non-load-bearing parts
Designing for safety starts with clarity about what will be loaded and what will not. For non-load-bearing components, prioritize features that improve ergonomics, alignment, and operator awareness. Key principles include generous wall thickness, fillets to avoid stress risers, and conservative tolerances to ensure easy fit without forcing components together. Add simple features such as rounded edges to reduce snag hazards and visible indicators to signal when a part should not be used under load. Avoid creating parts that could transfer shock or torque to the chainsaw’s essential systems. If a printed piece must contact metal components, design with inspection in mind: include features that make cracking or wear easy to spot during routine checks. Finally, document every decision and rationale for future review and safety audits.
Material choices and printer settings
Material selection directly affects durability, temperature resistance, and wear behavior. For non-load-bearing parts, PLA is a common starting point due to ease of printing and good dimensional stability. PETG offers better impact resistance and temperature tolerance, making it another strong option. ABS or ASA provide improved UV stability for outdoor use but can be trickier to print. When printing, use moderate to high wall thickness, 2+ perimeters, and a solid or low-infill fill pattern to improve rigidity without excessive print time. Consider post-processing steps like light sanding and clear coating to improve fit and durability. Always print a small test piece to verify fit before scaling up to larger parts.
Creating and validating CAD models for print
Begin with a clear brief: define the exact non-load-bearing function, mounting points, and interaction with existing hardware. Use CAD software to design the part with precise dimensions, then export to STL/OBJ for slicing. Add intentional clearance (0.2–0.5 mm) to accommodate printer tolerance and material creep. Validate the model by performing a virtual fit check against the real component it will accompany. If possible, print a scale model first to confirm geometry. Keep revision notes, version numbers, and a changelog to track improvements and safety-related changes over time.
Printing process: prepping, slicing, and post-processing
Prepare the printer by ensuring the bed is level, nozzle clean, and filament dry. Slice with conservative layer height (0.2–0.25 mm) and 20–30% infill for basic rigidity. Orient parts to minimize supports and maximize edge quality, using chamfers at sharp corners to reduce stress concentrations. After printing, remove supports carefully and perform light sanding to achieve a snug fit. Post-processing may include applying a protective coating or color-coded markers to indicate non-usable status in certain conditions. Document print settings and results so future prints can be replicated or adjusted as needed.
Assembly and fitting: how to test fit without load
Assemble printed parts with mock hardware or safe fasteners to verify alignment and fit. Do not engage the chainsaw’s real drive components during fit testing. Use calipers to verify critical diameters and mounting holes, and verify that edges are smooth to prevent scraping. If parts interfere with access to controls, rework the geometry rather than forcing a fit. Record any interference and adjust the CAD model for subsequent prints. This stage focuses on ergonomic comfort, visibility, and operator safety rather than performance under load.
Safety tools, PPE, and workspace setup
Working with chainsawn related tooling—even for training props—requires proper PPE: safety glasses, cut-resistant gloves, and hearing protection where appropriate. Maintain a clean, well-lit workspace with a dedicated area for printing, post-processing, and inspection. Keep a non-slip mat beneath the printer to reduce movement during operation. Segregate prototype parts from live tools to minimize cross-contamination of safety risks. Establish a simple checklist to ensure PPE and workspace safety before each print and post-processing session.
Practical applications: guards, jigs, and training aids
3d printed components can greatly enhance safety training and workflow efficiency. Examples include guard prototypes, clamping jigs for alignment tasks, mock chainsaw handles for ergonomic testing, and storage fixtures for spare parts. Training aids help new users learn safe procedures without exposure to real cutting events. Each application should be clearly labeled as non-functional for live operation and include visual cues that remind users not to engage with powered components. Emphasize repeatable, safe procedures that can be practiced offline.
Common failure modes and how to avoid them
Common failures include cracking under impact, warping from temperature exposure, and poor fit leading to rattle or misalignment. To reduce risk, design with conservative tolerances and use stronger materials for outdoor or hot environments. Verify layer adhesion and ensure print orientation minimizes weak planes. Inspect printed parts after exposure to sunlight or heat, and retire parts showing deformations. Maintain a log of failures and iteratively improve designs to promote safer, longer-lasting results.
Compliance and ethical considerations
Even for learning projects, comply with local laws and safety standards. Avoid using printed parts in critical areas of a chainsaw or in places that could affect its safety or performance. Respect IP rights when sourcing CAD files and templates; prefer open-source or author-approved designs. Clearly label all parts as non-functional for live operation and provide honest safety guidance to users. The goal is to advance knowledge and safety awareness without encouraging misuse.
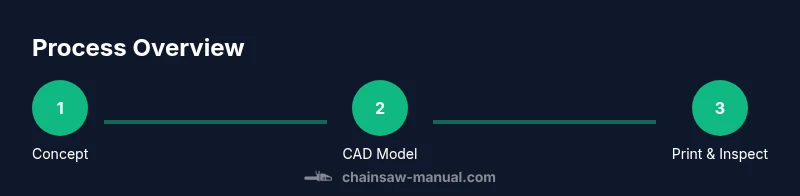
Project plan: from idea to first prototype
Start with a simple concept that clearly benefits safety or training. Draft a brief design spec, then model the component in CAD and print a small test piece. Evaluate fit, ergonomics, and safety indicators, and capture feedback from a colleague or supervisor. Iterate with updated CAD files and additional tests until the prototype meets safety criteria and documentation standards. Finally, assemble a non-load-bearing version with clear labeling and usage guidelines for end-users.
Tools & Materials
- 3D printer(For prints at least 200 × 200 mm build area; ensure stable mount for post-processing.)
- Filament (PLA, PETG, or ABS)(Choose based on strength, temperature exposure, and outdoor use; PETG often offers better impact resistance.)
- CAD software(For designing or editing non-load-bearing parts; many free options available.)
- Slicing software(Used to prepare STL/OBJ files for printing; adjust tolerances and safety margins.)
- Calipers or digital ruler(Precise measurements to ensure proper fit and alignment.)
- PPE (safety glasses, gloves, hearing protection)(Mandatory during printing, handling prints, and post-processing.)
- Post-processing tools(Sandpaper, needle files, and deburring tools for smooth finishes.)
- Non-load-bearing test fixtures(Dummies or mock assemblies to validate fit and ergonomics before real use.)
Steps
Estimated time: 6-8 hours
- 1
Define scope and safety
Clarify that the printed parts will be non-load-bearing and intended for safety training, guards, or fixtures. Establish clear safety boundaries and document constraints before any design work.
Tip: Write down the intended use and non-use scope to prevent scope creep. - 2
Source or create CAD model
Obtain a CAD model or sketch a design that meets the non-load-bearing requirements. Include mounting interfaces and clearances for printer tolerance.
Tip: If starting from a template, trim features that could contact moving parts. - 3
Choose materials and settings
Select a filament suitable for the environment and print parameters that balance strength with print efficiency. Set conservative wall thickness and adequate infill.
Tip: Test with a small sample piece to validate fit before scaling up. - 4
Export and slice with margins
Export to STL/OBJ and slice with cautious tolerances; add a visible clearance around critical fit areas.
Tip: Enable cooling enhancements for better print quality in small features. - 5
Print a test piece
Print a small representative segment to verify geometry, fit, and ergonomics without risking larger parts.
Tip: Inspect layers closely for delamination or warping before proceeding. - 6
Inspect fit and document results
Check alignment with the actual tool and existing accessories. Record measurements and any deviations.
Tip: Take photos and notes to guide future iterations. - 7
Iterate design
Modify CAD based on feedback and reprint. Focus on improving safety indicators and ease of use.
Tip: Limit changes per iteration to isolate effects. - 8
Finalize non-load-bearing accessory
Finalize a version that clearly communicates it is non-functional for live operation and document usage guidelines.
Tip: Add color-coding or labels for quick visual cues.
FAQ
What is a 3d printable chainsaw?
A 3d printable chainsaw typically refers to non-load-bearing parts, guards, jigs, or training aids designed to improve safety or ergonomics. It is not a substitute for essential, load-bearing chainsaw components.
A 3d printable chainsaw usually means non-load-bearing parts or training aids, not a replacement for critical components.
Can printed parts be used on a real chainsaw?
Printed components should never replace critical, load-bearing parts on a real chainsaw. Use printed parts only for training, guards, or non-structural accessories with explicit safety labeling.
Printed parts should only be used for training or non-load-bearing accessories, never on critical parts.
Which filaments work best for outdoor use?
For outdoor or heat exposure, PETG or specialty materials offer better durability than standard PLA. Always account for UV stability and environmental conditions in your design and post-processing.
PETG is often better than PLA for outdoors, but check UV exposure and temperature limits.
How should I test a printed part safely?
Test printed parts in a controlled, non-operational setup using mock hardware. Verify fit, clearance, and ergonomics before any attempt to use with live tools.
Test with a non-operational setup and avoid engaging live chainsaw parts.
Where can I find CAD models or templates?
Look for open-source CAD repositories or design communities with explicit safety notes. Prefer designs that are clearly labeled for training or non-functional use.
Check open-source CAD libraries and look for safety-labeled, non-functional designs.
Are there safety standards I should follow?
Follow general workshop safety practices and local regulations. Treat all printed parts as non-functional unless explicitly certified for safety use.
Follow standard workshop safety rules and label printed parts clearly as non-functional.
Watch Video
The Essentials
- Start with non-load-bearing prints for safety.
- Document design decisions and testing results.
- Choose materials with appropriate temperature and impact resistance.
- Always label printed parts as non-functional for live operation.