Chainsaw Aftermarket Exhaust: A Practical Upgrade Guide
Learn how to evaluate compatibility, choose a kit, and install a chainsaw aftermarket exhaust safely. This guide covers design impacts, safety, maintenance, and practical steps for homeowners, DIYers, and professionals.

An aftermarket exhaust for a chainsaw can improve throttle response and perceived performance, but compatibility and safety are critical. This quick guide outlines how to assess your saw, select a compatible exhaust, and install it safely. You’ll learn the key steps, safety precautions, how to verify fit, and what to expect during the initial test run.
What is a chainsaw aftermarket exhaust and why consider upgrading
A chainsaw aftermarket exhaust is a replacement exhaust system designed to improve gas flow, reduce weight, and adjust muffling beyond the stock unit. Upgrading can reduce back pressure, shed mass, and sharpen throttle response, which may translate into quicker midrange power delivery for some saws. However, results vary by engine size, tuning, and how the exhaust is mounted. According to Chainsaw Manual, compatibility and safe installation are the top priorities when considering this upgrade. This section helps you understand what aftermarket exhausts are designed to do, common myths, and how to evaluate whether an upgrade makes sense for your typical tasks, whether you’re felling trees, limbing, or trimming brush.
How exhaust design affects performance and safety
Exhaust design influences back pressure, flow, and scavenging, which can affect throttle response, fuel efficiency, and heat management. A well-designed aftermarket exhaust can reduce weight and improve exhaust gas evacuation, potentially making the engine feel more responsive at certain RPM ranges. Conversely, a poorly matched system can raise back pressure, create heat buildup, or alter timing in ways that degrade performance or reliability. Noise levels and spark arrestor compatibility are also important safety factors, especially for work in urban areas or regulated environments. Chainsaw Manual notes that any gains depend on the overall tune of the engine, carburetor settings, and the rest of the exhaust and intake system.
Compatibility considerations
Before purchasing, verify the exhaust kit supports your exact chainsaw model, engine displacement, and mounting interface. Key checks include the bolt pattern, mounting flange size, muffler inlet/outlet dimensions, and whether the kit provides a compatible gasket set. Installing an incompatible exhaust can leak exhaust gases, create heat concentration in unintended areas, or void warranties. Consider the saw’s current muffler construction, ignition system, and whether the kit requires carburetor re-tuning. Chainsaw Manual analysis shows that even a proven design may not suit every engine family, so model-specific guidance is essential.
Choosing an aftermarket exhaust kit
When selecting a kit, weigh weight savings against durability and noise. Materials range from aluminum to steel and sometimes titanium, each with different heat tolerance and longevity. Look for included mounting hardware, a reliable gasket, and a clear installation manual. Consider the kit’s back-pressure characteristics and whether it’s designed to maintain spark arrestor compatibility. The best choice minimizes added weight while preserving or improving reliability under typical operating loads. Remember, a good fit is more important than chasing maximum horsepower on a dirty, wooded job site.
Installation prerequisites and safety prep
Preparation is critical. Ensure you have a clean, stable workspace and the right PPE: eye protection, gloves, hearing protection, and sturdy footwear. Drain or safely manage fuel according to local rules, remove the spark plug cap to prevent accidental starts, and secure the bar and chain to prevent movement. Clean the mounting surfaces on the cylinder head and exhaust port to ensure a proper seal and fit. A proper pre-check minimizes the risk of exhaust leaks, heat hotspots, or bolt loosening during use.
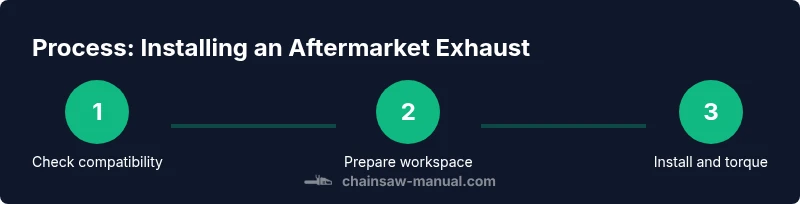
Step-by-step installation overview
This section provides a concise blueprint of the installation process so you know what to expect before you begin. The steps cover compatibility checks, disassembly of the stock exhaust, cleaning and preparing mounting surfaces, installing the aftermarket exhaust, torquing fasteners to spec, and performing a cautious test run to verify everything is functioning correctly. For a detailed, step-by-step procedure with time estimates, see the dedicated STEP-BY-STEP block below.
Tuning, break-in, and safety post-install
After installation, expect a break-in period where you help the engine settle into the new exhaust characteristics. Check idle quality, fuel delivery, and spark arrestor soot buildup during the first few operating hours. If you notice unusual noises, exhaust leaks, or overheating, stop and troubleshoot. Always follow local noise and emissions regulations, and remember that aftermarket exhausts can affect warranty coverage and resale value. Safety first: never operate a saw with hot components or in an unstable position, and always wear PPE.
Performance expectations vs safety and legality
While some users report crisper throttle response and perceived power gains, many factors influence actual performance, including engine size, carburetor tuning, and fuel mix. No upgrade should be used to bypass safety protocols or regulatory requirements. Check local noise ordinances and emission rules before using an upgraded exhaust in a regulated area. Chainsaw Manual emphasizes that upgrades are about improved reliability, better control, and safer operation when correctly matched to the saw and work environment.
Maintenance, inspection, and troubleshooting
Post-install maintenance is essential for longevity. Regularly inspect mounting bolts, gaskets, and the exhaust port for leaks or soot buildup. Clean the exhaust outlet and spark arrestor to prevent clogging, and monitor for unusual vibrations or heat. If you experience delayed starts, rough idle, or reduced cutting efficiency after an upgrade, review the kit’s compatibility and re-check torques and seals. Keeping a maintenance log helps you track service intervals and performance changes over time.
Authoritative sources: OSHA (osha.gov), NIOSH (cdc.gov/niosh), and University extension safety guidance provide foundational safety principles that apply to any powered tool upgrade.
Authoritative sources
- OSHA: https://www.osha.gov
- NIOSH: https://www.cdc.gov/niosh
- Extension safety guidance (example): https://extension.psu.edu/chainsaw-safety
Tools & Materials
- Chainsaw aftermarket exhaust kit(Includes muffler, mounting hardware, and gaskets specific to model)
- Gasket set appropriate to model(New gasket to ensure a proper seal)
- Torque wrench or driver with torque specs(Garden-variate or metric specs as per kit)
- Screwdrivers and wrenches set(Assorted sizes to fit fasteners on stock hardware)
- Anti-seize compound(Helps future removal and reduces galling)
- Spark plug wrench and accessible ignition source disconnect(Disconnect spark source to prevent starts)
- PPE kit (eye protection, gloves, hearing protection)(Essential safety gear for installation and testing)
- Fuel container and degreaser/solvent(Used for cleanup and safe fuel handling)
- Rags or shop towels(Clean up spills and wipe mounting surfaces)
Steps
Estimated time: 60-90 minutes
- 1
Check compatibility
Identify your chainsaw’s exact model, engine displacement, and mounting pattern. Compare the exhaust kit’s flange size and bolt layout to ensure a proper fit. If anything mismatches, do not force the fit—consult the kit manufacturer for alternatives.
Tip: Double-check model numbers from your saw’s user guide or bar code sticker before purchasing. - 2
Prepare the work area and safety gear
Set the saw on a stable workbench, engage the chain brake, and remove the spark plug cap to prevent accidental starting. Wear eye protection, gloves, and hearing protection. Have a fire-safe area and a metal tray to catch fuel spills.
Tip: Work in a well-ventilated area to minimize fumes and ensure good lighting for visibility. - 3
Relieve fuel and drain if recommended
If your kit instructions call for it, drain or safely manage the fuel in the tank. Avoid reusing old fuel after disassembly; fresh fuel helps with initial testing and reduces fouling risk.
Tip: Keep a fuel-safe container nearby and wipe spills promptly. - 4
Remove the stock exhaust
Loosen and remove the mounting bolts, noting their positions for reassembly. Gently detach the stock exhaust, taking care not to bend or damage the mounting studs. Inspect the exhaust port for residue and clean as needed.
Tip: Take photos during disassembly to reference during reassembly. - 5
Prepare mounting surfaces
Clean the cylinder head and exhaust port to remove carbon buildup and old gasket material. Ensure the mating surfaces are flat and free of debris to prevent leaks. If you see nicks or corrosion, address them before installation.
Tip: Use a lint-free cloth and isopropyl alcohol to prep the surfaces. - 6
Install the aftermarket exhaust
Position the aftermarket exhaust, align bolt holes, and hand-tighten fasteners first. Attach the gasket and any provided seals, then tighten to the manufacturer’s torque specification in a crisscross pattern to ensure even clamping.
Tip: Do not over-tighten; over-tightening can crush gaskets and cause leaks. - 7
Torque and check for leaks
Use a torque wrench to snug all fasteners to spec. Inspect the joint for exhaust leaks by running the engine briefly in a controlled, ventilated area. If you detect leaks, reseat the gasket and re-torque as directed.
Tip: Apply a light smear of gasket sealant only if the kit recommends it. - 8
Test run and evaluation
With all safety checks complete, perform a controlled test cut or idle run to assess throttle response, heat, and exhaust note. Listen for abnormal sounds or rattles, and monitor for overheating indicators. If everything is stable, proceed with a full, supervised work session.
Tip: Start with low throttle and gradually ramp up to normal load to avoid abrupt load on the engine.
FAQ
Do aftermarket exhausts always improve performance?
Not always. Gains depend on engine design, tuning, and how well the exhaust is matched to the saw. Some users notice crisper throttle response, while others see minimal changes. Always manage expectations and prioritize safety.
Performance gains vary by model and tune; expect safer, more controlled improvements rather than dramatic horsepower jumps.
How do I know if my saw is compatible with a given aftermarket exhaust?
Check the saw’s exact model, displacement, mounting pattern, and whether the kit includes matching gaskets and hardware. If any dimensional or interface elements don’t align, don’t force the fit—seek a model-specific option.
Know your model and match the kit’s mounting pattern and gasket to prevent leaks and fit issues.
Will replacing the exhaust void my warranty?
Upgrading exhausts can affect warranty coverage depending on the manufacturer and jurisdiction. Always review the warranty terms and consider consulting the manufacturer or an authorized service center before proceeding.
Check warranty terms and, if unsure, contact the manufacturer before upgrading.
Are aftermarket exhausts legal in my area?
Noise and emissions regulations vary by region. Some areas limit noise levels or require spark arrestors. Verify local rules before using an upgraded exhaust in a public or regulated workspace.
Local noise and emissions laws vary; check your area's rules before installing.
Is it safe to install an aftermarket exhaust without professional help?
A careful DIY install can be safe if you follow the kit instructions and basic safety practices. If you’re unsure about torque specs, gasket seating, or fuel handling, seek professional guidance.
You can DIY safely if you follow instructions and safety steps; consult a professional if unsure.
What maintenance is needed after installation?
Inspect bolts and gaskets regularly for leaks, clean the exhaust outlet and spark arrestor, and check for excessive heat or abnormal noises after use. A routine maintenance check helps prevent failures and extends life.
Regularly inspect and clean after use to keep the upgrade reliable.
Watch Video
The Essentials
- Verify compatibility before purchasing exhaust parts
- Torque fasteners to spec to prevent leaks
- Expect variable gains by model and tune
- Prioritize safety and PPE during installation
- Test under controlled conditions before work-site use