Replace Chainsaw Primer Bulb: Safe, Practical Guide
Learn how to replace a chainsaw primer bulb with a safety-first, step-by-step approach. This guide covers tools, materials, steps, tips, and troubleshooting for reliable performance.

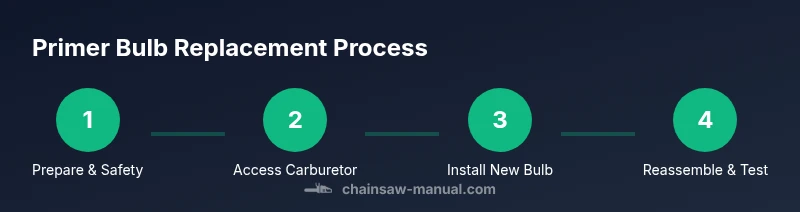
By following this guide, you will learn how to replace a chainsaw primer bulb safely and effectively. You’ll verify symptoms, gather the right replacement bulb, disconnect fuel lines, swap bulbs, and test for proper priming without leaks. This step-by-step approach minimizes fuel spills and engine damage. It emphasizes safety, correct orientation, and compatible parts.
Why replacing a primer bulb is sometimes necessary
A chainsaw primer bulb is a small, flexible diaphragm inside the carburetor that draws fuel into the engine before starting. Over time, the bulb can harden, crack, or lose elasticity, making priming difficult or impossible. If you notice a leaky bulb, fuel smells, or a hard time starting the saw, it’s a strong sign that replacement is needed. Replacing the primer bulb can restore reliable starting performance and fuel economy, while also reducing the risk of fuel leaks that could splash onto hot engine parts. In many models, an old bulb also affects choke engagement and idle consistency, so addressing it promptly helps the overall carburetor health. When you replace chainsaw primer bulb, use parts that match your carburetor and model for best results and safety.
Quick note on compatibility and parts
Primer bulbs come in several sizes and connection types. Always consult your model’s manual to identify the exact bulb size and hose barb diameter. If you can’t find a model-specific bulb, look for a universal kit with the same bulb diameter and compatible hose fittings, but avoid forcing a mismatch, which can lead to leaks or air leaks that degrade performance.
Tools & Materials
- Replacement primer bulb (compatible with your carburetor model)(Choose a bulb with the same size and port configuration as the original)
- Small flat-head screwdriver(For removing covers and prying clips)
- Small Phillips screwdriver(For carburetor screws and housing screws)
- Needle-nose pliers(For handling tiny fuel lines and clamps)
- Fuel-safe cleaner(To wipe away fuel residue and lightly clean components)
- Shop rag or paper towels(Keep spills under control and protect surfaces)
- Gloves and eye protection(Protect hands and eyes from fuel and sharp edges)
- Optional carburetor gasket kit(Use if you need to reseal the carb body)
- Penetrating oil (optional)(Loosens corroded connections if needed)
Steps
Estimated time: 60-90 minutes
- 1
Prepare and secure the saw
Park the saw on a stable work surface, engage the chain brake, and ensure the engine cannot start. Disconnect the spark plug wire to prevent accidental starts. Gather your tools and PPE before you begin to minimize interruptions.
Tip: Always wear gloves and eye protection; fuel exposure can be hazardous. - 2
Access the primer bulb area
Remove the air filter cover and air filter to expose the carburetor. Take note of how hoses and the bulb are oriented for reassembly. Work slowly to avoid damaging adjacent carburetor components.
Tip: Take a photo of the bulb and hose layout before removal for reference. - 3
Detach fuel lines from the bulb
Gently loosen the hose clamps and pull the fuel lines off the primer bulb using needle-nose pliers. Cap or tape off open lines to prevent spills. Do not kink or crush the lines.
Tip: Keep track of which line goes where; misplacing lines can cause improper priming. - 4
Remove the old primer bulb
Carefully remove the bulb assembly from the carburetor. If clips or screws hold it in place, loosen them with the appropriate screwdriver. Keep the screws in a small tray to avoid losing them.
Tip: If parts resist removal, apply a light amount of penetrating oil and wait 1–2 minutes before retrying. - 5
Install the new primer bulb
Position the replacement bulb in the same orientation as the original. Reconnect the fuel lines to their correct ports, secure clamps, and reseal any clips. Reassemble the adjacent housing and air filter components.
Tip: Double-check that the bulb sits fully seated and that lines aren’t crossing or twisted. - 6
Reassemble and reseal the carburetor area
Replace any gaskets or seals as needed. Reattach the air filter and cover. Ensure all screws are snug but not overtightened to avoid stripping.
Tip: Avoid overtightening screws; it can warp the cover and cause air leaks. - 7
Prime and test the engine
With the air filter back in place, prime the engine according to your model’s instructions. Attempt a start; if the engine sputters, give another quick prime and attempt again. Look for a steady warm-up without fuel leaks.
Tip: Have a fire extinguisher nearby when testing fuel systems for the first time. - 8
Check for leaks and finalize
Inspect all connections for fuel leaks after starting. Wipe down any spills promptly. If leaks appear, recheck hose connections and bulb seating before running again.
Tip: If leaks persist, stop and consult a professional; continued leaks can be hazardous. - 9
Clean up and store
Dispose of old parts properly. Clean your tools and store the spare parts in a labeled container. Document any model-specific notes for future maintenance.
Tip: Keep replacement parts organized to streamline future maintenance.
FAQ
Can I replace the primer bulb myself, or should I hire a pro?
Yes, a DIY replacement is feasible if you follow the steps carefully and use the correct parts. For unfamiliar models or persistent leaks, consult a professional.
You can replace it yourself if you follow the steps and use the right parts; otherwise consider a pro for tricky models.
What if I cannot find a model-specific primer bulb?
Look for a universal bulb kit with the same size and port configuration, then verify hose barb diameters match. If uncertain, contact the manufacturer.
If you can't find your exact bulb, try a universal kit with the same size and check the hose sizes; when in doubt, ask the manufacturer.
Is replacing the primer bulb the same as rebuilding the carburetor?
Replacing the primer bulb is a targeted repair; carburetor rebuilding is broader. In most cases, bulb replacement suffices for starting issues caused by the bulb.
Replacing the bulb handles bulb-specific issues; carburetor rebuilding is usually not required unless there are broader fuel problems.
How long should a primer bulb last with proper care?
A primer bulb’s lifespan depends on use and fuel quality. With proper care and clean fuel, expect reliable performance for many seasons.
A well-maintained bulb can last for multiple seasons; fuel quality and storage matter a lot.
What safety gear should I wear during replacement?
Wear gloves and eye protection to guard against fuel spills and sharp edges. Work in a ventilated area away from flames.
Put on gloves and eye protection, work in a ventilated space, and keep flames away.
What should I do with old parts and fuel-soaked rags?
Dispose of fuel-soaked rags and old parts per local hazardous waste guidelines. Do not throw them in regular trash.
Dispose of used parts and rags according to local rules; don’t trash them with regular waste.
Watch Video
The Essentials
- Identify symptoms to justify replacement
- Match bulb size to model for a reliable seal
- Follow safe steps to avoid fuel exposure
- Test priming and watch for leaks
- Document notes for future maintenance