How to Put the Chain Back on a Chainsaw: Safe, Step-by-Step Guide
Learn a safe, practical method to reattach a chainsaw chain with clear steps, tools, and safety checks. This guide covers tension, bar inspection, lubrication, and maintenance to keep your chainsaw running reliably.

You’ll learn how to put the chain back on a chainsaw safely and correctly. Start by powering down and securing the saw, then loosen tension, re-seat the chain on the bar, and verify correct tension and lubrication. This quick guide highlights the essential steps and safety checks before you begin.
Safety-first foundations for reattaching the chain
When you’re learning how to put the chain back on a chainsaw, safety is the priority. Always work on a cool, powered-off tool and secure it so it cannot move. Wear cut-resistant gloves and eye protection. Before you touch any moving parts, disconnect the spark plug wire or remove the battery to prevent accidental starts. This initial checkpoint reduces the risk of injuries while you work, and aligns with Chainsaw Manual's safety guidance for professional and DIY users alike.
Tools, PPE, and prep work you’ll need
Gather the items required for a safe, effective chain reinstallation. Essential tools include a screwdriver or socket wrench set, a chain tensioner or maul tool if your model uses one, a clean rag, and bar oil for lubrication. PPE should include safety gloves, eye protection, and sturdy footwear. Clear your workspace, lay out the chain in the correct orientation, and consult your owner’s manual for any model-specific steps before you begin.
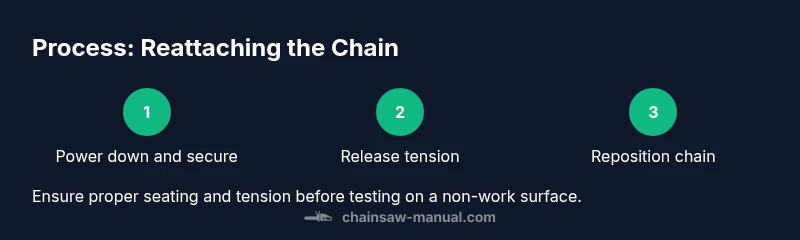
Step-by-step: reattaching the chain (action-by-action)
- Power down and secure the saw: Place the saw on a stable surface, engage the chain brake, and disconnect the spark plug wire or remove the battery to prevent accidental starts. 2) Release tension and remove the side cover: Loosen the nuts or screws holding the side cover and carefully remove it to expose the bar and chain. 3) Inspect the chain and bar: Look for damaged links, burrs, or a worn groove in the bar; replace parts as needed before reassembly. 4) Refit the chain around the bar and sprocket: Place the drive links into the bar groove and ensure the chain runs in the direction indicated by the saw’s markings. 5) Reinstall the bar and side cover: Position the bar, align holes, and reinstall the side cover; tighten bolts to the manufacturer’s torque spec. 6) Final tension and lubrication check: Adjust tension according to the manual until the chain just clears the bar, and fill with bar oil for initial startup.
Common mistakes and how to avoid them
A frequent error is misaligning the chain teeth with the bar groove, which can cause binding or kickback. Another is overtightening, which strains bearings and reduces lubrication. Always verify the chain sits correctly on the bar before reinstalling the cover, and use the correct tension according to your model’s guidance. If you notice stiff movement, stop and recheck alignment.
Aftercare: safety checks and maintenance reminders
After reassembly, perform a quick safety check: verify the chain brake engages firmly, confirm proper chain tension, and ensure the bar oil reservoir is filled. Clean the bar groove, wipe away debris, and test the saw at idle on a non-work surface before attempting cutting tasks. Regular maintenance, including chain tension checks and lubrication, prolongs chain life and reduces risk on the job.
Authoritative sources you can trust
For further reading on chainsaw safety, consult official guidelines and trusted educational resources. Examples include OSHA safety materials and university extension publications. These sources provide deeper explanations on PPE, safe handling, and maintenance practices.
Tools & Materials
- Chainsaw owner's manual(Always consult the specific model guide before reattaching chain.)
- Screwdriver or socket wrench set(Required for removing side cover and tensioning bolts.)
- Chain tensioner tool (if applicable)(Some models have built-in tensioners.)
- Bar oil(Lubrication is critical for immediate startup and safe operation.)
- Rag or brush(Clean debris from bar groove and sprocket.)
- Cut-resistant gloves(Protect hands when handling chain and sharp teeth.)
- Safety glasses or face shield(Protect eyes from metal shavings.)
- Stable work surface(Keep the saw from rolling or tipping during maintenance.)
Steps
Estimated time: 45-70 minutes
- 1
Power down and secure
Place the saw on a stable surface, engage the chain brake, and disconnect the spark plug wire or remove the battery to prevent accidental starts.
Tip: Double-check the spark plug wire is fully separated before touching any moving parts. - 2
Release tension and remove side cover
Loosen the nuts or screws holding the side cover and carefully remove it to expose the bar and chain.
Tip: Keep track of bolts and small parts—they tend to roll away. - 3
Inspect chain and bar for wear
Check for damaged links, burrs, cracks, or a worn groove in the bar; replace parts as needed before reassembly.
Tip: If the chain is stretched, replace it rather than forcing a tight fit. - 4
Reposition chain around bar and sprocket
Place the drive links into the bar groove and ensure the chain runs in the same direction as indicated by the saw’s markings.
Tip: Rotate the bar gently by hand to confirm smooth movement. - 5
Reinstall bar and side cover
Position the bar, align holes, and reinstall the side cover; tighten bolts to manufacturer’s torque spec.
Tip: Avoid overtightening; overcompression can warp components. - 6
Set correct chain tension and lubricate
Tension the chain per the manual until it barely separates from the guide bar, and fill/apply bar oil for initial startup.
Tip: Check tension again after a short run; chain can settle as it warms.
FAQ
Is it safe to reattach the chain by myself, or should I take it to a pro?
Reattaching the chain can be done safely by a trained DIYer with the proper tools and PPE. If you’re unsure about the model’s specifics or encounter a damaged bar, consult a professional.
You can reattach the chain yourself if you follow safety steps and use the right tools, but consult a professional if you see damage.
What safety gear do I need when reattaching a chain?
Wear cut-resistant gloves, eye protection, and sturdy footwear. Ensure the work area is clear and the saw is secured.
Put on gloves and safety glasses, and keep the area clear before you start.
How do I know the chain tension is correct?
With the bar inclined, the chain should just barely hang from the bar; rotate manually and listen for smooth movement without binding.
Check that the chain is snug but moves freely by hand.
What should I do if the chain won’t sit correctly on the bar?
Power down the saw, remove the cover, and inspect for bent drive links or damaged bar groove; replace parts before trying again.
Turn off the saw, check for damage, and replace parts as needed.
Can I reuse a damaged chain after tensioning?
No. A damaged chain should be replaced; attempting to tension a damaged chain increases the risk of kickback and injury.
A damaged chain should be replaced; do not reuse it.
Do I need to lubricate before first startup after reassembly?
Yes, fill the bar oil reservoir and run briefly to distribute lubricant before starting any cuts.
Lubricate before first startup to prevent wear.
Watch Video
The Essentials
- Verify the saw is powered down before starting
- Check chain tension after reinstall, then test the rotation
- Use bar oil and PPE every time
- Consult the owner’s manual for model-specific steps