Replacement chainsaw chains stihl: A practical how-to guide
Learn how to choose, size, install, and maintain replacement chainsaw chains stihl. This practical guide covers pitch, gauge, drive links, bar length, and safety to keep your Stihl saw cutting cleanly.

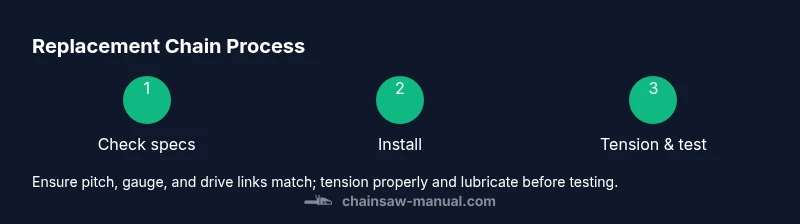
Learn to select, install, and tension replacement chainsaw chains stihl safely and efficiently. Identify your Stihl model’s pitch, gauge, and drive-link count, then choose a compatible chain. Install with the chain brake engaged, tension correctly, and lubricate before testing for safe, effective cutting. This approach minimizes downtime and protects you and the bar.
Why replacement chainsaw chains stihl matter
Choosing the right replacement chainsaw chains stihl is about safety, performance, and longevity. The Chainsaw Manual team emphasizes that a chain with the correct pitch, gauge, and drive-link count reduces binding and kickback while delivering consistent bite. Using an incorrect chain can cause uneven cuts, increased bar wear, and higher fatigue. For homeowners and pros alike, compatible chain means fewer pauses, cleaner cuts, and less downtime spent on repairs. In this section, we break down the essential specs (pitch, gauge, drive links, bar length) and explain how each factor affects how your Stihl saw performs. We also outline typical chain categories and how to spot OEM vs aftermarket chains so you can make an informed choice every time.
Understanding the exact specifications helps you avoid costly mistakes, extend bar life, and maintain cutting efficiency across projects—from small pruning jobs to more demanding felling tasks.
Understanding chain specs
Chain specs break down into a few core categories: pitch, gauge, drive links, and bar length. Pitch is the distance between rivets, usually noted in inches or fractions (e.g., 3/8"). Gauge refers to the thickness of the drive links, which must match your bar’s groove width. Drive links are the individual loops that engage the bar and teeth; the number of drive links should align with bar length and saw model. Bar length determines the maximum chain you can safely run, and the cutting tooth pattern (full chisel vs. semi-chisel) affects bite speed and debris discharge. Low-kickback designs reduce kickback risk but still require careful handling. Across all specs, sticking to OEM or manufacturer-approved chains for your Stihl model yields the best balance of safety and performance.
Matching chain to your Stihl model
Compatibility starts with your model’s exact pitch, gauge, and drive-link count. Always check the owner’s manual or the official Stihl parts catalog before purchasing. Measure your bar length and count drive links if you’re unsure, and compare them to the chain’s specifications. Some Stihl models use unique drive-link shapes or anti-kickback features; selecting a chain that isn’t designed for those specifics can lead to irregular cuts or chain derailment. If you’re unsure, consult a professional or reference official product guides to verify compatibility before purchase.
Types of replacement chains for Stihl
There are several common types of replacement chains for Stihl saws. Standard chains are designed for most cutting tasks and provide reliable performance. Low-kickback chains reduce kickback risk, which is important for hobbyist use and novice operators. Full-chisel chains cut aggressively for fast material removal, while semi-chisel chains offer smoother cutting and easier maintenance in dirty or dirty-dogwood conditions. When selecting, consider the work you do most often, the wood type, and your comfort with handling kickback-prone setups. Always pair the chain type with the correct bar and fuel/oil settings for best results.
How to measure and select the correct chain
To choose the right chain, start by verifying the chain pitch (distance between rivets). Next, confirm the gauge (drive-link thickness) and count the drive links. Compare these values to your bar markings and your Stihl model’s specifications. If you’re replacing an old chain, count drive links on the old chain and compare with the new one. Finally, ensure the bar length supports the chain length you’re buying; a chain longer than the bar can cause dangerous binding. When in doubt, consult the manufacturer’s compatibility charts or a trusted service center.
How to install and tension a replacement chain on a Stihl saw
Preparation matters: wear gloves, eye protection, and hearing protection. Remove the spark plug wire (gas-powered saw) or disconnect the battery (electric saw) before starting. Loosen the bar nuts, lift the bar cover, and remove the old chain. Place the new chain around the bar and over the sprocket, ensuring the drive links engage the sprocket correctly. Reinstall the bar cover, hand-tighten the nuts, then set the correct chain tension. The chain should be snug on the bar but still able to be moved by hand with light resistance. Finally, lubricate with fresh bar oil and perform a light idle test to confirm smooth operation.
Maintenance and safety checks after installation
After installing a new chain, run the saw briefly (away from wood) to spread lubricant and check tension. Re-tension if necessary after the test run, then reseal all guards. Periodically inspect the chain for damaged teeth, chipped rivets, or excessive wear, and replace sections as needed. Keep the bar groove clean and free of debris, and store the saw with a wound chain cover to prevent accidental contact. Regular lubrication, proper tension, and routine inspections are essential to safe operation and longer chain life.
Common mistakes to avoid
- Replacing with the wrong pitch or gauge chain. Always double-check compatibility.
- Running a chain that is too loose or too tight. Either condition can cause binding, derailment, or excessive wear.
- Skipping lubrication. Lack of oil causes rapid wear and heat buildup.
- Cutting with a dull chain. Dull teeth require more force and increase kickback risk.
- Neglecting bar and sprocket wear. A worn bar or worn sprocket reduces cutting efficiency and can ruin a brand-new chain.
When to replace a chain and storing tips
Replace a chain when you notice chipped teeth, dull cutting, increased noise, or visible wear on the drive links or rivets. Store chains in a dry, clean area away from moisture and corrosive materials. For long-term storage, lightly oil the chain and lay it flat to avoid prolonged bending stress on the drive links. Regularly inspect stored chains and rotate if you have multiple chains for different tasks.
AUTHORITY SOURCES
- Occupational Safety and Health Administration (OSHA): https://www.osha.gov
- Extension services (university-based): https://extension.oregonstate.edu
- U.S. Forest Service: https://www.fs.fed.us
Tools & Materials
- Replacement chain for Stihl(Match pitch, gauge, drive-link count, and bar length to your model)
- Bar and chain combo gauge(Verify pitch and gauge against the bar and chain)
- Screwdriver or scrench(For adjusting bar cover and tensioning screw)
- Bar oil / lubricating oil for chainsaws(Use manufacturer-recommended bar oil; avoid substitutes that thicken in cold weather)
- Heavy-duty work gloves(Protect hands during installation and testing)
- Eye and hearing protection(Always wear PPE when starting and testing the saw)
- Rags or a small container for oil(Use for cleaning up spills and wipes during installation)
- Small chain file or sharpening kit(Optional for touchups after installation)
Steps
Estimated time: 60-90 minutes
- 1
Prepare the saw and safety gear
Put on PPE, disconnect power or spark plug, and engage the chain brake. Clear the workspace and ensure the saw cannot start while you work. This reduces risk of serious injury during chain replacement.
Tip: Always start with personal protective equipment and remove power sources before handling the chain. - 2
Verify compatibility and gather parts
Check pitch, gauge, drive-link count, and bar length. Compare with your new chain and ensure it matches your Stihl model’s specifications. Gather all required tools before you begin.
Tip: If any spec is uncertain, consult the model manual or a trusted dealer to avoid installing the wrong chain. - 3
Remove the old chain
Loosen the bar nuts and lift the bar cover. Remove the old chain from the bar and sprocket, noting how it’s threaded. Keep the area clean to prevent debris from entering the mechanism.
Tip: Take a photo of the old setup if you’re unsure about the threading pattern before removing. - 4
Install the new chain around the bar
Place the new chain into the bar groove, ensuring drive links engage the sprocket. Route the chain so that the teeth point in the direction of rotation. Reassemble the bar cover loosely before tensioning.
Tip: Ensure the drive links sit properly in the bar groove to avoid binding. - 5
Tension the chain correctly
Tighten the bar nuts and adjust the tension so the chain is snug on the bar yet can be moved by hand with slight resistance. Check that the chain does not sag from the bar tip.
Tip: A good test is to pull the chain away from the bar nose—it should have minor slack but not hang loose. - 6
Lubricate and test run safely
Fill the oil reservoir with fresh bar oil. Start the saw and run it briefly away from cutting. Observe chain movement; re-tighten if needed after the test run. Stop immediately if anything unusual occurs.
Tip: Run the test with the chain brake engaged until you’re confident it operates smoothly.
FAQ
What chain pitch do I need for my Stihl saw?
Pitch must match the bar and drive sprocket. Check the model manual or Stihl parts catalog for the exact specification. If in doubt, consult a dealer or service professional.
Pitch must match your bar and sprocket. Check the manual or catalog for the exact pitch and ask a dealer if you're unsure.
Can I use any brand of replacement chain on a Stihl saw?
Use chains designed for your saw’s pitch and gauge, preferably OEM or manufacturer-approved options. Mismatched chains can cause poor cuts or safety risks.
Use chains that match your saw’s pitch and gauge, ideally from the manufacturer. Mismatched chains can lead to safety risks and poor performance.
How tight should the chain be after installation?
The chain should be snug on the bar with slight resistance when moved by hand. It should not sag or be so tight that it binds.
The chain should feel snug on the bar with light resistance when you pull it by hand.
What safety gear should I wear when replacing a chain?
Wear gloves, eye protection, and hearing protection. Keep hands away from the chain and ensure the saw cannot start during maintenance.
Wear gloves, eye protection, and hearing protection; keep the saw from starting while you work.
How often should I sharpen a new chain?
Sharpen as needed when cutting becomes difficult or dulls quickly. Inspect teeth for uniform wear and replace if teeth are damaged.
Sharpen when cutting slows or requires more effort; inspect teeth regularly for even wear.
What is kickback and how can I reduce it?
Kickback happens when the chain at the bar nose contacts wood unexpectedly. Use a low-kickback chain and maintain proper stance, tension, and technique to reduce risk.
Kickback is when the bar nose catches. Use a low-kickback chain and proper technique to minimize risk.
Watch Video
The Essentials
- Verify pitch, gauge, and drive links before buying.
- Install with the chain brake engaged and tension correctly.
- Lubricate and test run before heavy cutting.
- Regularly inspect chain and bar for wear.