How to Replace the Chain on Husqvarna Chainsaw 450 Rancher
Learn step-by-step how to replace the chain on the Husqvarna Chainsaw 450 Rancher, pick the correct replacement chain, tension properly, and perform safe maintenance to extend cutting performance.

By following this guide, you will correctly replace or inspect the chain on your husqvarna chainsaw 450 rancher chain, ensuring the right pitch, gauge, and drive-link count. We cover how to identify the right chain, how to tension it safely, and how to avoid common mistakes that can cause poor cutting or kickback. We also compare sharpening vs replacement.
Understanding the husqvarna chainsaw 450 rancher chain specifications
For anyone maintaining a Husqvarna chainsaw 450 Rancher, starting with the chain specifications is essential. The husqvarna chainsaw 450 rancher chain you choose must match three key factors: pitch, gauge, and drive-link count. The pitch is the distance between drive links, commonly 3/8 inch for many residential models; gauge refers to the thickness of the drive links; and drive-link count determines how the chain engages the bar. According to Chainsaw Manual, verifying these three numbers against your bar and sprocket prevents binding, improves cutting efficiency, and extends chain life. When in doubt, consult your owner's manual or bring the bar and chain to a reputable dealer for a quick match. In addition, inspect the chain for wear, missing cutters, or bent drive links before purchase. The goal is a chain that seats evenly on the bar without gaps or tight spots, delivering smooth, controlled cuts with the Husqvarna 450 Rancher.
This guide keeps the focus on the exact replacement chain needed for the husqvarna chainsaw 450 rancher chain and how to avoid common mistakes that can reduce performance.
On a separate note, the Chainsaw Manual team emphasizes safety and proper maintenance as foundational practices.
Tools & Materials
- Replacement chain for Husqvarna 450 Rancher(Ensure it matches the bar length, drive-link count, pitch, and gauge with the existing chain.)
- Chain sharpening file and gauge(Use the file size appropriate for the chain pitch; select a gauge that matches the chain and bar.)
- Chain breaker or tensioning tool (scrench)(Use to remove the old chain and assist with installation and tensioning.)
- Safety gear: gloves, eye protection(Leather gloves and ANSI-rated safety glasses recommended.)
- Bar and chain cleaning supplies(Rags and solvent to clean the groove and bar before installing the new chain.)
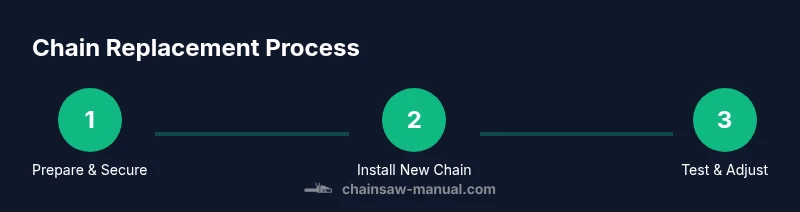
Steps
Estimated time: 15-25 minutes
- 1
Prepare and secure the saw
Before touching the chain, park the saw on a stable surface, engage the chain brake, and disconnect the spark plug to prevent accidental starting. This keeps you safe while you inspect the bar, chain, and sprocket and plan the replacement. Have plenty of light and organize your tools within reach.
Tip: Engage the chain brake and remove the spark plug cap so the engine cannot start during maintenance. - 2
Loosen bar nuts and remove the bar cover
Loosen the bar nuts with the appropriate wrench or scrench, then lift off the bar cover. Do not force the bar; work slowly to avoid bending the bar’s mounting holes. This exposes the chain and keeps disassembly controlled.
Tip: Support the bar as you lift the cover to prevent dropping it on your hand. - 3
Remove the old chain from the bar
Slide the old chain off the bar, then detach it from the drive sprocket. If the chain is stubborn, use the scrench to ease it free. Inspect the groove for any burrs or debris that could damage the new chain.
Tip: Check for damaged drive links or burrs that could snag the new chain. - 4
Inspect the bar and sprocket
With the chain off, inspect the bar groove for wear, heat damage, or sharp edges. Check the sprocket for hooked teeth or excessive wear. Replace any worn parts before installing the new chain to ensure smooth operation.
Tip: Replace a worn sprocket or a grooved bar to avoid chain derailment. - 5
Install the new chain onto the bar
Position the new chain along the bar’s groove, ensuring the drive links mesh with the sprocket teeth. Align the chain so the leading cutters face the same direction for cutting. Confirm the rivets sit evenly in the groove.
Tip: Ensure drive links sit properly in the groove to prevent binding. - 6
Reinstall the bar and snug the nuts
Reattach the bar and screw in the bar nuts by hand to avoid cross-threading. Then tighten them to snug fit with the scrench but do not over-tighten; this step prepares for proper tensioning.
Tip: Hand-tight first to avoid cross-threading the bar mounting holes. - 7
Tension the chain correctly
Use the tensioning screw to remove any slack until the chain just clears the underside of the bar nose by a small amount. A properly tensioned chain should come off the bar slightly when pulled, but not droop excessively.
Tip: Test tension by pulling the chain in the middle of the bar; it should have slight resistance without sagging. - 8
Check rotation and seating
Rotate the chain by hand to ensure it moves smoothly along the bar without binding. Recheck bar nuts for tightness and ensure the chain sits evenly in the groove. If you feel resistance, recheck the tension.
Tip: A properly seated chain reduces kickback risk during cutting. - 9
Lubricate and test safely
Fill the bar oil reservoir, start the saw, and perform a light test cut on a soft log to verify smooth operation and safe engagement. Stop immediately if you hear grinding, see sparks, or notice abnormal vibration.
Tip: Always perform a test cut in a controlled environment and helmets/eye protection on.
FAQ
How do I replace the chain on Husqvarna 450 Rancher?
The process involves choosing the correct replacement chain by pitch and gauge, removing the old chain, inspecting the bar and sprocket, installing the new chain, adjusting tension, and testing. Always follow safety steps and consult the manual for model-specific variations.
Yes. You’ll select the right chain, remove the old one, install and tension the new chain, then test the setup.
How do I know the chain pitch and gauge for my bar?
Check the existing chain for pitch markings and measure drive link width or consult the bar manufacturer’s specifications. The pitch and gauge should match the bar and chain exactly to ensure smooth operation.
Look at the current chain or the bar’s specs to confirm pitch and gauge.
When should I replace a chain vs sharpen it?
If the chain has damaged teeth, bent drive links, or significant wear that cannot be corrected by filing, replacement is recommended. Sharpening is suitable for dull teeth with proper technique.
Sharpen when teeth are dull; replace if there’s serious wear or damaged links.
What safety steps should I take before starting work?
Disconnect spark plug, engage chain brake, wear PPE, and work on a stable surface. Keep children away and avoid distractions during maintenance.
Power down, lock the chain, and wear goggles and gloves before you start.
Can I use a generic chain on Husqvarna 450 Rancher?
Using a chain compatible with the saw’s pitch and drive-link count is essential. Check the model and manufacturer recommendations to ensure compatibility and maintain safety.
Only use chains that match pitch and drive links for your saw.
Is this process the same for other Husqvarna models?
The general method is the same, but check model-specific instructions for pitch, gauge, and bar length. Some models use different tensioning methods or bar configurations.
The steps are similar, but verify model-specific specs before proceeding.
Watch Video
The Essentials
- Choose a chain with correct pitch, gauge, and drive links.
- Always secure the saw and disconnect power before maintenance.
- Proper tension and seating prevent derailment and reduce kickback risk.
- Regular inspection of bar and sprocket extends chain life.