Chainsaw Vinyl: Safe Step-by-Step Guide
Safe, practical guidance for decorative vinyl projects that mimic chainsaw cuts. Learn PPE, setup, tools, steps, and finishing with Chainsaw Manual.

This guide teaches a safe, step-by-step approach to working with vinyl when a chainsaw-inspired cut is part of your project. You’ll learn essential PPE, stable setup, and practical techniques that minimize risk while achieving a clean, decorative result. Before you begin, confirm your material, waste management plan, and a controlled workspace to protect you and your vinyl.
What chainsaw vinyl means in practice
In maker culture, the phrase chainsaw vinyl refers to achieving a rugged, saw-cut aesthetic on vinyl media—typically vinyl records or sheets—without compromising safety or the integrity of the material. The look mirrors the jagged edges and rhythm of a real chainsaw cut, but the goal is to realize this texture with controlled tools and precise technique. You may employ templates, stencils, and careful edge work to recreate the feel of a chainsaw action while keeping the work safe and predictable. This approach is popular in wall art, signage, and upcycled decor where a bold, industrial vibe adds character to vinyl surfaces. Throughout this guide, keep in mind that safety comes first and that the most responsible path typically favors safer tools over a full-size chainsaw when working with vinyl.
In this context, chainsaw vinyl is about the visible texture and edge language you can create on vinyl substrates, not about torrenting the actual cutting power of a chainsaw on a delicate sheet. By planning your cuts, choosing the right tools, and using proper clamps or jigs, you can achieve convincing results while maintaining control over the material and environment. According to Chainsaw Manual, embracing a safety-first mindset is essential whenever power tools interact with vinyl products.
For homeowners and DIYers, the practical takeaway is simple: know your material, your toolset, and the boundaries of what is safe for vinyl—and then execute with care.
wordCountStripped90
Tools & Materials
- PPE set (eye protection, hearing protection, cut-resistant gloves)(ANSI-rated PPE; ensure goggles; ear protection; gloves for handling sharp edges.)
- Vinyl material (records or sheets)(Choose clean, undamaged pieces; consider thickness around 1–2 mm for better control.)
- Cutting tool (safe option: utility knife or rotary tool with fine bit)(Prefer safer tools to start; reserve heavy tools for large straight lines only with jig.)
- Template or stencil transfer kit(Use painter’s tape and carbon transfer or printable stencil for accuracy.)
- Clamps or stable jig(Secure material on a stable work surface to prevent movement during cutting.)
- Marker or pencil for layout(Fine-tipped marker; ensure visibility on dark vinyl.)
- Cleaning supplies(Soft cloth and mild cleaner for post-cut cleanup.)
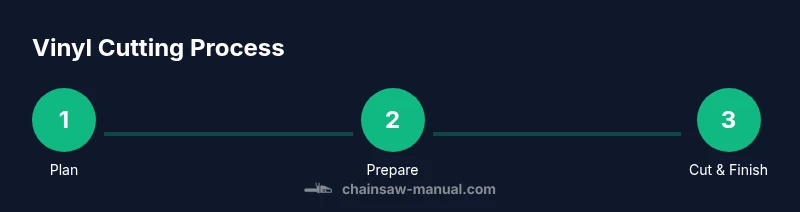
Steps
Estimated time: 2-3 hours
- 1
Prepare PPE and workspace
Put on your PPE, clear the workspace, and place a protective mat or cut-resistant surface. Inspect the vinyl to ensure there are no loose flakes or debris that could cause slips or miscuts. Establish a clean, well-lit area with good ventilation and a dedicated waste bin for vinyl scraps.
Tip: Double-check your eye and hand protection before you touch any cutting tools. - 2
Select material and design
Choose a vinyl piece with minimal warping and a design that suits the material’s thickness. Print or trace a simple design template and decide where you want to create texture or edge breaks to mimic a chainsaw effect. Mark the cut lines clearly on the vinyl.
Tip: Start with a simple shape to practice handling and edge control. - 3
Transfer the design onto vinyl
Affix the template to the vinyl with painter’s tape and use a carbon paper transfer or light pencil marks to copy the design onto the surface. Ensure the lines are distinct and free of smudges. Remove the template carefully to avoid shifting the marks.
Tip: Check alignment from multiple angles to ensure symmetry or intended asymmetry. - 4
Secure the material in a jig
Clamp the vinyl securely to a worktable or jig to prevent vibration or movement during cutting. Ensure there is sufficient blade clearance and avoid over-tightening that could warp the vinyl.
Tip: Use a sacrificial backing board under the vinyl so you don’t mar the underside during cutting. - 5
Rough-cut along the lines with a safe tool
Using a safe option (utility knife or rotary tool with a fine bit), follow the marked lines with shallow passes. Let the tool do the work; avoid forcing it through the vinyl to minimize chips and chatter. Step back frequently to reassess alignment.
Tip: Make multiple shallow passes rather than a single deep cut to reduce material stress. - 6
Refine the cut and shape edges
Switch to a detail tool for refining corners and curves. Use light, controlled passes to smooth along the line and create natural-looking texture. Avoid bending or twisting the vinyl during edging, which can cause cracking.
Tip: Rotate the vinyl or adjust your stance to keep lines vertical and edges crisp. - 7
Sand and smooth edges
With a fine-grit sanding pad, gently blend any rough edges. Wipe away dust with a damp cloth and inspect the cut for burrs or jagged sections that could catch on clothing or hands.
Tip: Wear gloves during sanding to protect fingers and grip the tool securely. - 8
Clean up and inspect
Remove all loose scraps, inspect the final profile, and test-fit with any adjacent pieces if part of a larger design. Document results with notes for future similar projects and file away scraps for reuse where possible.
Tip: Take a photo sample of the finished edge for future reference.
FAQ
Is it safe to cut vinyl with a chainsaw?
No—using a full-size chainsaw directly on vinyl is hazardous. This guide emphasizes safer tools and controlled methods to achieve a chainsaw-inspired look without exposing you to unnecessary risks.
No. A full chainsaw should not be used on vinyl; this guide covers safer alternatives to achieve the look without the danger.
What PPE do I need for vinyl sculpting with tools?
Wear eye protection, hearing protection, and cut-resistant gloves. A dust mask may be used if sanding produces fine particles, and ensure proper ventilation.
Wear eye protection, hearing protection, and cut-resistant gloves, with ventilation if sanding.
What vinyl types work best for this technique?
Vinyl records or sheets around 1–2 mm thick tend to cut more predictably and resist tearing when a careful approach is used.
Vinyl records or sheets about 1–2 mm thick usually cut more predictably with care.
Can scraps be reused after a failed cut?
Yes, smaller scraps can often be repurposed for test cuts or small decorative elements. Save bruges and store clean scraps separately.
Yes, you can often reuse scraps for tests or small accents.
What tool alternatives are recommended for curves?
A rotary tool with a fine bit, a jeweler’s saw, or a thin utility knife can help achieve smoother curves without the risk of kickback from a chainsaw.
For curves, try a rotary tool, jeweler’s saw, or a fine-blade knife.
Watch Video
The Essentials
- Wear appropriate PPE and secure materials.
- Use safe tools to mimic chainsaw textures on vinyl.
- Transfer designs accurately before cutting.
- Deburr, clean, and inspect edges after finishing.
- Document results and reflect on safety improvements.